One of the things you don’t realize until you start making video is that recording is low-key one of the most stressful, hardest parts of making video. Doing it well takes time and practice, talent that you may not have, and a decent set up. Lighting alone requires either buying new gear or having a perfectly placed window.
Enter AI avatars—animated video stand-ins who never blink weirdly, don’t need ring lights, and won’t forget their lines. They show up whenever you want them, camera-ready, read your script, and can even pass for real people (if you don’t look too close).
In Descript, you can make an entire video with AI avatars without recording a single frame of live footage. No cameras. No mics. Just your script, a still image, and a few clicks.
In this guide, we’ll walk through that whole workflow:
- Creating or choosing an avatar
- Writing your script
- Designing your video with scenes and layouts
- Generating the avatar performance
- Exporting and sharing your finished avatar video
When and why to use avatar videos
Avatar videos are great when:
- You don’t feel like getting camera-ready.
- You’re making repeatable content—think product explainers, onboarding, quick updates, FAQs, and customer education videos.
- You have teammates who hate being on camera. Let them write; the avatar can perform.
- You want consistency. AI avatars give you the same framing, lighting, and presenter, whether you’re recording at 9 a.m. or 1 a.m.
How to make avatar videos with Descript
Ready to make your own AI avatar video? Here’s a step-by-step guide to doing it inside Descript.
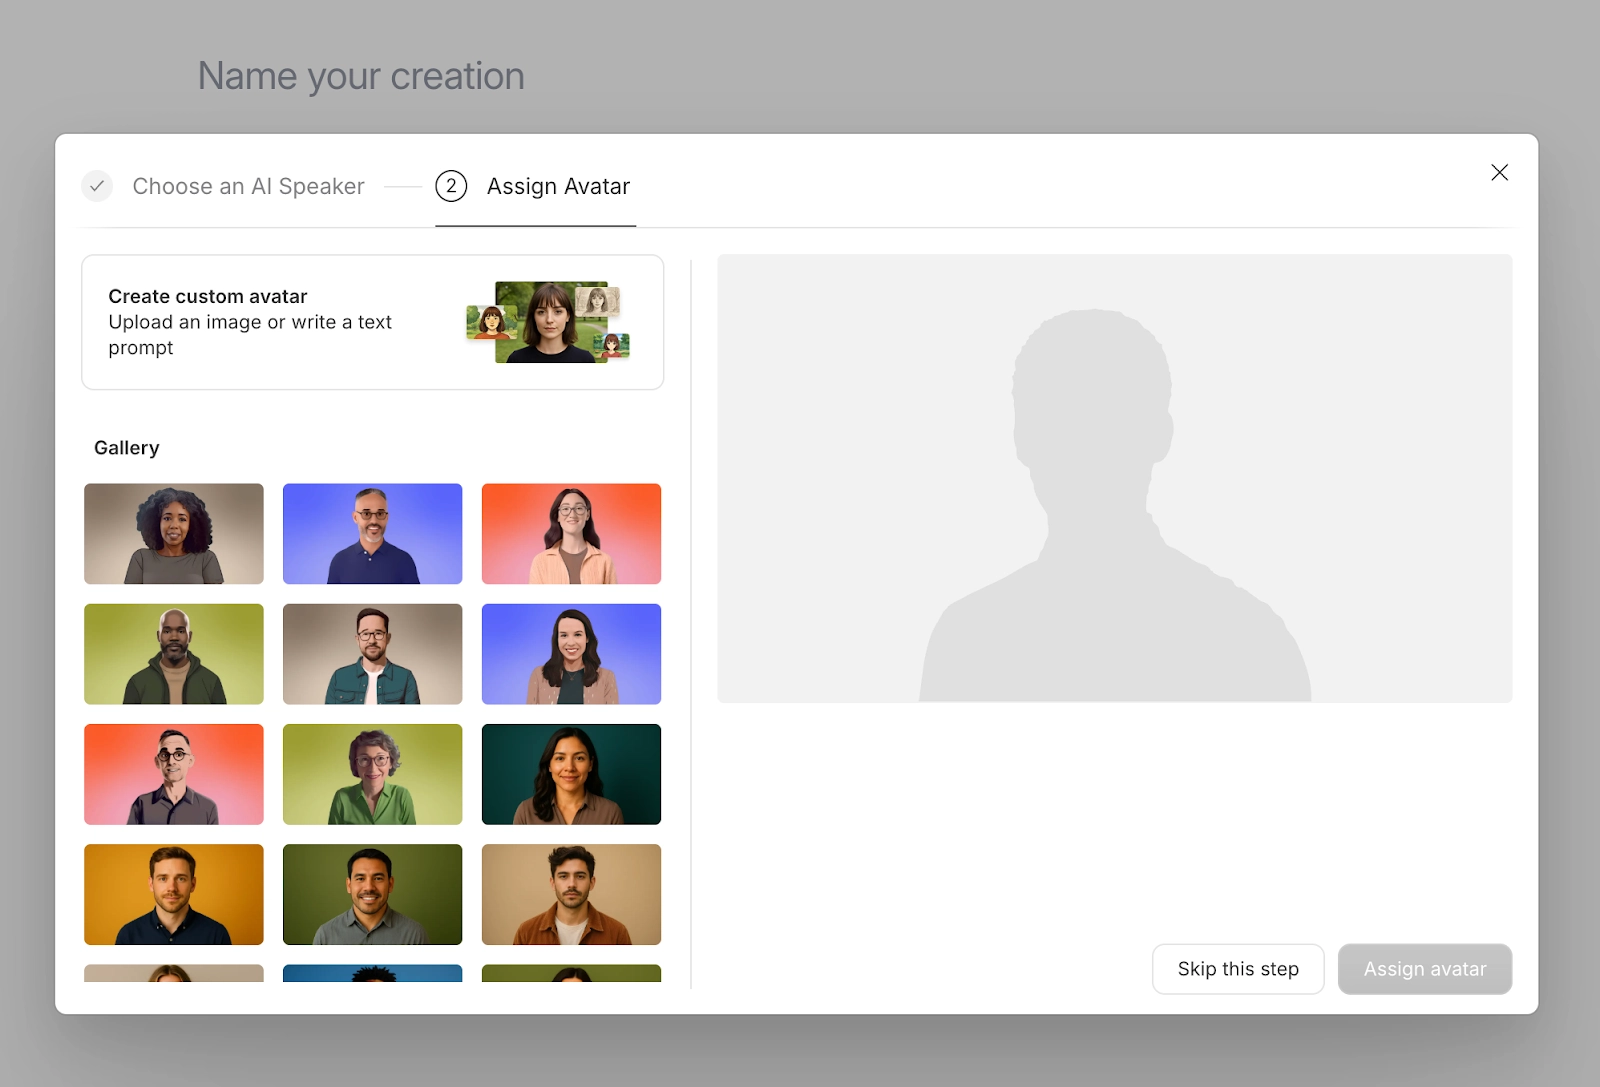
Step 1: Create your avatar
First, open Descript in your browser or using the Mac or Windows apps. Create your account, then:
- Open a new project and choose “Create with AI speaker”.
- Choose a voice for your avatar. Here, you’ve got two options:
- Pick a stock AI speaker from the list (great for quick demos, prototypes, or when you don’t want your own voice in the mix).
- Clone a voice you’ve already created in Descript, if you want the avatar to talk like you.
- Select the speaker you want and click “Choose speaker.”
- Pick your visual avatar. Again, you’ve got two options:
- Choose from the avatar gallery: Browse the built-in avatars and click the one you want. These are pre-made, well-lit characters that work out of the box.
- Upload a custom photo: The framing, background, and expression from this photo will influence how good your generated video looks. For the best results, use a clear, front-facing shot, keep the lighting even, and choose a simple background. Relax your expression: neutral or slightly smiling works best.
- Assign the avatar. Once you’ve found the right character or uploaded your photo, click “Assign avatar.” Descript now knows this voice + this face = your on-screen presenter. IMPORTANT: Don’t generate your video yet—you want to get everything else just the way you want it before you hit Generate.
🧠Good to know: Descript requires you to verify your voice before you’re able to clone it for an avatar. This protects against deepfakes—only you can use your AI-generated voice (Step 4 below).
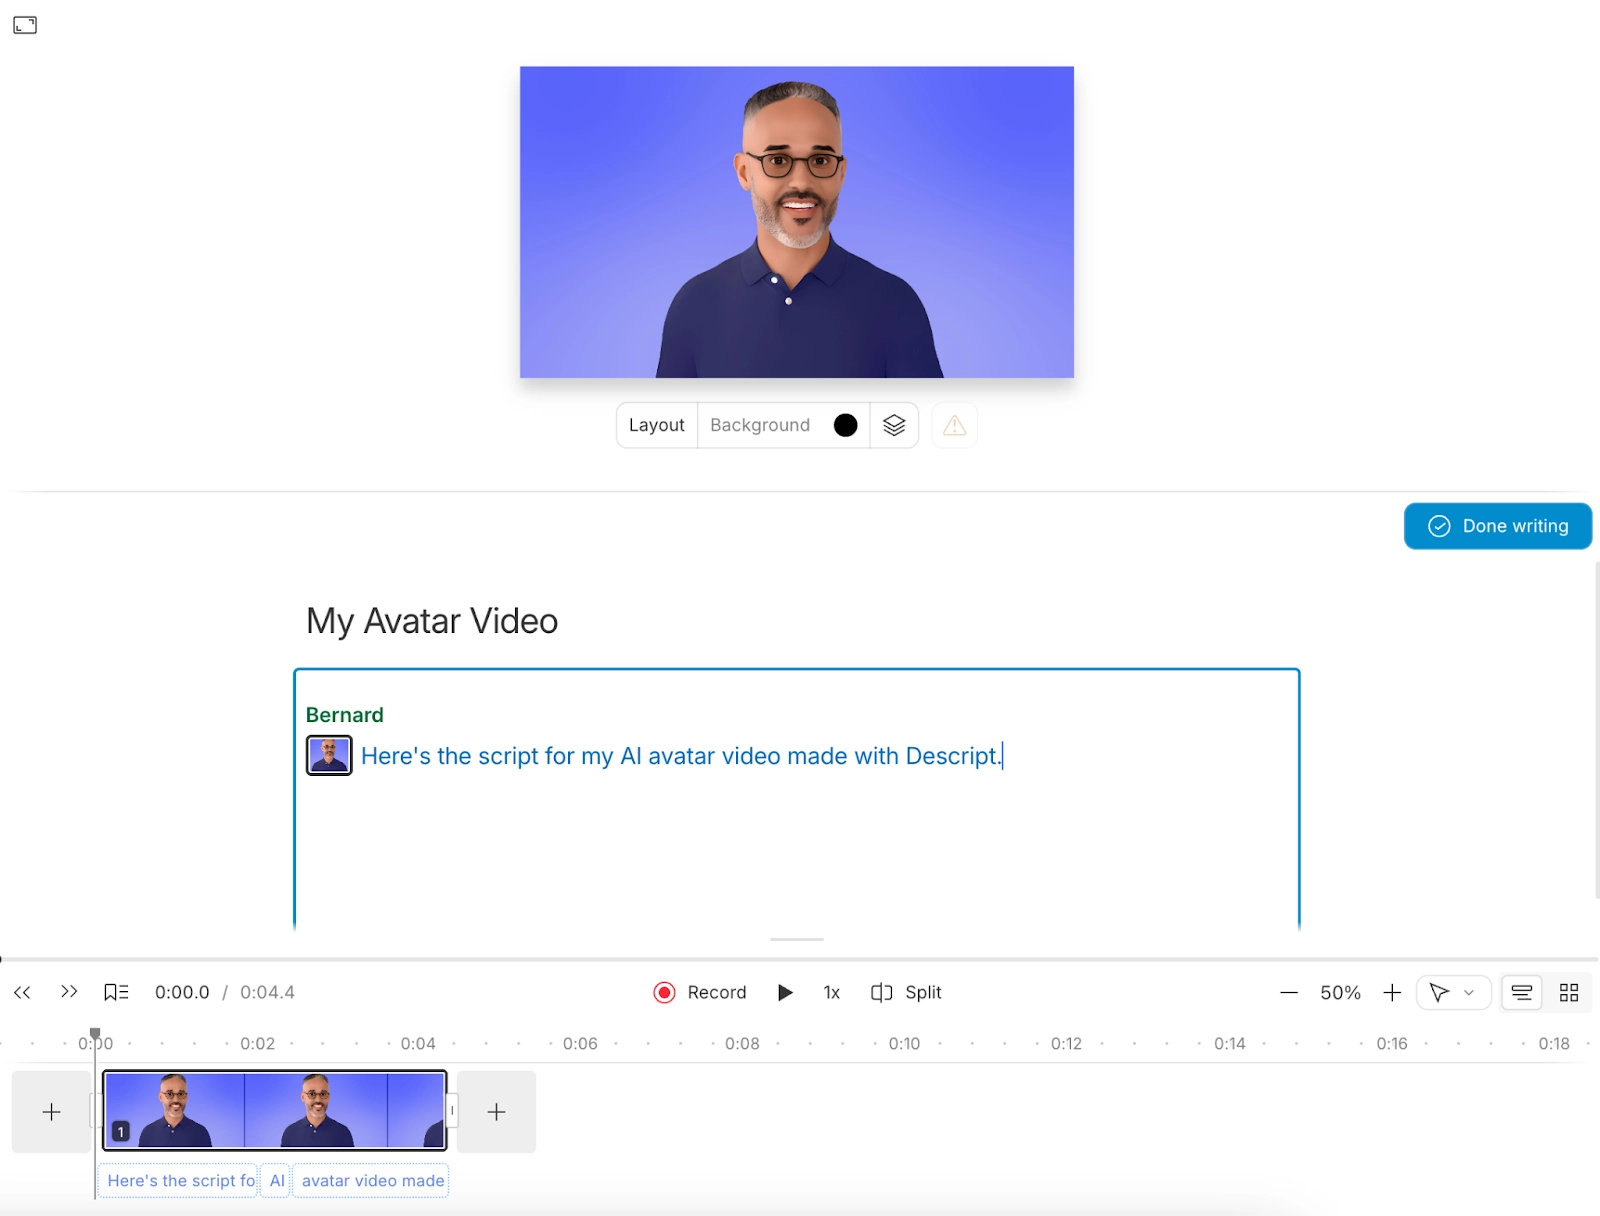
Step 2: Write your script
Now it’s time to give your AI avatar something to say.
When you create a project with an avatar inside Descript, “Write mode” is automatically turned on. That means you can start typing in the script area right away.
To do this:
- Draft your script. Type directly into the script window, paste in a script you’ve already written (just make sure it’s plain text), or have AI generate one for you. Think of this like writing narration for a normal video: talk to your audience, keep sentences reasonably short, and read it out loud.
- Exit Write mode to generate AI speech. When your script is ready for a test run, click “Done writing.” Descript will generate AI speech for your chosen voice.
- Preview the audio. Hit “Play” and listen to your avatar’s voice. The avatar won’t move yet—that comes later when we generate the video—but you’ll hear the full read-through.
- Iterate on the script. Rinse and repeat until the narration is pacing and sounding the way you want. If you want to tweak a line or add a whole new section:
- Toggle “Write mode” back on
- Make your edits directly in the script
- Click “Done writing” again to regenerate the AI audio
Step 3: Design your video with scenes and layouts
Once your script feels solid, it’s time to make the video look like… a video.
You don’t have to design every frame from scratch. Descript includes scene layouts tailored for avatar videos—templates that combine your avatar with text, media, and backgrounds in a polished way.
Here’s how to shape things up:
- Add and organize scenes. Break your script into logical sections—intro, main points, closing. Create a new scene for each section so the visuals can change along with the story.
- Apply avatar-friendly layouts. In the scene layout panel, look for options that position the avatar alongside text, images, or your screen content. For example, you could have the avatar over a branded gradient or background image or alongside a bullet list.
- Customize your visuals. Within each scene, you can:
- Change background colors or gradients
- Add images, logos, or other brand assets
- Drop in B-roll or screen recordings (for product demos, walkthroughs, etc.)
- Overlay titles, lower thirds, and callouts
- Add music and sound design (optional but nice). A bit of background music or light sound effects can help your avatar video feel more alive. Just keep levels balanced so your narrator is still the star.
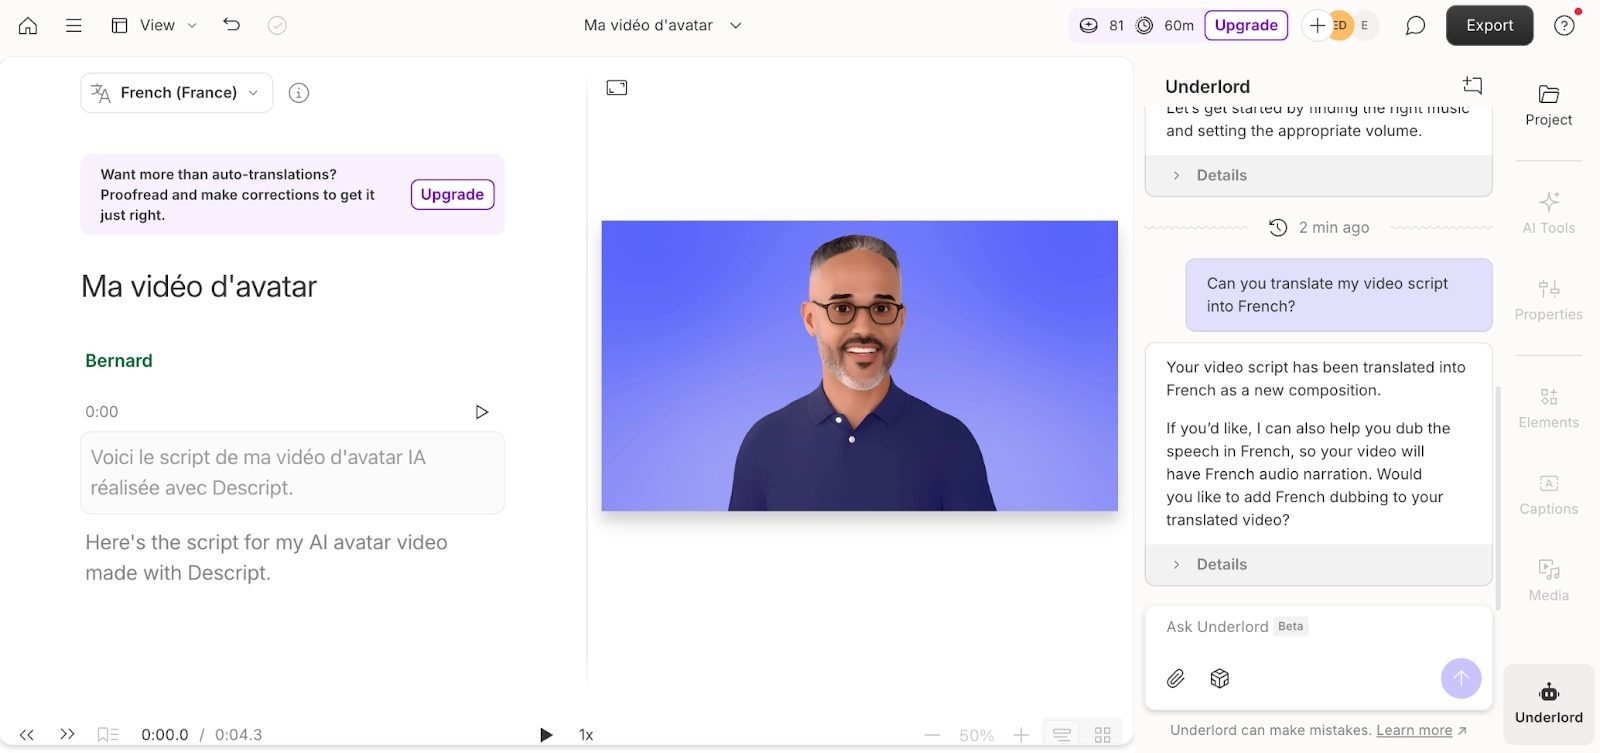
💡Tip: Lacking editing expertise? Lean on Underlord, Descript’s AI assistant; it can help edit your video. Ask it to shorten word gaps, draft accompanying social media posts, translate your video into more than 20 languages—or whatever you want to ask it.
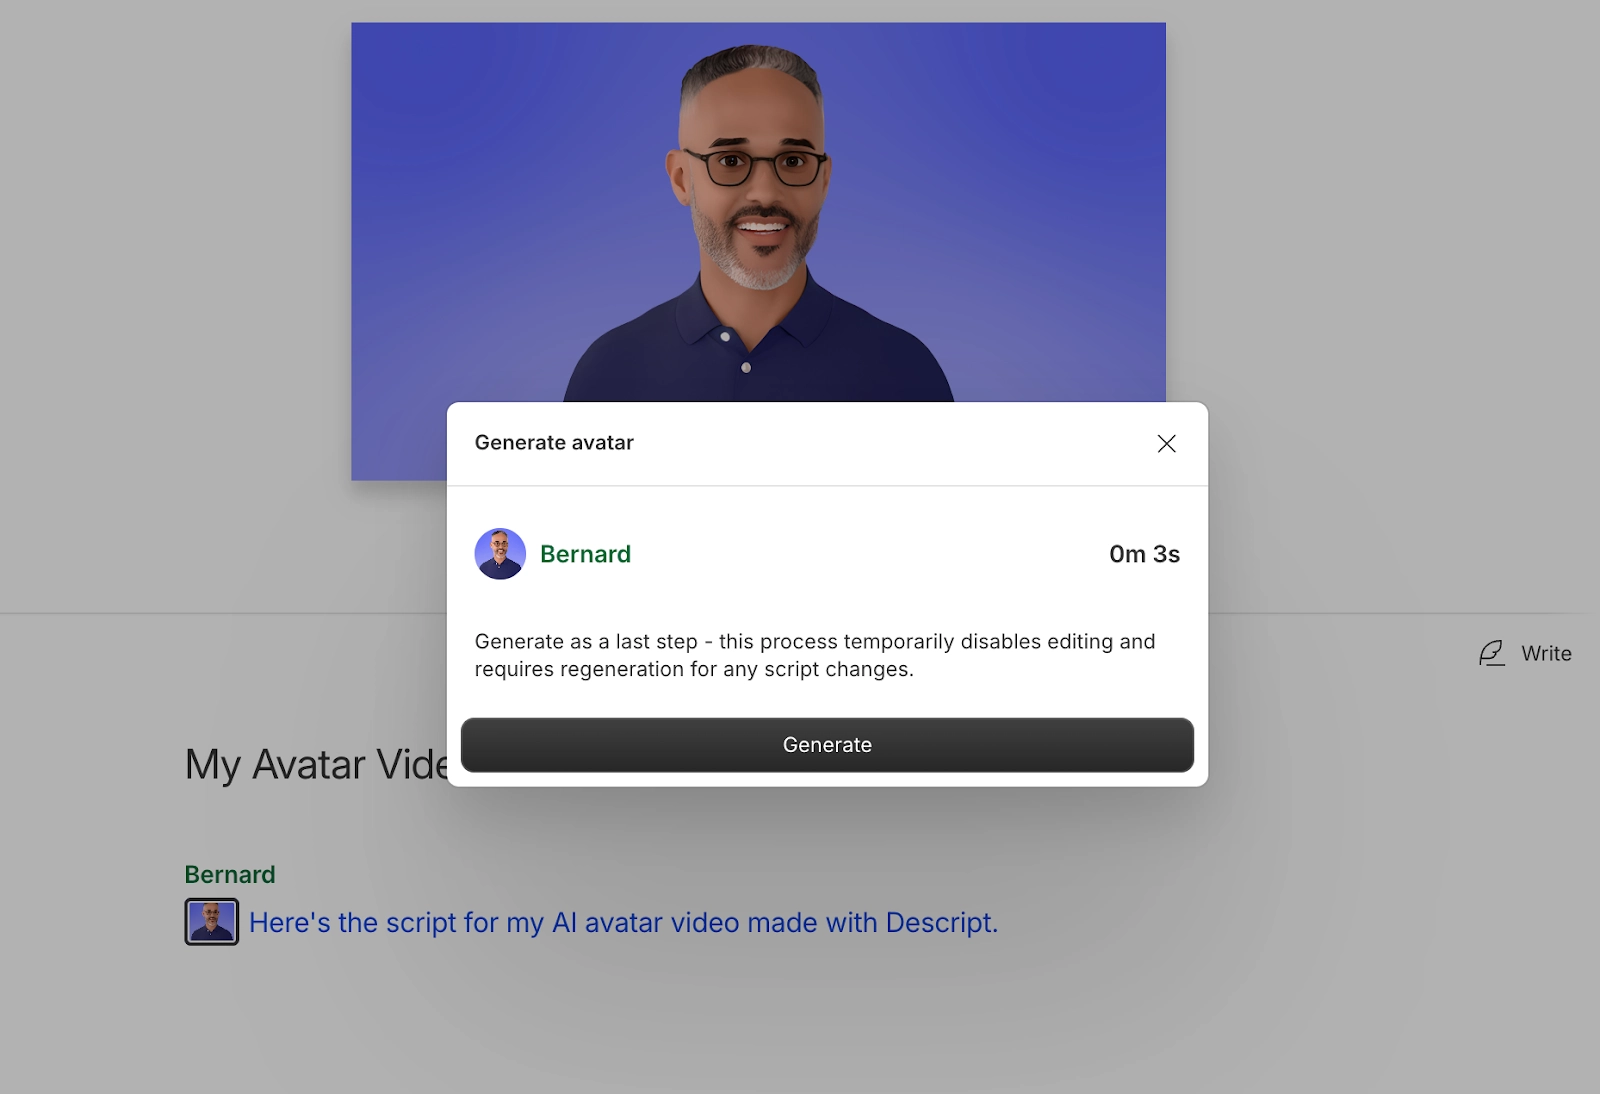
Step 4: Generate your avatar’s performance
Now for the fun part: turning your static avatar into a moving, speaking human-ish person.
Before you push the button, do a final review. Watch through your project with the AI audio. Check timing, scene changes, script typos, and layout alignment, and take a look over your final script. You can edit this after generating the avatar, but changes will require you to regenerate the avatar video.
When you’re happy, click the “Generate avatar” button. When it’s done, your avatar will be fully animated and synced to the script—blinking, talking, gesturing, the whole thing.
Step 5: Review, export, and share
Hit “Play” to watch your avatar video all the way through. Do one final check for weird words or pronunciations that need a script tweak, scenes where the layout needs tightening, and timing issues between visuals and narration.
If you do make significant script changes, toggle “Write mode”, then edit and regenerate the avatar for those sections.
Once you’re happy, you have two options to share it with the world:
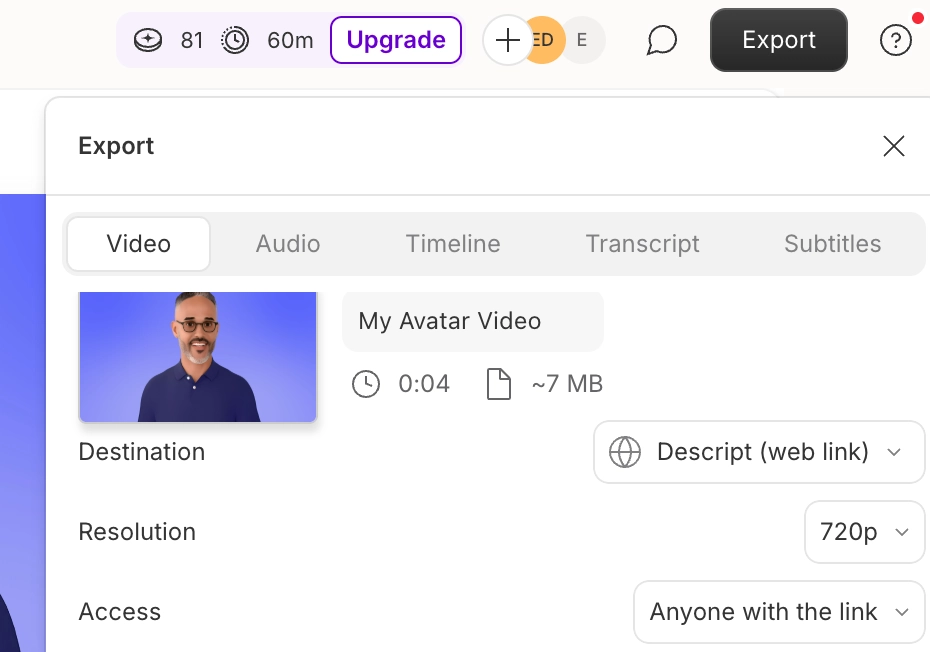
- Export your video. Choose the export format that fits where you’re sharing (MP4 for most platforms). Adjust resolution and other settings as needed, then click “Export”.
- Share via link. If you’d rather not download a huge file, you can share it straight from Descript with a shareable link.
Get not-so camera-ready with AI avatars in Descript
Whether you’re creating a short intro video, a product explainer, or a quick 60-second FAQ, you can do it all with a custom AI avatar in Descript. Follow these steps to begin experimenting with what you can create using the power of AI.
Once you’re comfortable, the options are endless. Mix avatars with recorded video, generative B-roll, and whatever else your video editing workflow throws at you.
Descript’s AI video editor makes it easy with features like:
- Studio Sound to remove unwanted background noise
- Clips, which repurposes your most shareworthy moments into shorter videos
- Automated subtitles and captions
- Bespoke media—including images, videos, and music—using AI prompts
- Video translation in 20+ different languages