The art of podcasting has evolved far beyond in-person recording sessions in a professional studio. Now recording sessions happen in home studios and closets, with co-hosts living miles apart, and, increasingly, with video.
A lot of that is thanks to remote video recording, which lets you collaborate with guests, experts, and co-hosts from anywhere in the world — no matter what timezone they sleep in. It also removes the need to spend money on travel and studio rental fees. And it’s scalable, making it easier for beginners to produce quality content more often.
But it’s not foolproof. To get the best quality audio and video from your remote recording, you’ll want to check out the techniques, low-cost tools, and software suggested in this article.
Table of contents
- How to set up a remote video recording space
- Best practices for remote video interviews
- How to improve the visual quality of remote video recordings
- Recommended recording devices and accessories
- Editing and post-production tips for remote video recordings
How to set up a remote video recording space
Take a look at how Conan O’Brien Needs a Friend (a Descript customer!) incorporates video content in its production. One of the show’s segments, Conan O’Brien Needs a Fan, invites fans from around the world to get on the podcast and chat with Conan. Most of these fans can’t be in the studio in person and don’t have access to fancy recording studios or Sirius XM-levels of professional recording equipment:
Remote video recording is a great solution to the problem but also challenging; you can't control the environment like you could in a studio. Audio and lighting quality, in particular, are tough to nail in a remote setting, where there’s only so much you can ask your guests or collaborators to do. But it’s worth trying: A good looking and sounding video podcast gives you credibility and improves audience engagement.
Up next, we’ll give you some tips for nailing the lighting, the audio quality, and the background in your remote videos.
Tips for achieving good lighting remotely
Getting good lighting in your videos doesn't require professional video equipment. Here are a few easy-to-apply tips you can use to improve lighting in your remote video recordings:
- Help your remote guests find good natural lighting. You can advise your guests to do a few accessible and budget-friendly things like sit by a window, time their recordings during sunrise and sunset (also known as golden hours), avoid backlighting, and use a white sheet, aluminum foil, or a white poster board to reflect more natural light onto their faces.
- Provide a simple video tutorial or visual guide. You can draw a simple diagram that shows where lights should be placed in relation to the guest. You can also create — or find on Youtube — a simple tutorial that walks your guest through the lighting setup process. This diagram or video could include tips on positioning, diffusing, and adjusting household lights.
 |
- Do a pre-recording check. This session with your remote guest shouldn’t be long; just focus on the most important aspects of lighting that we mentioned earlier. Based on the assessment, make recommendations on adjusting curtains or the position of their lamps. Remember to guide the guest to ensure the lighting is flattering and does not cast harsh shadows or overexposing the shot. Feel free to check their audio quality while you’re at it.
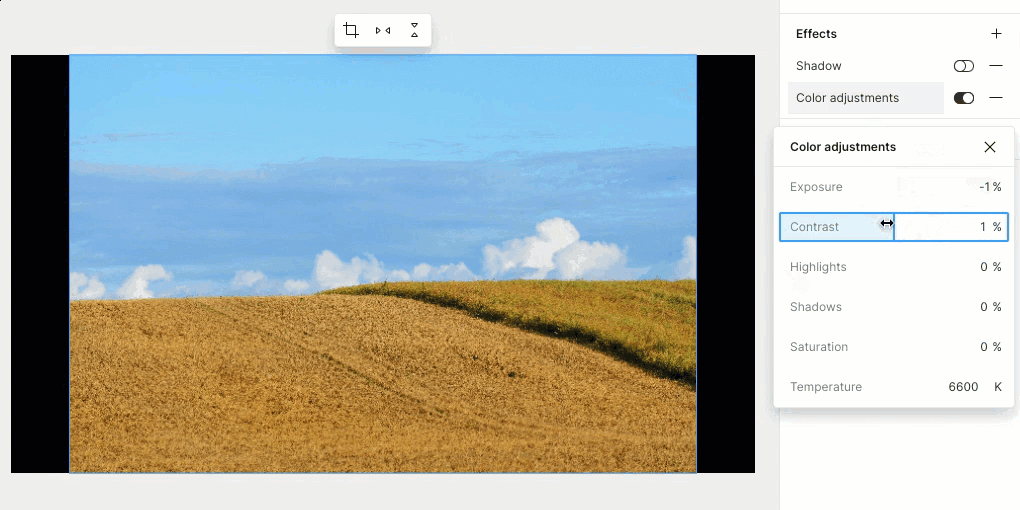
- Use Descript’s color adjustment tool. If, in the end, your guests can't quite hit the notes you were hoping for, you can control brightness, saturation, and contrast easily using Descript.
 |
Choose a clean and visually appealing background
Here's how podcasters can help their remote guests to choose and set up a simple background before recording sessions:
- Understand your guest’s space and advise accordingly. Get on a call with them or give them instructions on finding the space with the least interruptions. Tell them to avoid busy areas like the kitchen and living room. You can better guide your guests to an ideal location by understanding their options.
- Encourage creativity and personality. A clean and visually appealing background doesn't have to be sterile or devoid of personality. Encourage your guest to include a few personal touches, such as a favorite artwork, a well-placed plant, or a neatly arranged shelf. Suggest themes or objects that resonate with the content depending on the podcast's subject. This could include relevant books, industry awards, or hobby-related items.
- Use Descript's AI-powered Green Screen feature: If your remote location doesn't have an ideal backdrop, Descript's green screen feature allows you to replace the background with an image or video of your choice. This feature can provide a professional and consistent appearance, regardless of where your guests are recording and without needing a physical green screen.
 |
Get good audio quality and minimize background noise
There are many tricks to get higher quality audio when you record remote video, some of which we'll go over in a minute. However, the key is getting good remote video recording software.
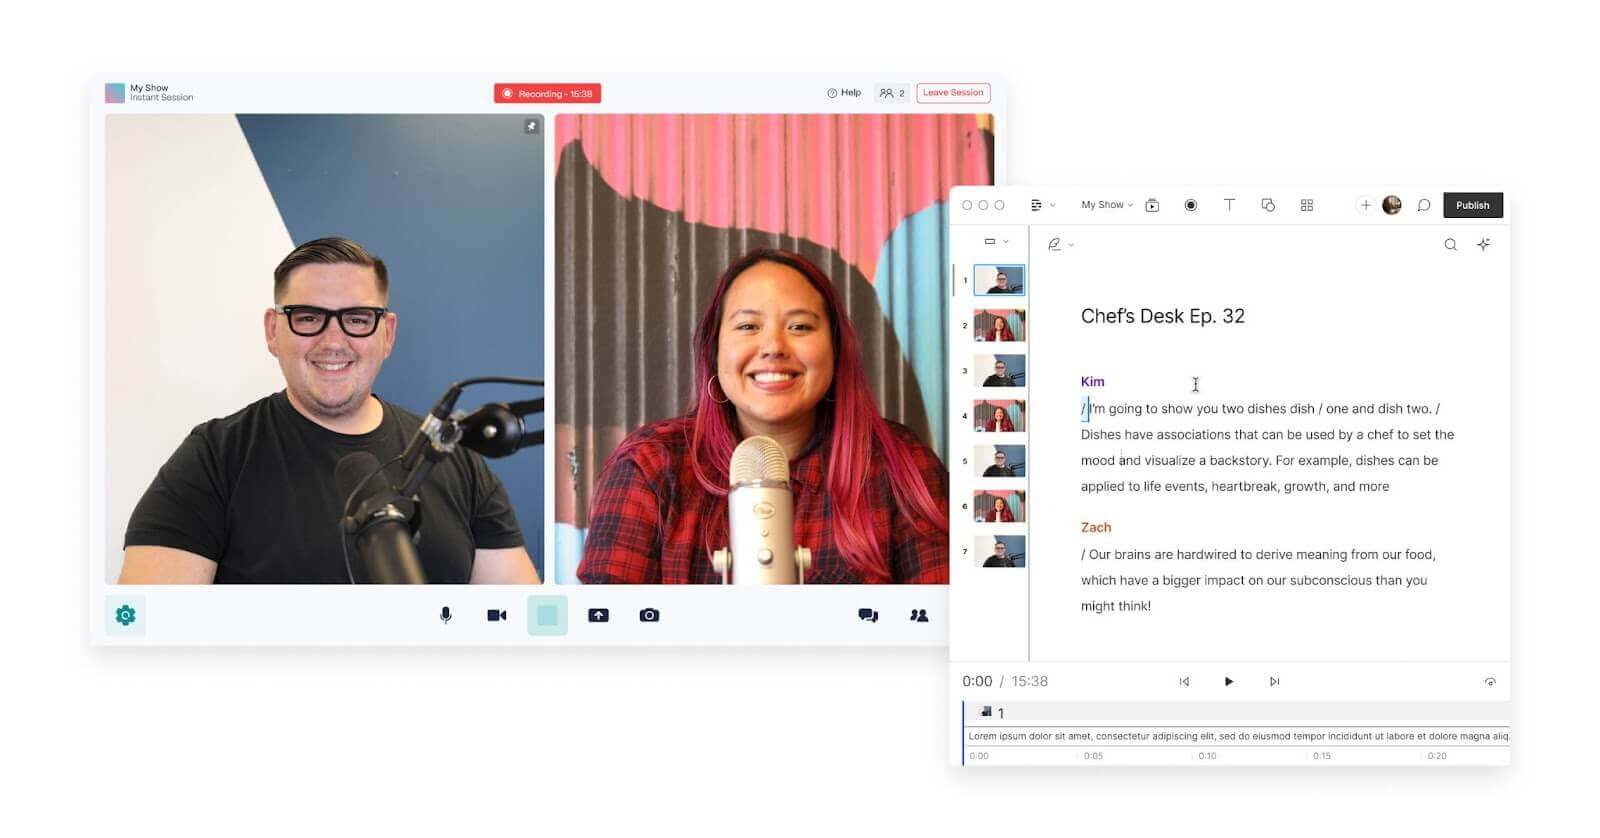
Descript’s remote recording, powered by SquadCast, is a great option. The integration lets you take advantage of SquadCast’s high-fidelity audio recording to ensure quality is clear as day, without any of the glitches and artifacts you get with video conferencing apps.
 |
It also offers features like:
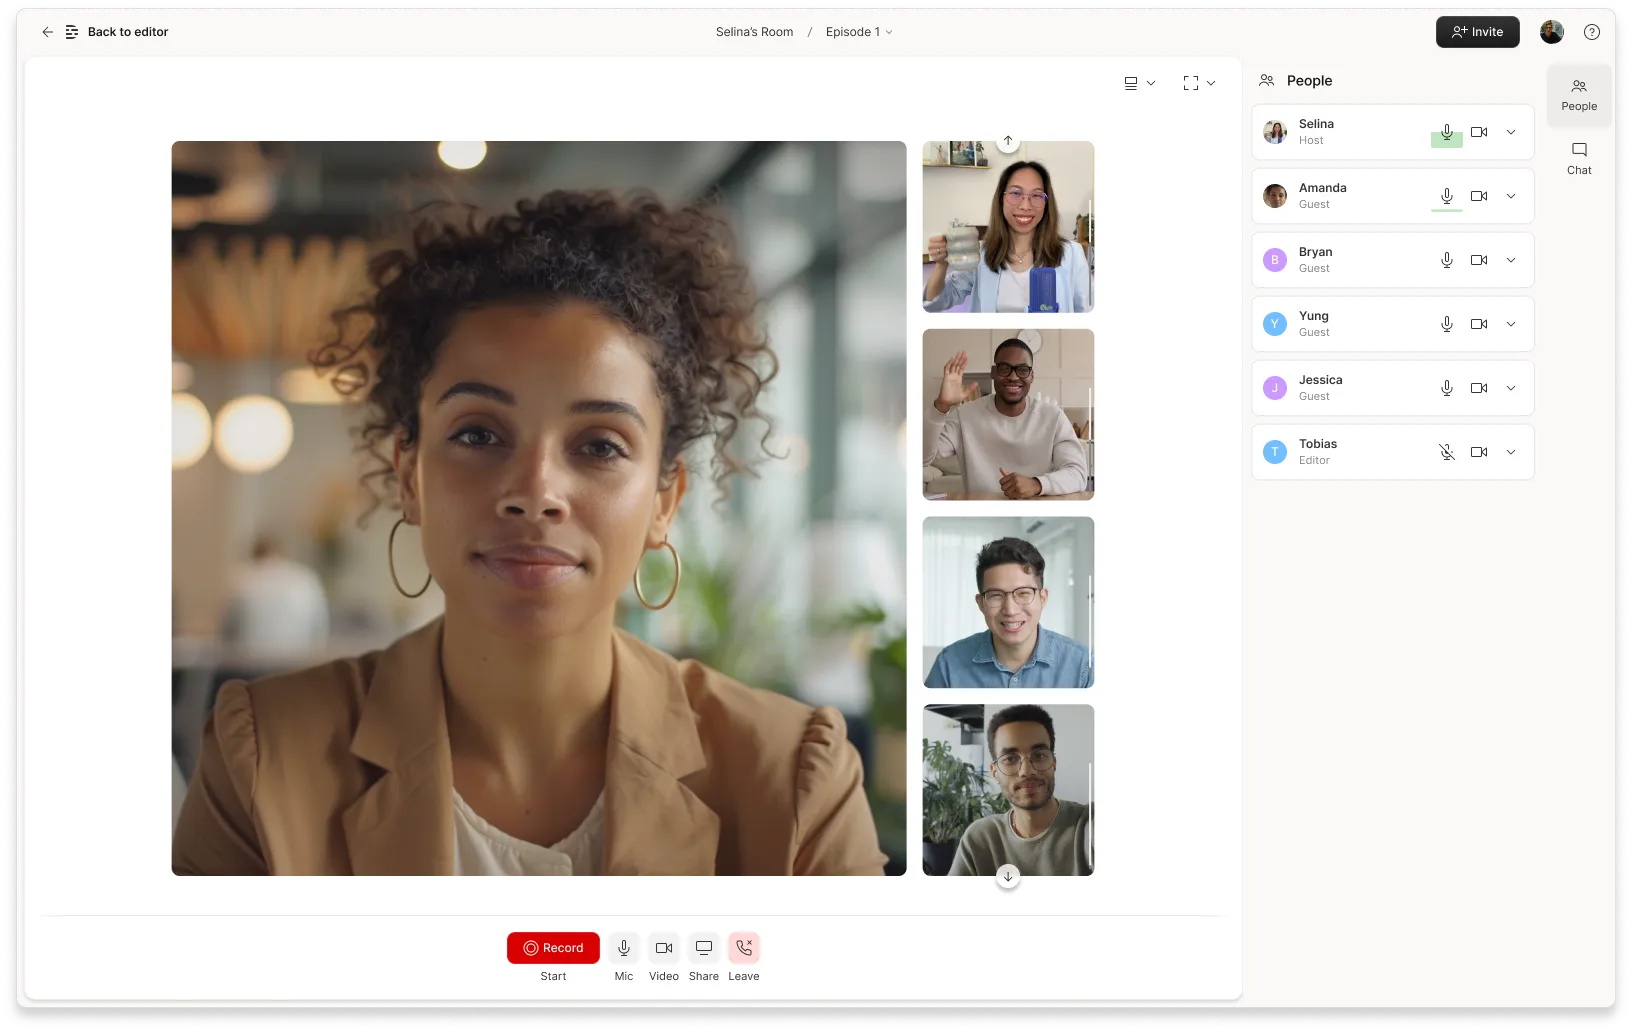
- A user-friendly interface that lets you and podcast guests see each other during the video call.
- Automatic backups so you never have to worry about losing video files.
- Progressive uploading, which saves your recording through the session.
- A green room that lets people test and adjust their podcast equipment and audio settings beforehand.
With Descript, you can also use the Studio Sound feature for an even more professional polish to your audio. Studio Sound will not only strip away background noise, but it will break down and regenerate speakers’ voices so it sounds like they were recorded in a studio. You can also use EQ, compression, and other mixing tools to elevate your audio.
Remote recording is included when you sign up for any Descript plan.
Learn more about Descript remote recording powered by Squadcast — and try it free
Once you get good software, you want to create a remote audio experience that feels as professional and engaging as an in-studio recording. Here are some tips you can give your remote guest to get a better quality recording:
- Position the microphone close to the mouth. If they’re using an external microphone (which, ideally, they are), it should be positioned about 6 to 8 inches from the mouth. This distance usually captures the voice clearly without too much breathing noise.
- Pick the right angle. The microphone should be slightly off to the side, not directly in front of the mouth, to avoid capturing popping sounds from speech. Around a 45-degree angle usually works well.
- Test different heights. Encourage the guest to test speaking with the microphone at different heights. Sometimes, positioning it slightly below the mouth can reduce sibilant and plosive sounds.
- Give your guest ideas on how to soundproof. Suggest improvements like closing windows, turning off fans, or placing a soft blanket or pillow beneath the microphone. They should be mindful of background noises like keyboard typing or paper shuffling — built-in laptop microphones are especially sensitive to these sounds.
- Use multitrack recording. Multitrack recording is when you capture each speaker on their own track, then adjust each individually. That allows you to remove distracting noises and edit out crosstalk in your podcast without disrupting the flow of the conversation. With Descript, you can record multitrack interviews remotely and generate a single transcript where you can edit every track, or work on them individually in Sequences.
Best practices for remote video interviews
Remote interviews are now a common practice in the podcasting world. But good remote video interviews take much more than just hitting the record button and waiting until the edit to worry about quality. The right preparation can create a recording session so smooth that the editing process will be a breeze.
Here’s how to prepare the guest for remote video interviews, nail eye contact, and overcome technical issues.
How to prepare the guest for remote video recording
Preparing your guest for a remote video interview requires communication, ongoing guidance, and proactive collaboration — before, during, and after the recording.
Here's a step-by-step process to ensure everything goes smoothly.
Initial communication and expectation setting
- Share guidelines: Offer guidance on the tone, style, and length of the interview. Outline the time and effort commitment on the guest’s part.
- Explain the process: Describe what the recording process will look like from start to finish. Encourage the guest to ask questions, no matter how small.
Technical preparation
- Provide a technical checklist: Include your suggestions on microphone placement, lighting, background, and camera setup. This is where the diagrams and video tutorials we mentioned earlier would come in handy.
- Recommend equipment: If possible, suggest using a dedicated microphone, headphones, and lightning props. Link them to affordable equipment they could use, or send them the hardware yourself if their setup can only result in poor quality video and audio.
- Schedule a test call: Arrange a time to test all the equipment, the audio and video quality, and the software you’ll use (SquadCast, Riverside.fm, Zoom, etc).
Content and interview flow
- Share the questions in advance: Provide an outline of the questions or topics to allow your guest to prepare. During the test call, get a sense of how the guest feels about the topics so you can anticipate some follow-up questions to ask them during the recording.
- Discuss the interview style: Explain if the interview will be more conversational or structured. Give your guest a sense of what you’re hoping to present in your podcast. Is it a debate between two opposing ideas? Actionable advice based on the guest’s hands-on experience? Entertainment? Edutainment? Make sure your guest knows what to expect.
Creating the right environment
- Suggest a suitable location: Guide your guest to choose a quiet, well-lit space without distractions. Review the tips and best practices we covered earlier to ensure good lighting, sound, and background.
- Address potential interruptions: Advise your guest to inform people in their household or immediate vicinity about the recording to minimize interruptions.
Legal and ethical considerations
- Share release forms: If applicable, send any release or consent forms for your guest to sign.
- Discuss content ownership: Clarify how the recorded material will be used and who will own it.
Building rapport
- Establish a connection before you start recording: Spend some time chatting before the official recording starts to build rapport. You could schedule an extra 15 minutes before the recording just for ice-breaking and helping the guest relax.
- Provide encouragement and support: Assure your guest that errors can be edited out, using tools like Descript, to create a relaxed atmosphere.
Post-Interview collaboration
- Explain the post-production process: Brief your guest on the editing process, and if applicable, how they can contribute or review the final product. If you’re leveraging Descript’s collaboration features, you could mention that the guest will have access to a transcript where they can suggest edits directly on the video.
- Offer thanks and follow-up information: Thank your guest and provide information on when and where the podcast will be released.
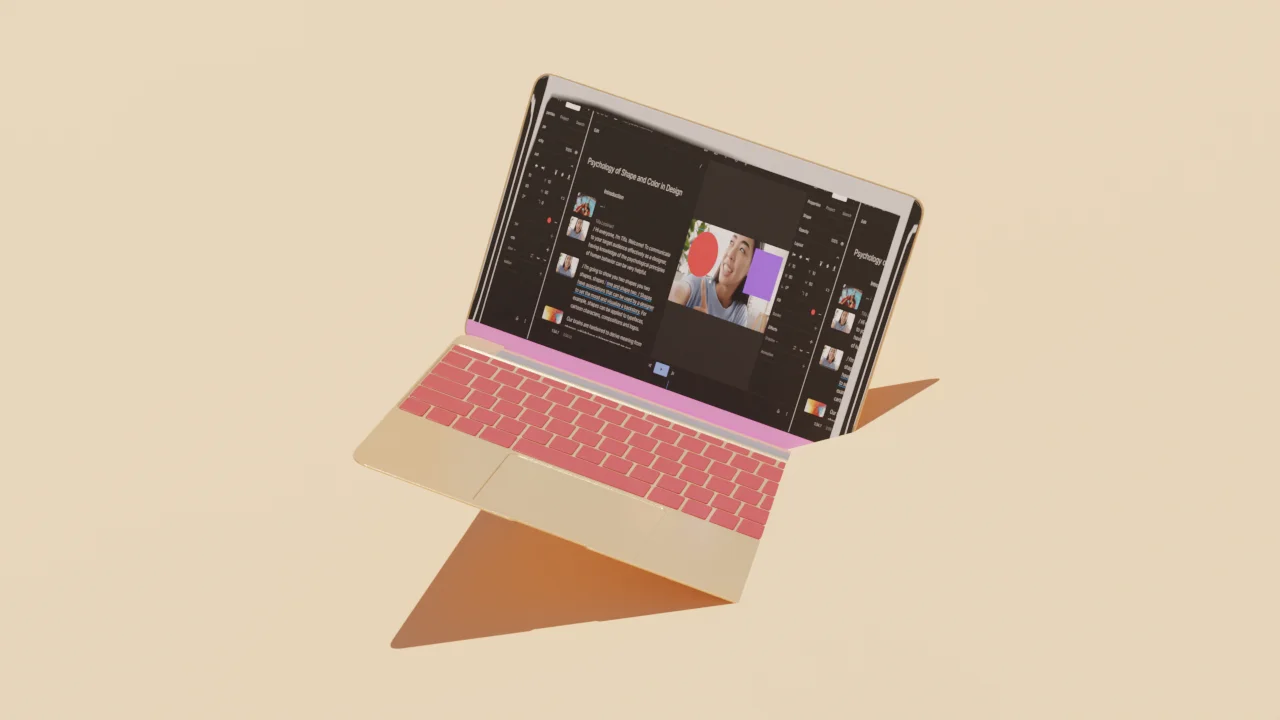
The best part about Descript — when it comes to applying feedback — is the ability to edit videos using text transcription. Basically, after you upload a video, Descript creates a transcription of the audio in the video. It looks like this:
 |
Then, you can edit the transcript like a Word document and the video will update accordingly. When you delete text, the corresponding clip in the video also gets deleted. This makes the editing process far more intuitive, especially for those not familiar with traditional, timeline-based video editing.
With Descript, you can also:
- Create speech just by typing. Using Overdub, you can build an ultra-realistic clone of your own voice.
- Automatically remove filler words. In one click of the “Remove Filler Words” feature, you can purge crutch words like “um,” “uh,” and “you know.”
- Use non-destructive editing. If you don’t like the edits you made and want to revert them, Descript preserves your original files so you can undo to your heart’s content.
Tips for engaging and maintaining eye contact with the guest
Just like in real life, eye contact matters when communicating with others. It helps convey trust and connection, and it conveys confidence and professionalism. A speaker who maintains eye contact seems more invested in their message, encouraging your listeners to be similarly invested.
Eye contact on a remote recording feels different than eye contact in real life because instead of looking at the person you’re talking to, you’ll need to look directly into the camera lens. That can feel unnatural at first, so it’s good to practice this skill during low-stakes Zoom meetings and calls with friends before you use it with a guest.
It’s more important that you make eye contact with the camera than it is for the guest, since it’s your job to make them feel like you’re connecting with them during the interview. But it helps for the guest to make eye contact, too. Here are a few tips to help you both nail it:
- Position the camera at eye level. If you have a standalone camera, ensure it’s facing you directly at eye level. Use household items and props to achieve the perfect height if you need to.
- Establish a cue for eye contact. You can establish a non-verbal cue or a periodic verbal reminder (like a codeword), to bring back eye contact during the recording.
- Use Descript's Eye Contact tool. If you’d rather skip all the coaching and just fix eye contact in post-production, this AI-powered tool adjusts a person’s gaze in a video so it appears like they’re looking directly into the camera — even when they’re looking at something off-camera, like a script or an ongoing chat with the podcast host.
How to manage technical issues during the interview
While remote video recording is convenient and accessible, it also introduces a new set of challenges — primarily technical issues you'll have to anticipate and solve.
Ultimately, these tips can spare you the typical headaches that come with recording video remotely: rescheduling, re-recording, and spending additional time in post-production, all of which consume resources and delay the publication of your podcast episode.
- Establish a backup internet connection. You can suggest having a mobile hotspot at the ready just in case the main connection goes down.
- Make sure all the hardware is in top shape. Check that the connection and troubleshooting have been taken care of so there are no surprises on recording day.
- Plan for interruptions. Tell your guest to inform others when the recording will take place, and have them put a “Do not disturb” sign on their door.
- Have a reconnection plan. If you’re recording something live and your platform of choice goes down, have a backup link for guests to reconnect to.
You can also use Descript with a video conferencing tool like Zoom or Skype. Capture high-quality, multitrack recordings from your microphone and the computer output using the Computer Audio feature (only available on MacOS at the moment). Then, you and your remote collaborators can annotate the resulting transcript and edit the audio simply by changing the text — all in a few clicks.
How to improve the visual quality of remote video recordings
You can achieve professional, polished, and studio-quality looks by applying a few simple techniques. With an understanding of basic framing and composition rules and the use of graphics and branded elements, even the most amateur video can shine.
The tricky part will be coaching your guests so they can follow along without getting overwhelmed. You could include these tips and techniques in the preparation guide you'd send your guest before the recording date and help them set up their recording space with a checklist that includes all of these tips.
Framing and composition techniques for a professional look
Try using the rule of thirds
Most remote podcast recordings will have the guest and host centered in their frames looking directly into the camera. But for a more film-inspired look, you could always try the rule of thirds. The rule of thirds works by dividing the screen into nine equal parts and positioning the guest's eyes along the top third line. This type of framing is widely used by photography and filmmaking professionals as a device to create visual balance. For a podcast recording, it also creates a space for visual aids or graphics.
 |
Establish headroom and lead room
Headroom refers to the space between the top of the subject’s head and the top of the frame, while lead room refers to the space directly in front of your subject. By establishing headroom and lead room, you’re preventing the subject from looking cramped or misaligned.
Use symmetry
Alternatively, you can do away with the rule of thirds and align the guest centrally with symmetric objects or lines. Symmetry can be applied to the background, where patterns, lines, and shapes are mirrored on either side of a central axis.
How to use graphics and incorporate branded elements
Graphics aren’t just an aesthetic choice. They also guide your viewer's attention, reinforce the content's message, and help build a recognizable and consistent brand image. And, with the right tool, adding visual components — like transitions and titles — doesn’t have to cut into your editing time.
Here are some ways you can use graphics and visual elements in your next video podcast recording.
Incorporate title cards and captions
Add introductions, title cards, and captions to ensure your videos are accessible without sound. With Descript, you can create captions (subtitles) in a few clicks — by pulling directly from the transcript.
Not only do captions make your videos more accessible, they can make it more visually appealing, with custom colors, animations, and backgrounds. You can also upload your own fonts to integrate your brand’s aesthetic into your videos.
Find ways to use transitions
A transition is a visual effect you can apply at the start, end, or in between scenes or individual clips. Descript comes with a number of transitions like fades and directional wipes that you can apply directly from your editing flow.
Use keyframe animation
Keyframes define the visual properties at the start and end of an animation and define its duration. They allow you to move a visual from one position to another on your timeline, make a visual zoom in or out, and change the opacity of a visual over time.
Recommended recording devices and accessories
One common best practice for remote audio recording is to send guests a box with the equipment they’ll need to achieve good quality video and audio. Consider mailing them a kit that includes a microphone, a mic stand, a pop filter, and a smartphone tripod or an HD webcam if their smartphone doesn’t have a good camera. Chances are, however, if they have a relatively new Android or iPhone, their camera will be good enough for remote video production.
For both video and audio, start by assessing what your guests are working with. If they have a built-in webcam, they’ll definitely need to move to a different video recording device, like their smartphone. Just take a look at the example below to see why.
On the left, it looks like Mark Zuckerberg is using a laptop webcam. On the right, he’s sitting at home with a full-fledged production studio that includes the most expensive cameras social media foundership can buy:
 |
Your guests don’t need to spend $6,000 on a RED camera — they can use their iOS or Android device if you guide them with a few instructions, suggest they buy some low-cost equipment and software, or send them the stuff yourself.
Here are some low-budget hardware suggestions for recording video and audio remotely.
- Use inexpensive phone tripods and gooseneck mounts. If you ask your guest to use their smartphone camera instead of their laptop webcam, these accessories will help. They give your guest the flexibility to move and set up their phone in the best rooms and at the best angles possible.
- Turn the phone camera into a webcam using an app. Tools like Camo allow users to use their phone as a webcam and control it from their computer. It gives you manual control over your phone camera and the ability to fine tune the image like you would with a DSLR. The basic platform is free, but you can upgrade to pro using the Descript user discount.
- Upgrade your microphone. With a good space and editing tools like Descript’s Studio Sound, you don’t really need a fancy microphone. But if you want to invest in a microphone for your remote guest, here’s a thorough breakdown of the best and most affordable options in the market. One low-budget upgrade is the Blue Yeti, a USB mic that runs for no more than $100.
- Upgrade your headphones. You want to use wired headphones to cut out any interference from your other podcasters talking. Headphones become especially useful when editing your podcast, since they allow you to pick up subtleties and details that lower quality headphones wouldn’t catch. Some podcasting headphones for under $100 include the CAD Audio MH510, the Shure SRH440A, and Sony’s MDR-7506.
Editing and post-production tips for remote video recordings
Now that you’ve set yourself and your guest for good quality video and audio recording, it’s time to edit your footage and make it look the best it can. The real magic of making a remote video recording look professional and captivating happens in the editing and post-production phase.
Selecting the right editing software for remote video recordings
Let’s start with the software you need to put it all together. Aim for a full-fledged screen recording platform that integrates all the tools you'll need to record, edit, collaborate, and publish your video podcasts.
With the Descript and SquadCast integration, you can manage the entire video capture and editing process in one place.
 |
Some other reasons Descript is excellent for editing are:
- The editing workflow is intuitive. Turning raw footage into polished content shouldn’t require the expertise of a seasoned film editor or videographer. Descript provides a text-based editing interface that allows you to literally edit audio like a Word doc. This unique approach to editing — coupled with tools for cutting, splicing, and rearranging content — enables quicker and more precise edits while letting you see the narrative as it takes shape. Whether you're a seasoned pro or a newbie, Descript's intuitive controls help you edit without hassle, spending less time on technicalities and more time on creativity.
- Descript facilitates collaboration. Collaboration is vital in remote podcasting, whether you're co-hosting or working with a team. Descript's real-time collaboration tools allow multiple team members (or external guests) to work on the same project simultaneously. Coupled with commenting and version history, these features create an environment where ideas can flow freely, revisions can be tracked, and everyone stays on the same page.
- You can publish videos natively. A seamless pathway from editing to publishing saves you time and effort. Descript integrates with popular podcast hosting platforms, enabling direct publishing from within the app. But it goes beyond that with a suite of exporting options, including various video and audio formats, tailored to different platforms' requirements. This seamless integration between editing and publishing ensures that your content reaches your audience in the best possible format, without tedious manual conversions or uploads.
- Descript has plans for every budget. Balancing cost against functionality is crucial for podcasters operating on different budgets. Descript offers various pricing tiers, each providing a rich set of features. Whether it's transcription services, an extensive sound effects library, or Overdub (our AI voice synthesis technology), you're getting value for your money. These functionalities, often bundled at a competitive price compared to piecing together separate services, mean that you can have an all-in-one solution without breaking the bank.
Techniques for improving the overall quality of the video
There’s some polishing involved in the editing process after you stop recording. You’ll want to apply some, or all, of the techniques below in order to bring your video’s visual quality to a professional level.
Experiment with video effects. Adding effects like blur, film grain, or pixelation can enhance your video's mood and style. Whether seeking a dreamy look, vintage touch, or digital feel, these effects provide creative flexibility. Descript offers these video effects for easy customization and unique visual texture.
Fine-tune audio during post-production: Balancing volume levels, avoiding distortion, and improving clarity can make your audio sound professional and clean. These fine-tuning techniques help remove unwanted noises and create a cohesive audio track. Descript provides comprehensive audio effects like a compressor and EQ tools for precise sound control.
Play with color intensity: Something as simple as manipulating the color brightness, saturation, and contrast of your video can add a nice touch. Understanding and applying color theory enhances the overall visual effect and complements your content's mood. Descript’s Color Adjustment features provide these professional color control tools.
Tailor audio for impact and clarity: Fine-tuning audio through effects like boosting or cutting specific frequency ranges creates a more polished and clear sound. Attention to detail in audio editing ensures professional results that resonate with listeners. Descript offers tools like High Shelf EQ, Low Shelf EQ, and Parametric EQ for tailored audio perfection.


.jpg)


