The slow-motion scene is an essential part of any filmmaker’s or video creator’s toolkit. Sure, you probably won’t be dodging bullets like Neo, but slowing things down can turn even a mundane moment — like dropping a pen — into a dramatic spectacle.
Fortunately, you don’t need fancy equipment to do it: your iPhone has you covered. Let’s see how to slow things down, iPhone-style, without needing a special effects budget that could fund the next Matrix sequel.
Luckily, you don’t need fancy, expensive video equipment or technical editing skills to shoot your own slow motion videos.
With an iPhone, you can record a slow motion video to add nuance to your footage and create stunning content that draws in your audience.
This article explains how to slow mo a video on iPhone and convert regular videos to slow-motion.
Can you make a slow motion video on iPhone?
Absolutely. Apple introduced the slow-motion feature in 2013 with the release of the iPhone 5s. Subsequent models — from iPhone 6 onward — also support slo-mo recording. On most newer devices (think iPhone 8 or later), you can film at up to 240 frames per second for extra-silky slow motion. If you’re on an older model, you’ll still get slo-mo; it just might record at a slightly lower frame rate.
Slow motion lets you record a video at a high frame rate, then play it back at a slower-than-normal rate. You can do this with all sorts of scenes: you could shoot a slo-mo video of a skateboard trick to highlight the skill involved, or you could shoot actors trying a restaurant’s signature dish to make the experience look even more tempting. Either way, slow motion reveals details your audience might have missed if the video were played at regular speed.
Depending on the iPhone model you have, you can shoot up to 240FPS to produce videos with better quality and smoothness. Plus, you can set which part of the clip to slow down and which parts play normally.
How to set up slow motion on iPhone
Now, let’s walk through how you can set up your iPhone to create videos in slow motion.
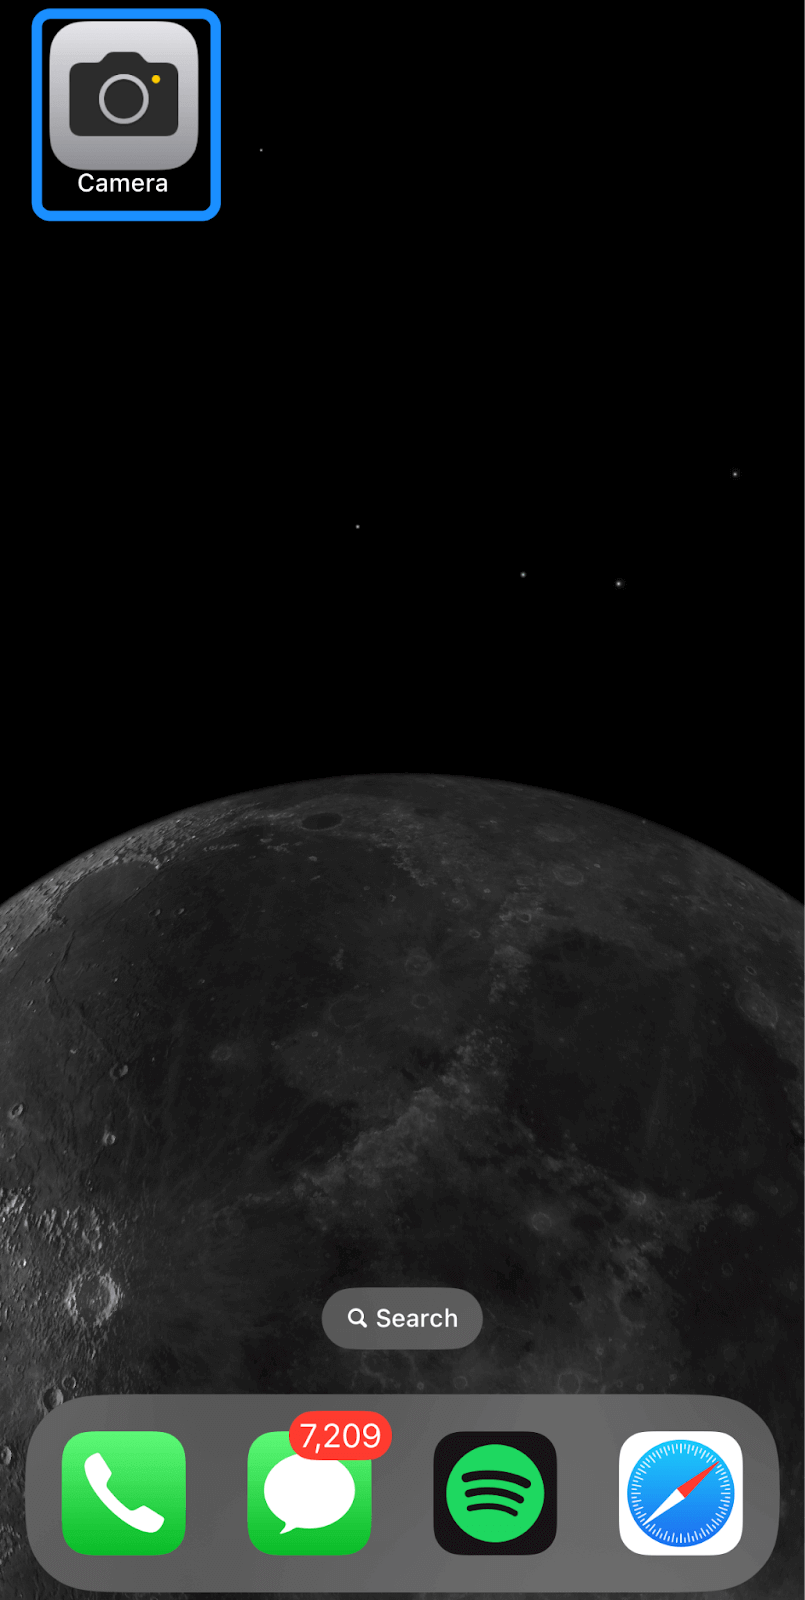
1. Open the Camera app
Tap the Camera app on your iPhone to launch it.
 |
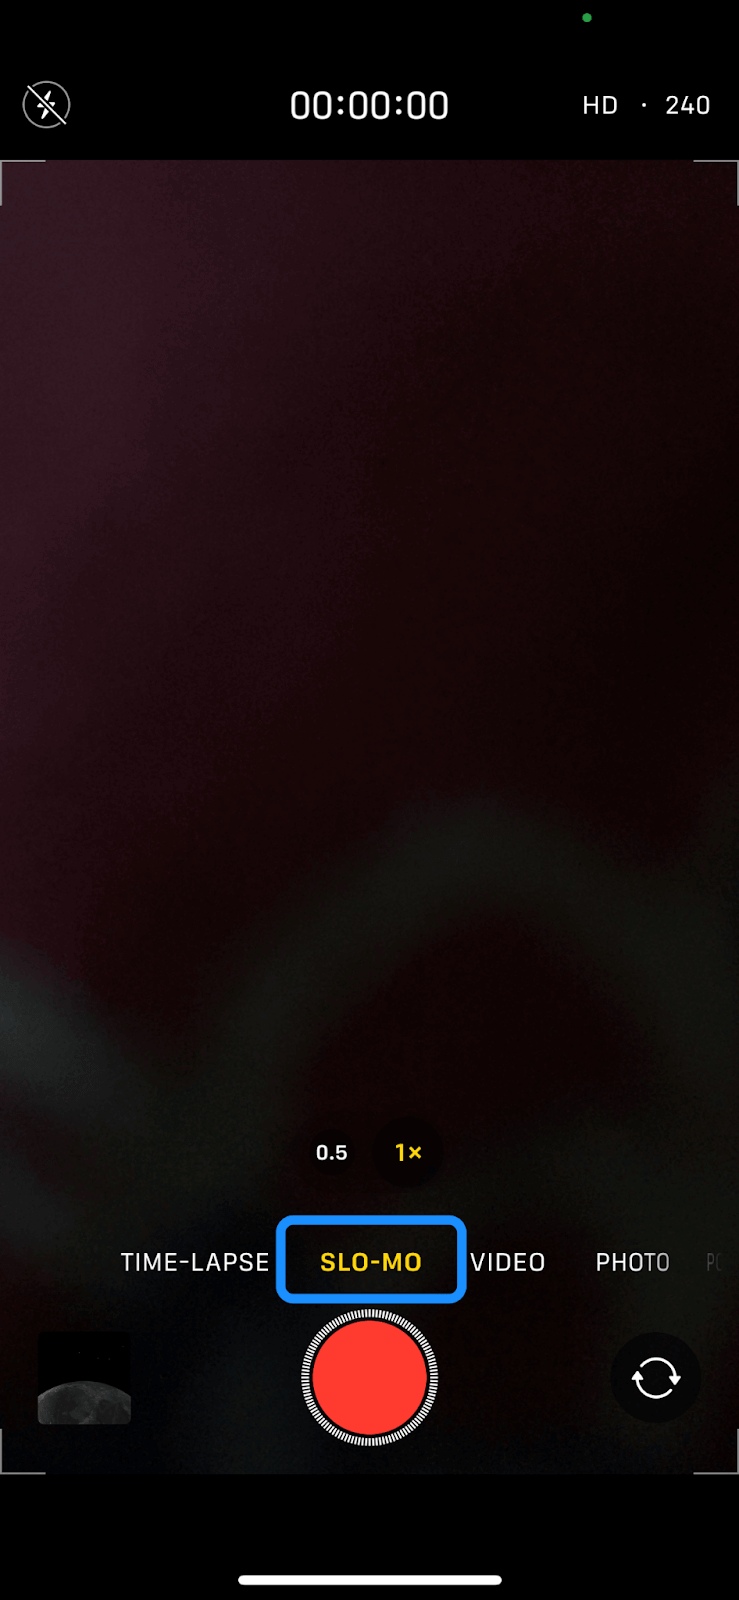
2. Select Slo-mo mode
Select Slo-mo mode from the options at the bottom of your screen.
 |
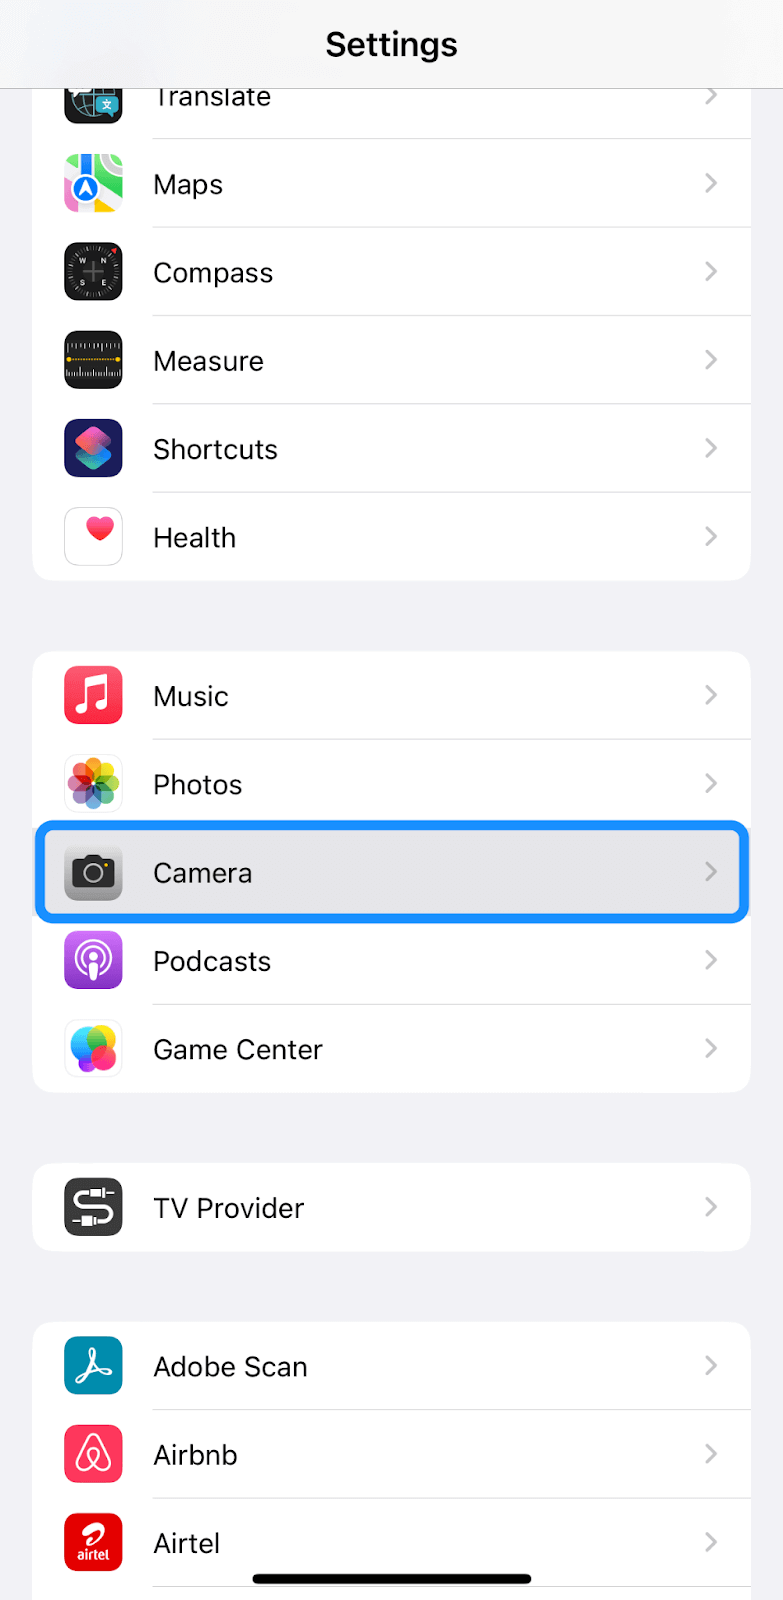
3. Choose a frame rate
Tap Settings and select Camera.
 |
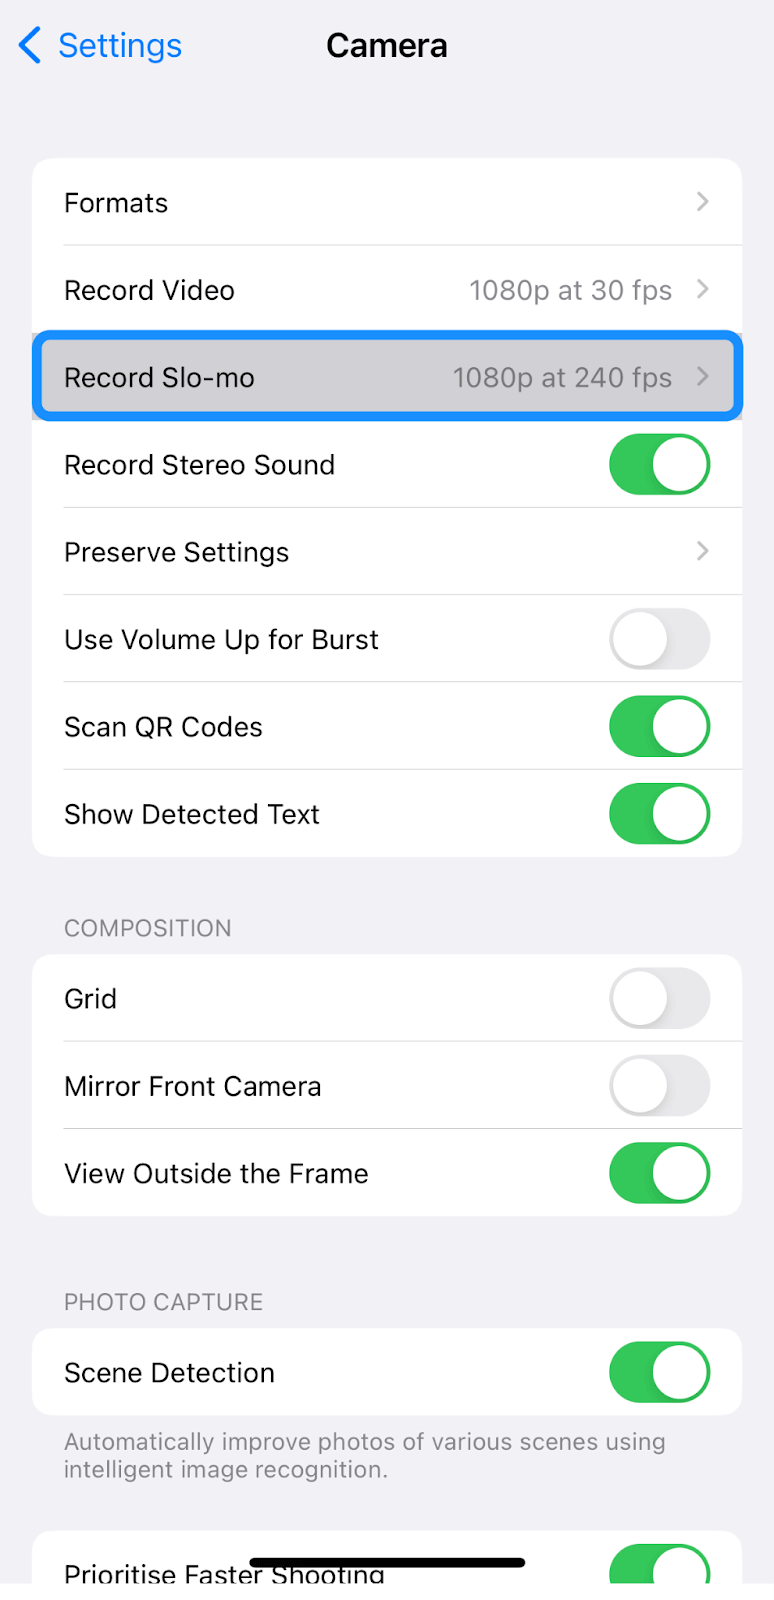
Tap Record Slo-mo to set the frame rate and resolution and shoot good-looking slow motion videos.
 |
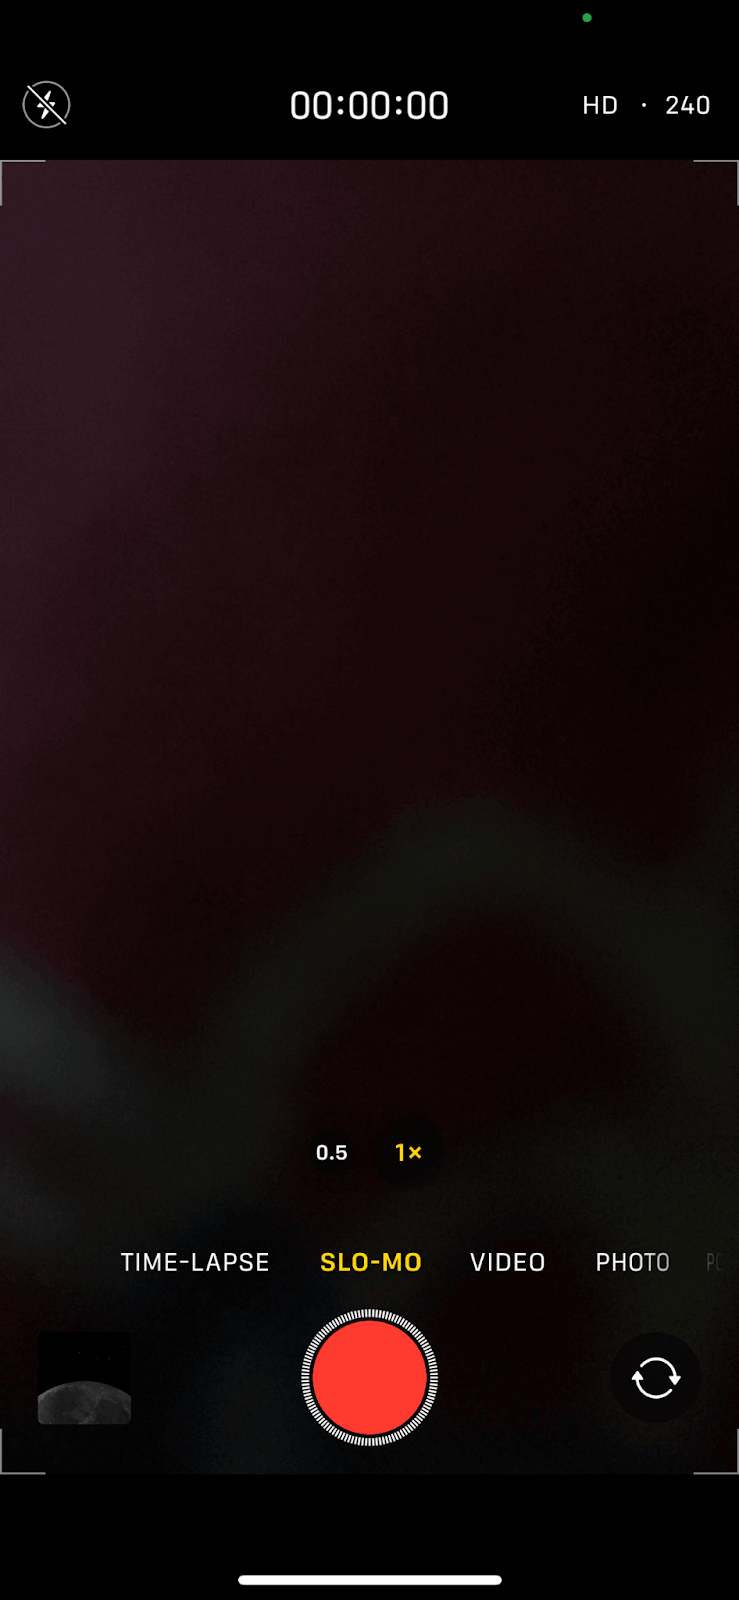
4. Compose your shot
Consider what you’re going for in the shot before recording, then focus your camera on it to capture the exact moment.
 |
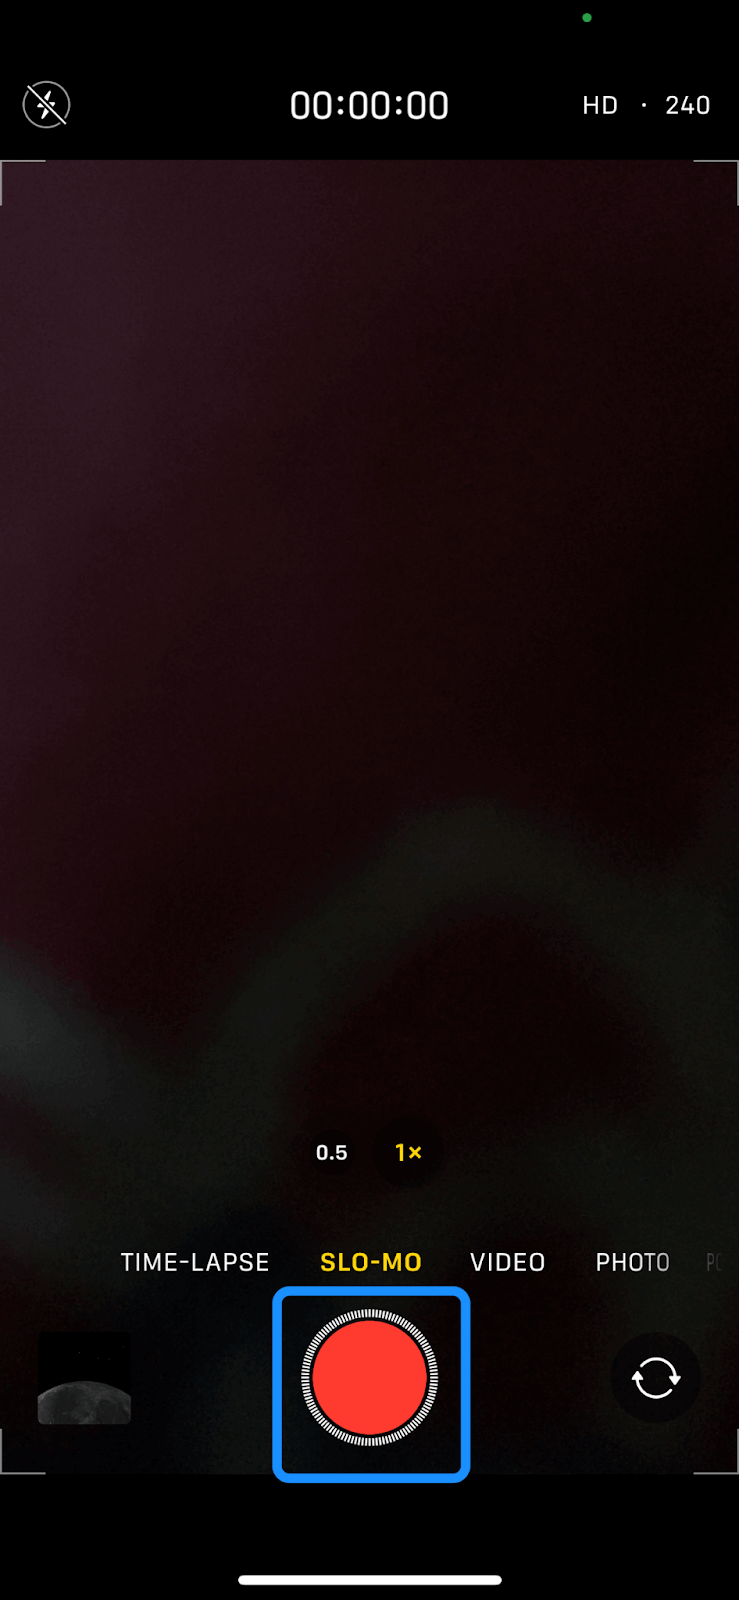
5. Start recording
Tap the red record button at the bottom of the screen to start and stop recording.
 |
How to record a slow motion video on iPhone
1. Open the Camera app
Tap the Camera app to open it.
Tip: If you accidentally removed the Camera app from your phone’s Home Screen, swipe left until you reach the App Library, then type Camera in the search field. Alternatively, scroll up and down to browse the alphabetical list, then tap Camera to open the app.
2. Swipe to Slo-mo mode
A menu with different recording modes will appear at the bottom of the screen.
Choose Slo-mo mode to shoot a clip in slow motion. You can even zoom in and out of a video like normal while recording in slow motion.
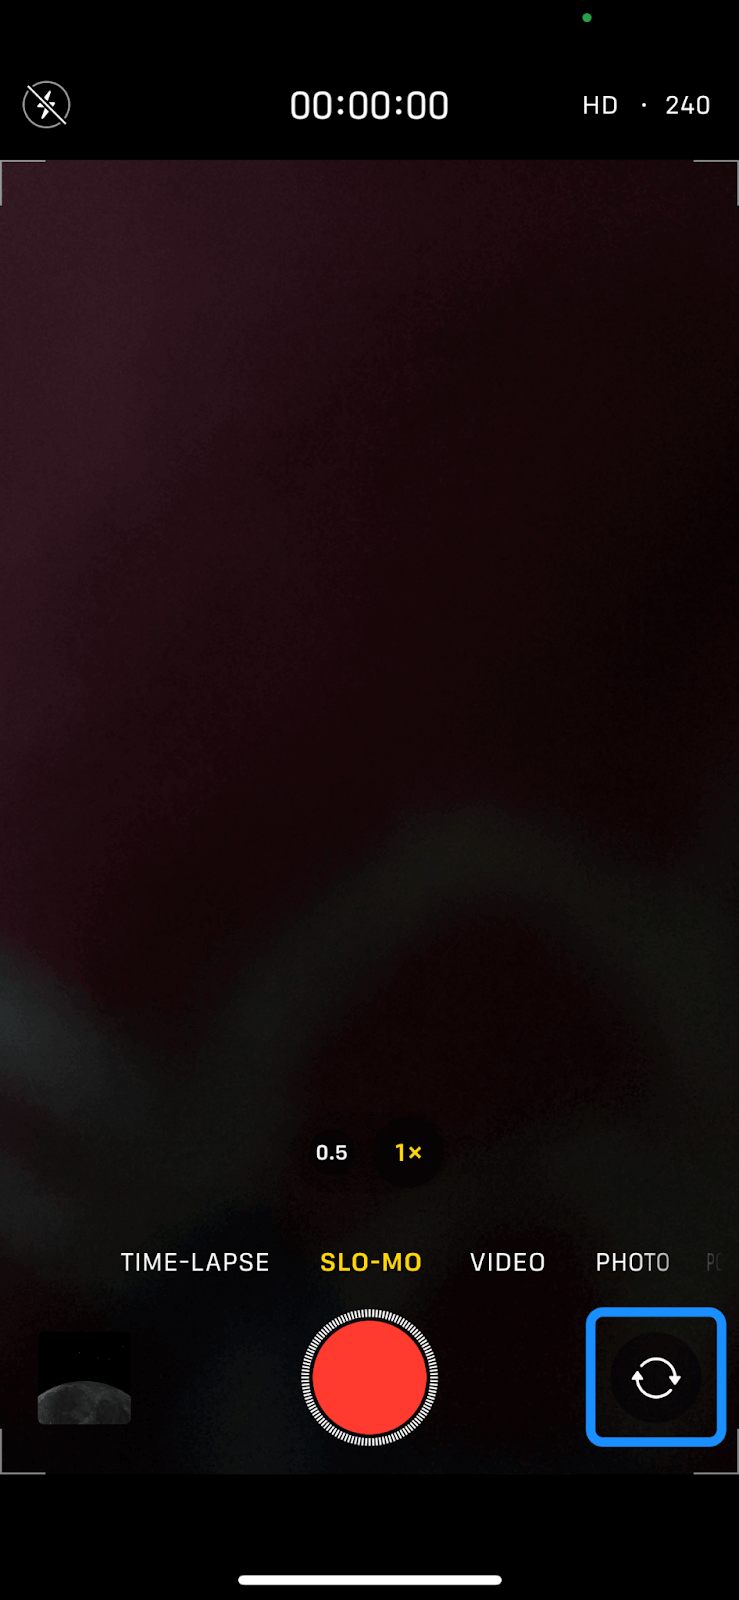
If you have an iPhone 11 or newer model (running iOS 13 or higher), you can record in Slo-mo mode with the front camera. For example, you can record slofies (selfies shot in slow-mo) to create attention-grabbing videos that’ll spice up your social media posts and engage your audience.
Tap the Rotate icon to switch to the front-facing camera, then tap Slo-mo mode to record your video.
 |
3. Choose the best frame rate
Frame rate refers to the number of frames per second (FPS) your phone will capture.
By default, the iPhone camera records videos at 30FPS. Depending on your iPhone model, you can choose different frame rates and video resolution settings—including 120FPS at 1080p HD or even 4K videos at 24, 30, or 60FPS.
Tap Settings and select Camera.
 |
Next, tap Record Slo-mo to set the frame rate and resolution that’s best for slow motion videos.
 |
For older iPhones, tap the number in the top right corner of the screen to switch frame rates for your slow motion video.
It’s worth noting that picking a faster frame rate and higher resolution results in larger video files, which could fill up your phone’s storage.
4. Compose your shot
Focus on the subject you want to record.
For clearer slow-mo shots:
- Hold your phone steady while recording, using a tripod if possible. Any slight movement can cause a change of focus and blurriness, which will show in the final recording.
- Keep a close distance when shooting small objects and further away for large objects.
- If you’re shooting through a glass object, like a window, make sure the surface is clean before recording the video.
5. Hit record
Tap the red Shutter button (or either volume button) to record your video.
 |
6. Save and share your video
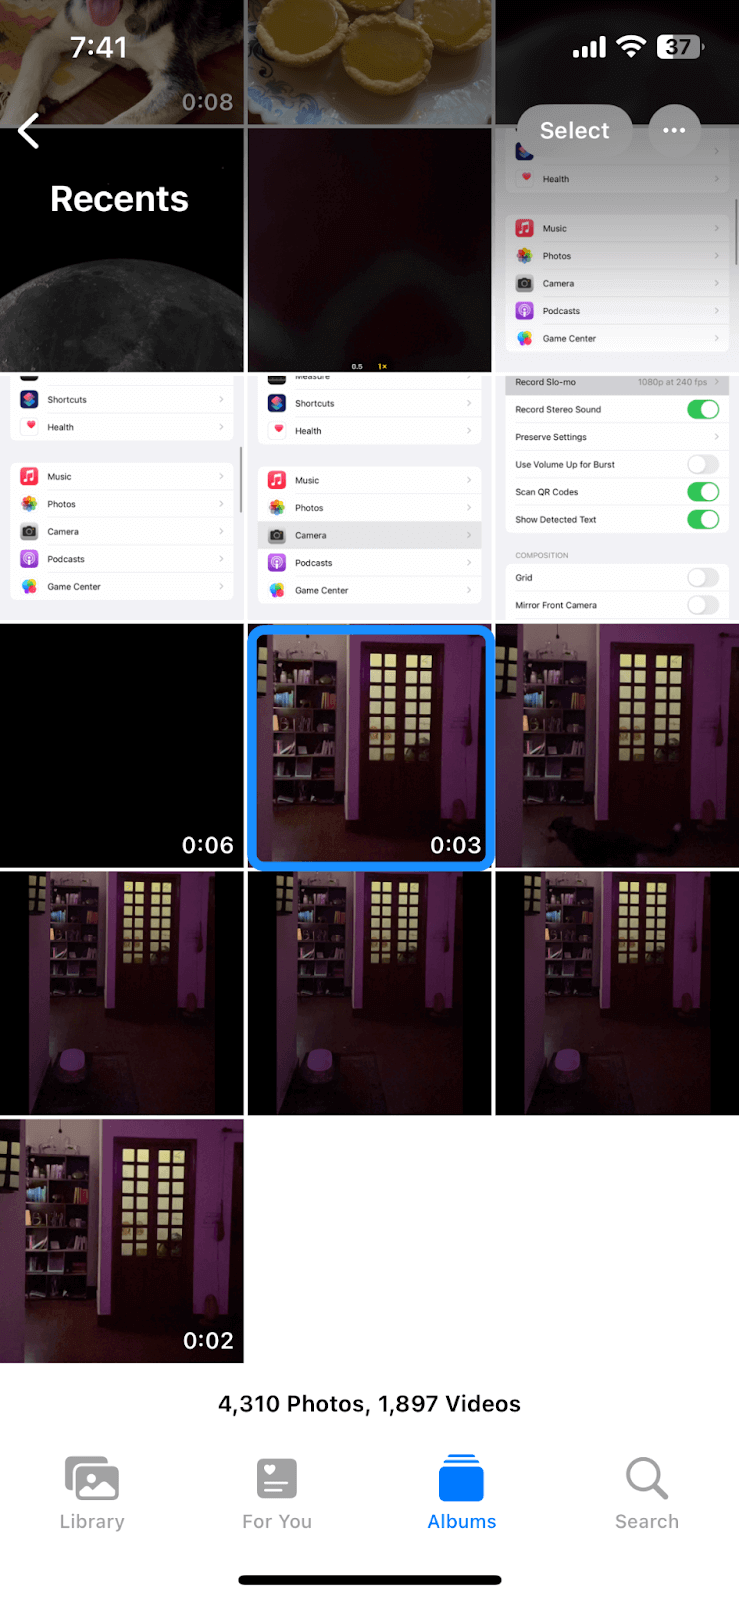
When you’re done recording, tap the Shutter button (or either volume button) again to stop recording.
Your footage is automatically saved in the Camera Roll of the Photos app (or Recents album for newer iOS versions).
 |
You can also make part of the video play in slow-mo and the rest at regular speed. To do this:
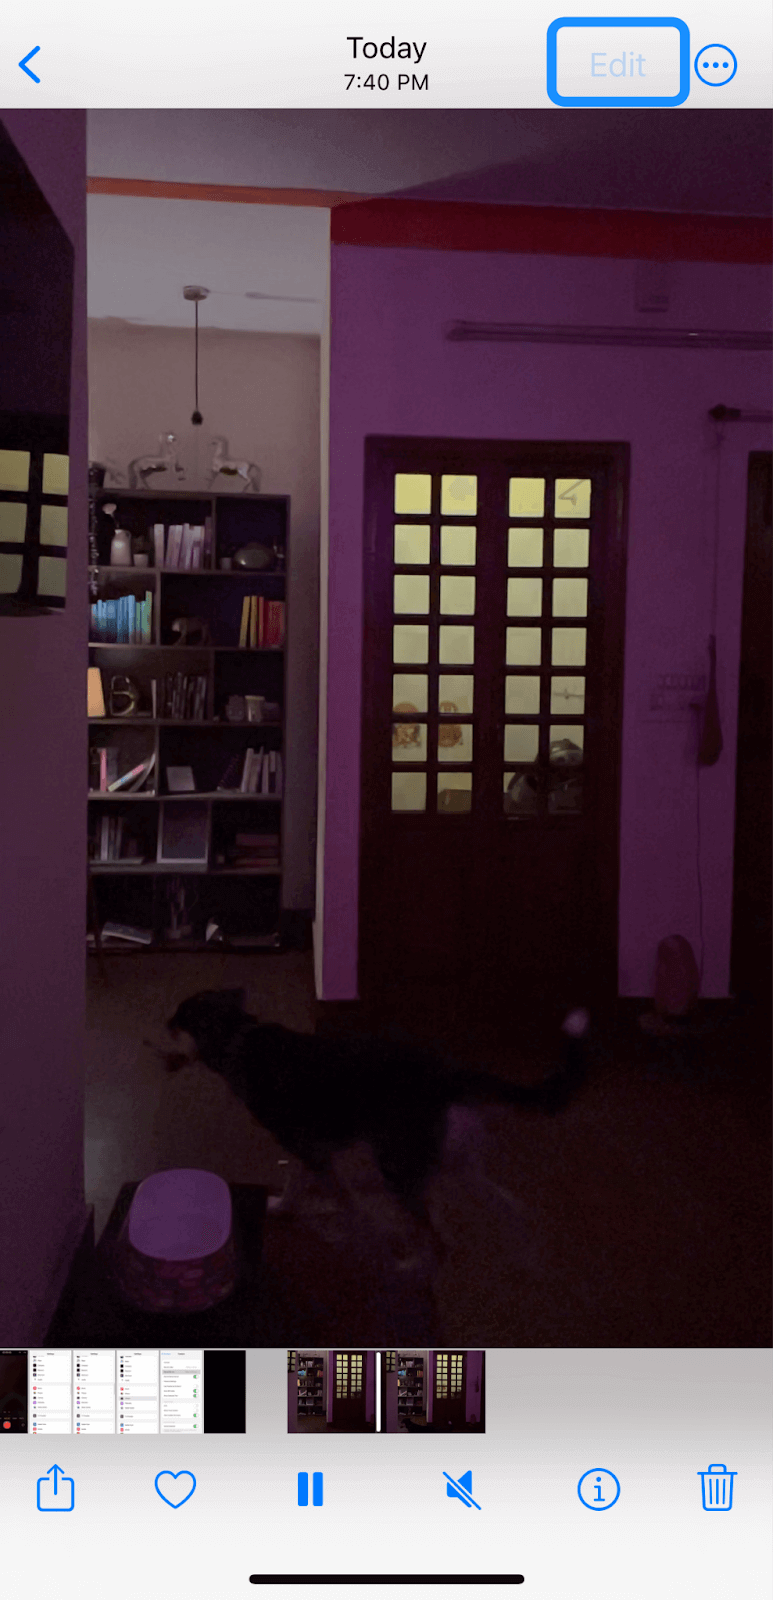
Tap the video thumbnail, then tap Edit.
 |
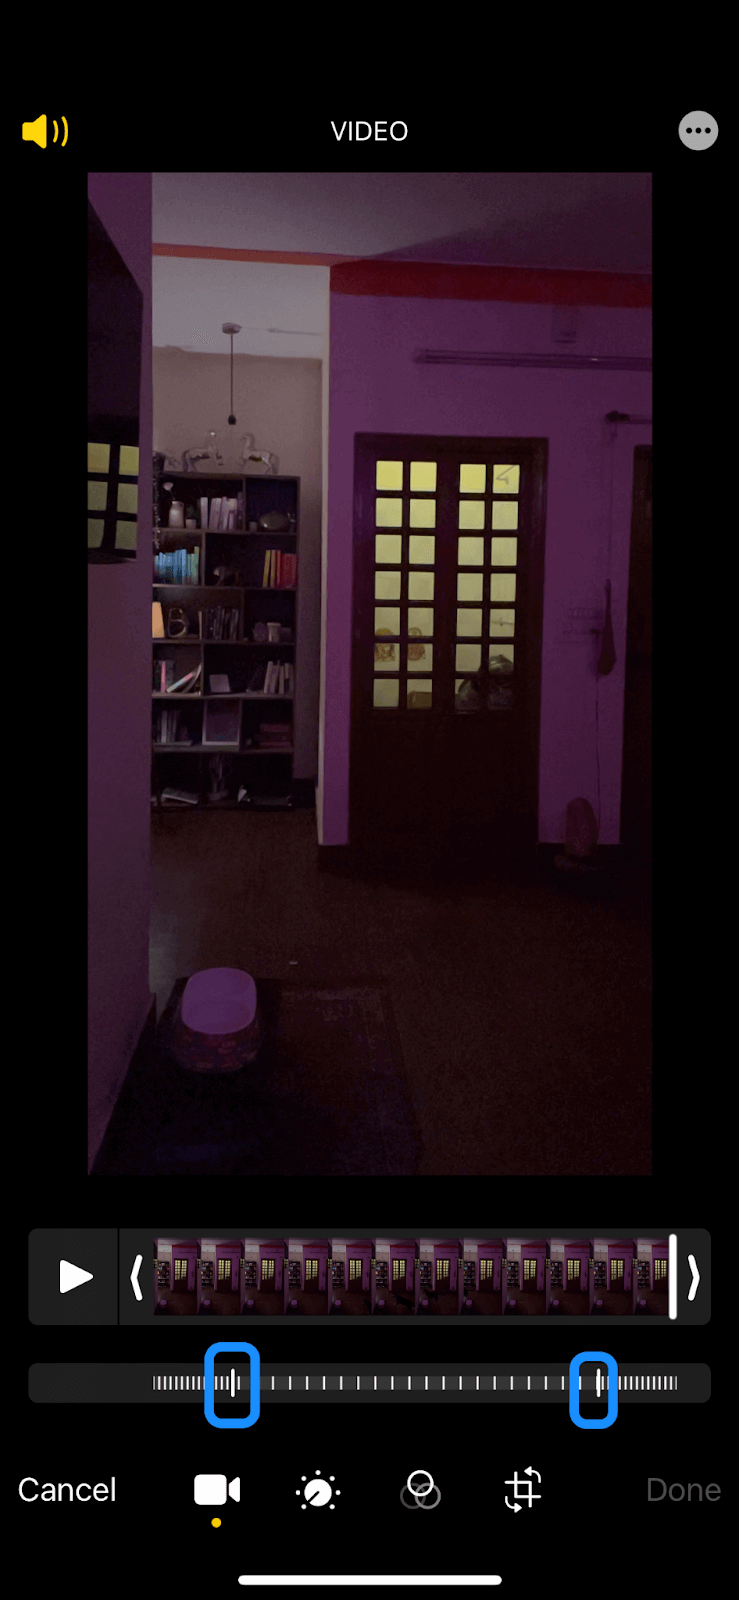
Drag the white vertical bars on the timeline bar to control how much of the video you want to play in slow motion.
 |
Tip: Add fun filters, and transitions, or adjust color settings, such as brightness, exposure, contrast, and more, to enhance your video and level up your storytelling.
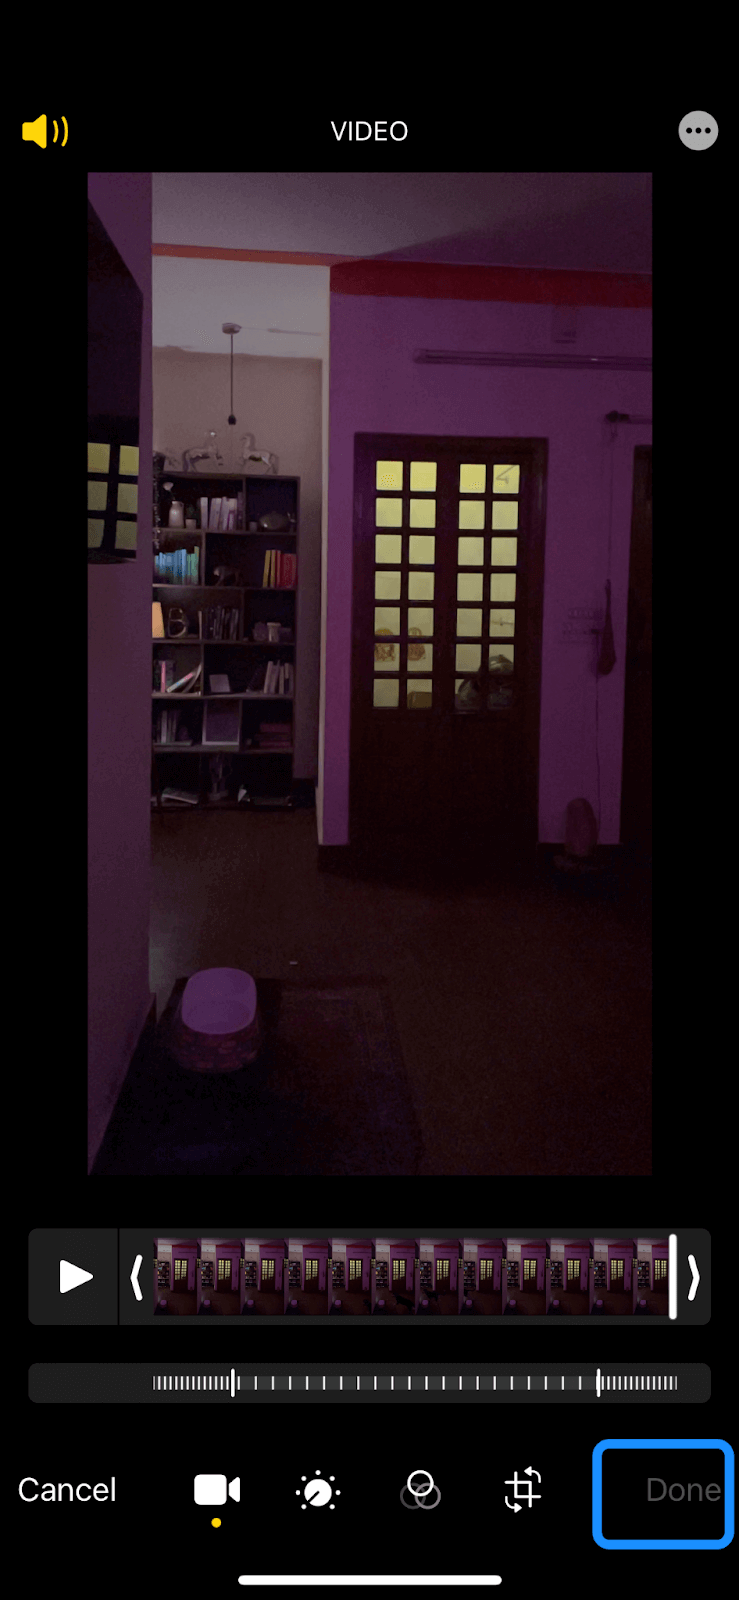
Tap Done.
 |
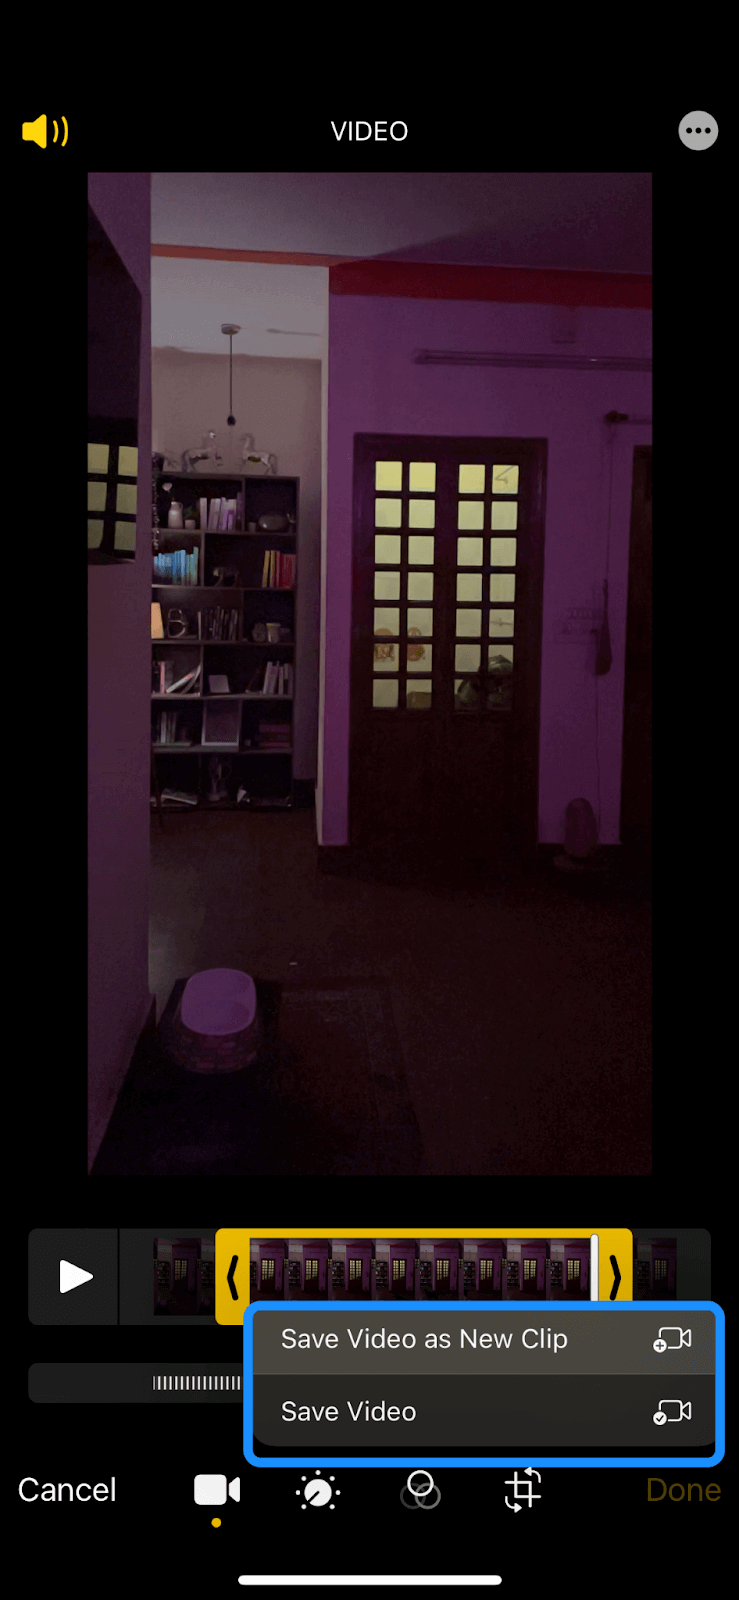
Tap Save Video (to save the edited clip) or Save Video as New Clip (to keep both the original and edited version of your video).
 |
How to turn a video into slow motion on iPhone
We’ve covered how to slow down a video on iPhone. But what if you want to speed ramp a pre-recorded, normal speed video?
You have a few built-in ways to slow down a pre-recorded, normal-speed video. For quick edits, just head to the Photos app, select your video, and tap Edit — you can trim or adjust the slow-motion portion right there. If you want more control, you can use the native iMovie app; it’s still free and easy for basic editing:
Here’s how to use iMovie to convert a video to slow motion:
Tap the iMovie app to launch it.
Can’t find iMovie on your iPhone? Download it for free from the App Store.
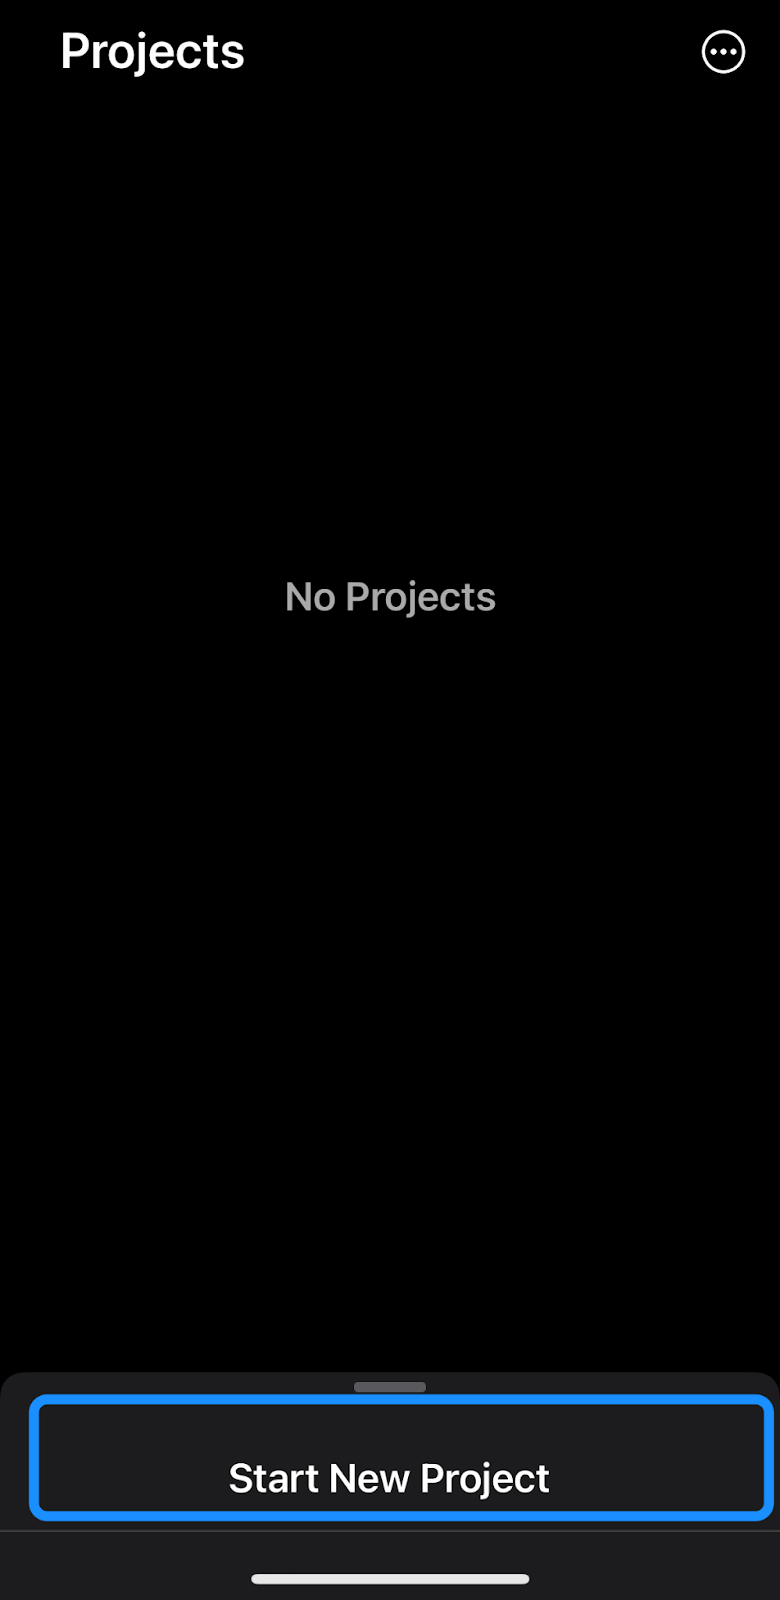
Select Start new project.
 |
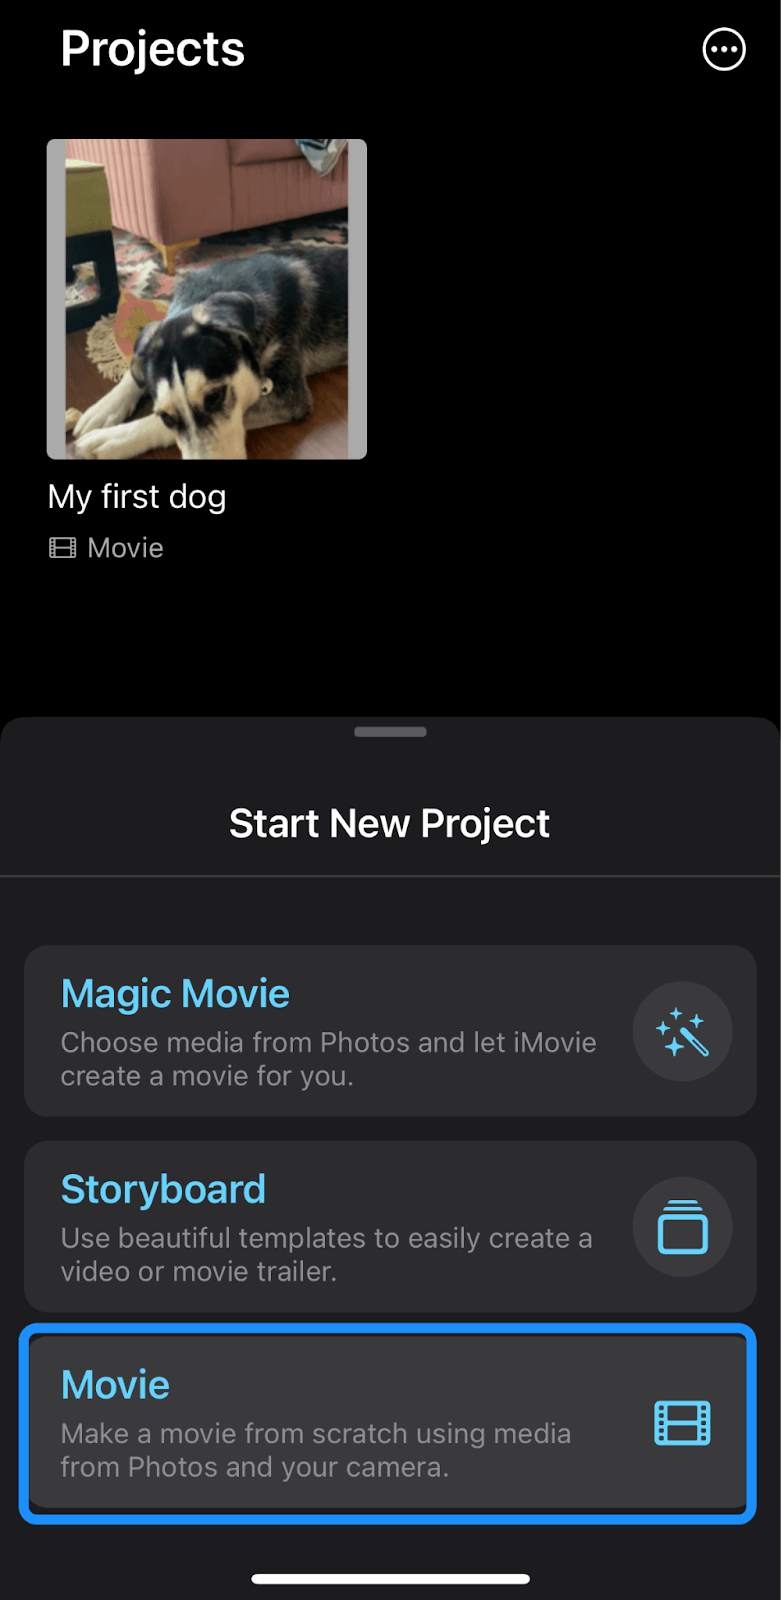
Select the Movie option.
 |
Choose the video you want to convert to a slow motion clip, then tap Create Movie to open it for editing.
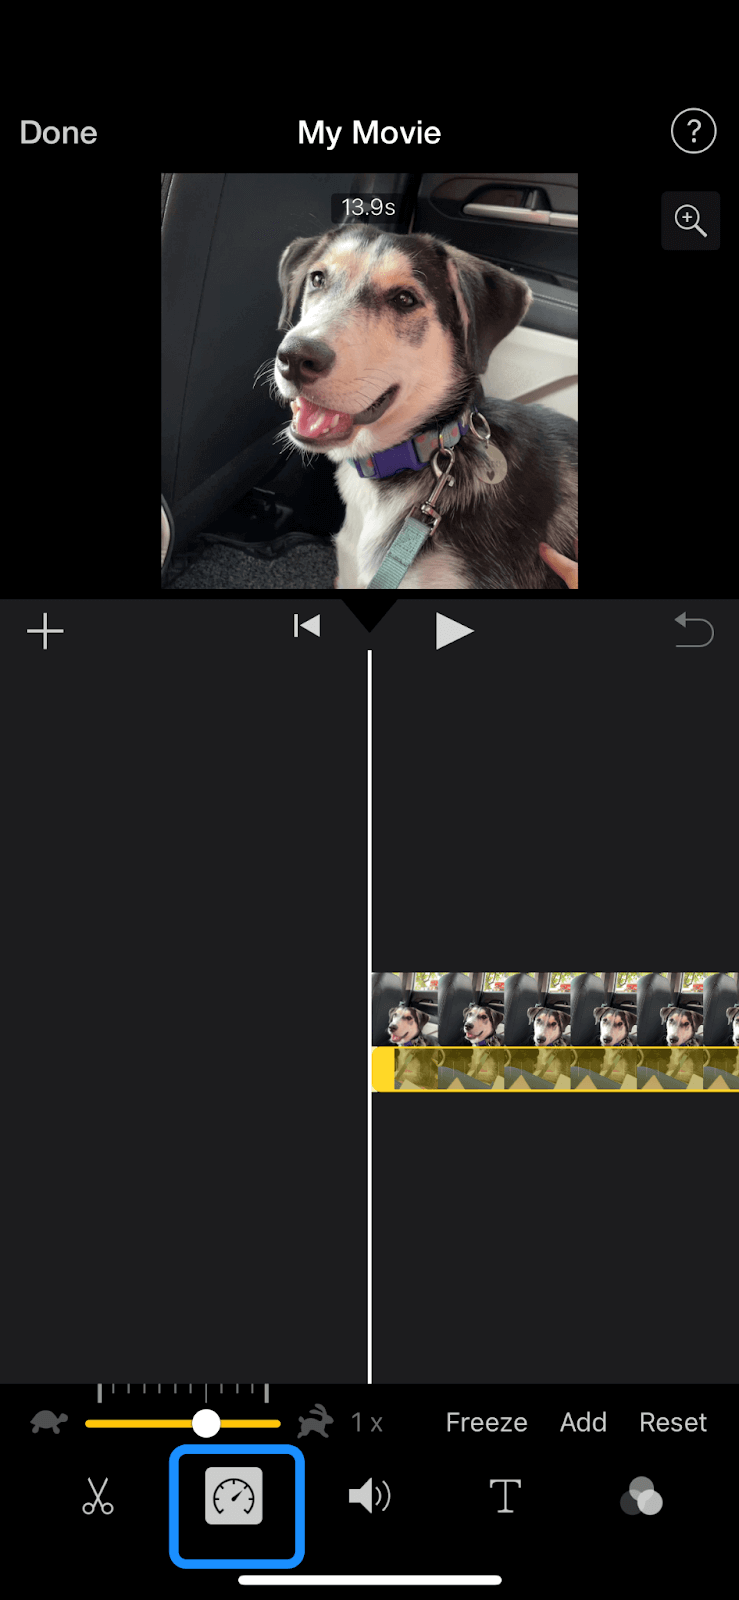
In the video editor, tap the selected clip, then tap the Speedometer icon to access the speed controls.
 |
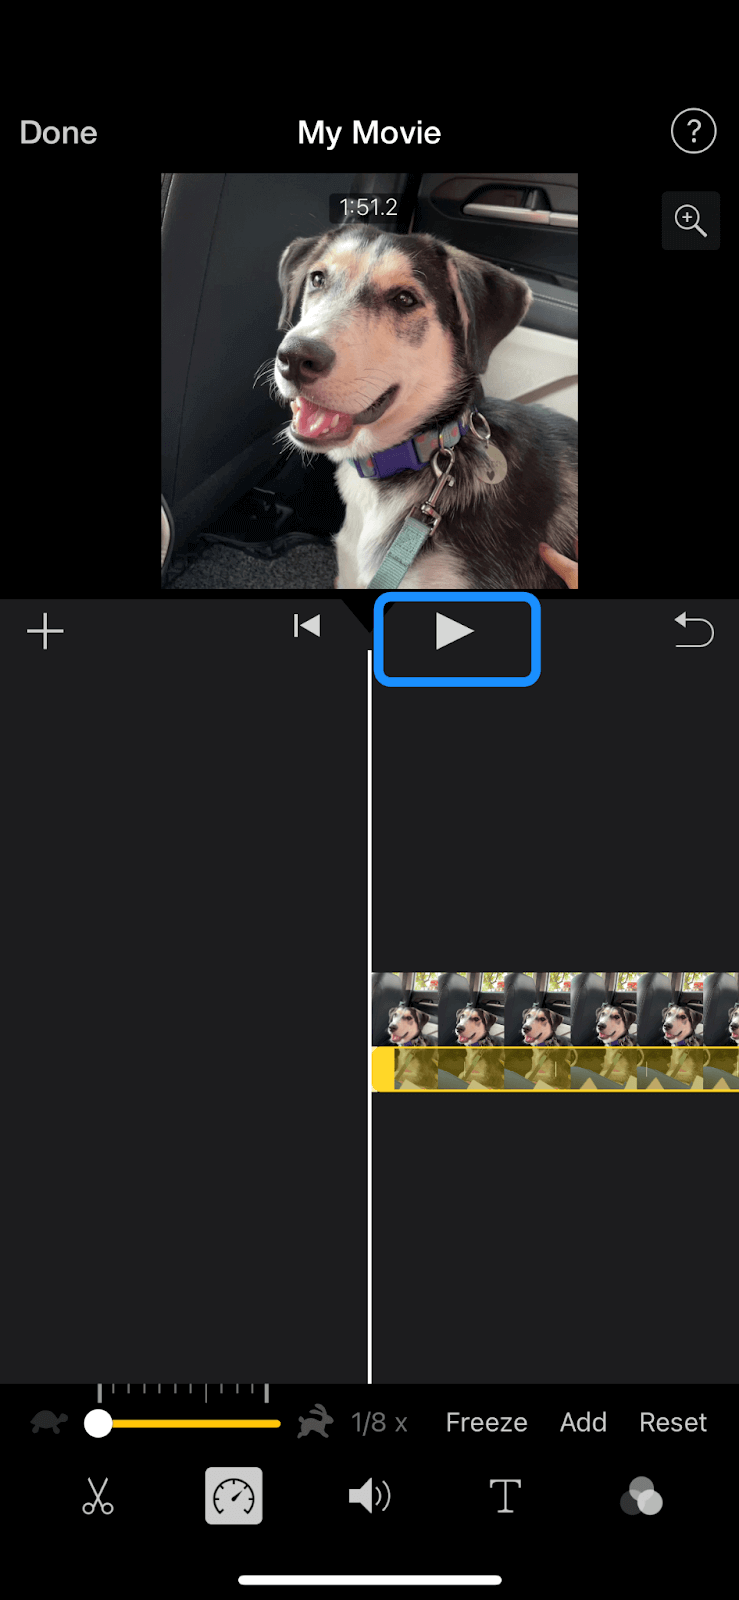
Drag the speed slider to the left to slow the playback speed.
Tap the Play button to preview your video at the new slow speed.
 |
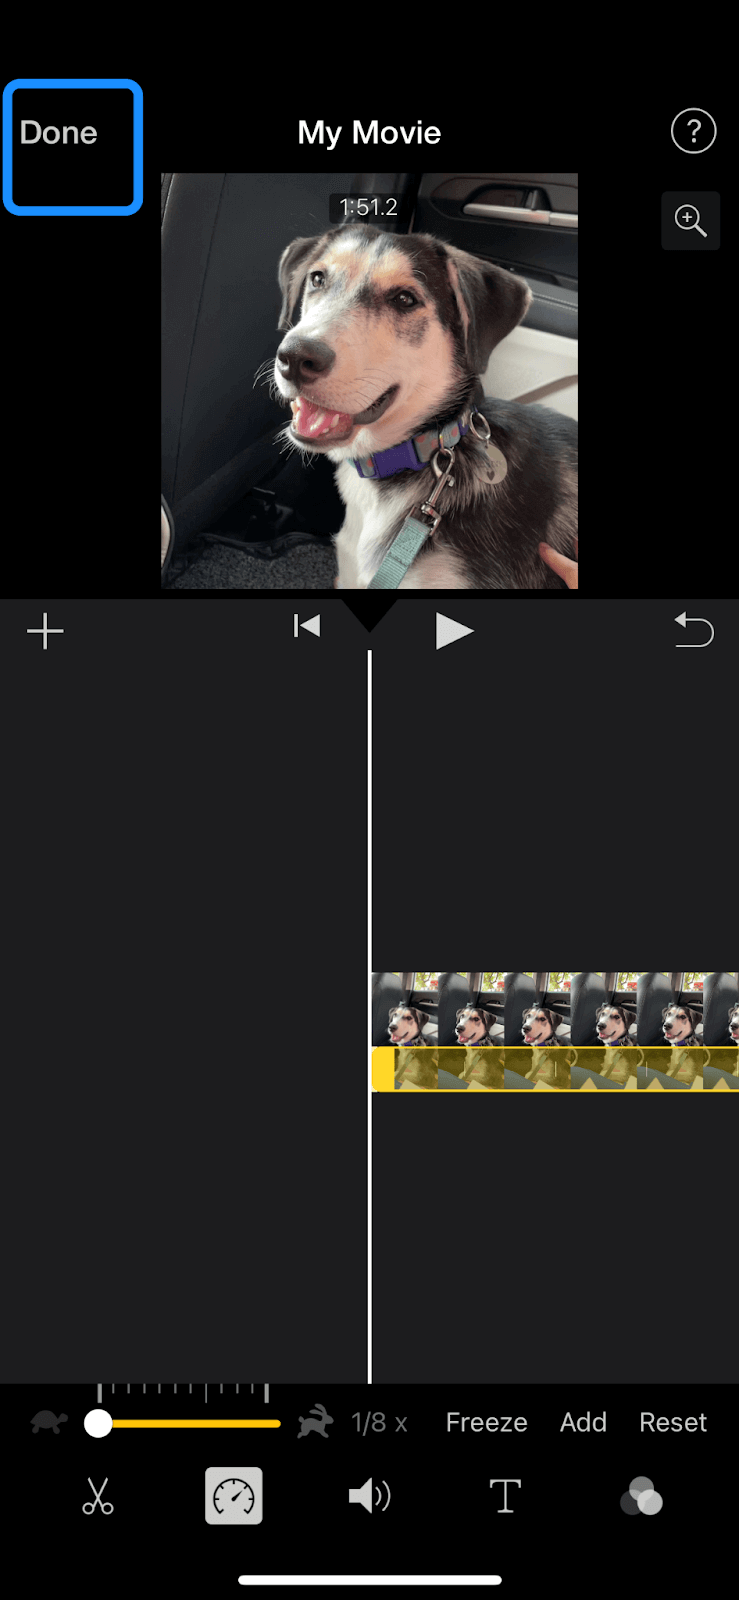
When you’re finished, tap Done. This will save the project in iMovie.
 |
Tap the iPhone Sharing icon.
 |
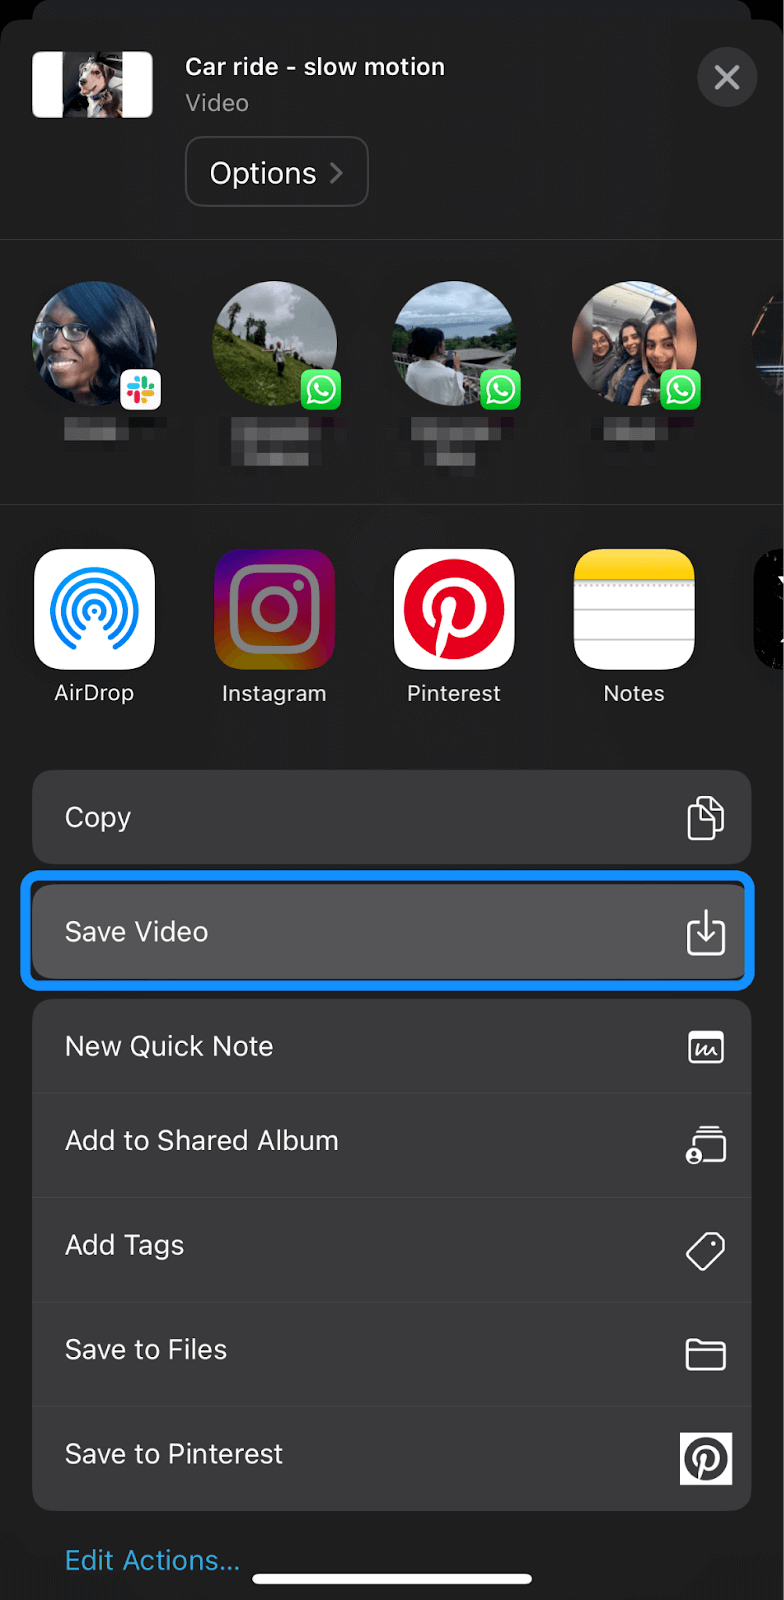
Tap Save Video to auto-save the converted clip to your phone’s Camera Roll or Recents album.
 |
iMovie is good for basic video conversion, but you can’t finesse your video’s settings further so it looks like it was shot at a regular frame rate.
A better approach is to use dedicated video editing apps to slow-mo your videos without compromising quality.
Here are a few useful ones:
1. Descript
Descript is an all-in-one video editor with a user-friendly interface and an excellent video speed tool to change the speed of your video. It offers a web-based solution and desktop app for Mac or Windows. That means you’ll need a computer, but Descript will make it much easier to either convert your iPhone video to slow motion or speed it up to make a time-lapse video.
Once you access your iPhone video from a computer — either via USB cable or through iCloud — you’ll need to upload your video into Descript's video editor. Descript accepts a number of different video file formats, including GIFs, MOV, AVI, MKY, and video files from other platforms like iMovie.
Next, use the Clip Speed tool to slow down your video. The default regular speed will show as 1x but it can go as low as a tenth of the original speed—without changing the actual file size of your video.
When you’re done, export your video or publish it directly to YouTube.
Pros:
- User-friendly and intuitive interface.
- Converts video speed without changing file size.
- Works with a wide range of video file formats.
- Dozens of video editing options.
Cons:
- No mobile app.
- For free users, videos export with a watermark.
- Integrated publishing options are limited to YouTube, Restream, and a few podcast hosting services.
2. Videoshop
Videoshop is a free, easy-to-use video editor app for iOS and Android devices.
You can slow down pre-recorded videos, then trim the clip or adjust color settings, such as brightness, contrast, saturation, and more.
Add filters, transitions, text, animated titles, stickers, music, or sound effects to make your video pop. Then share it directly via email or social media platforms, such as Facebook, Instagram, Snapchat, YouTube, and Vimeo.
Pros:
- Free and easy to use.
- Variety of editing tools and effects.
- Easy sharing to popular social media platforms.
Cons:
- Exports with a watermark.
- Video trimming can be a little confusing.
3. Slow Motion Video FX Editor
With the Slow Motion Video FX Editor app for iOS devices, you can slow down a video from particular frames (up to 12 times slower) or apply stop motion and time lapse effects. Add some background music to your video, then share it with your audience on social apps, such as Facebook, X (formerly Twitter), Instagram, and YouTube.
A free 3-day trial is available to test the app’s features. If you like it, upgrade to a premium subscription for $9.99/month to access premium filters, 170+ background music tracks, and unlimited video edits.
Pros:
- Easy to use.
- High-resolution video output.
- Quick processing time.
- Easy sharing to popular social media platforms.
Cons:
- Limited 3-day trial.
- Expensive.
Adjust your video speed in seconds with Descript
Descript packs everything you need for easy slow-motion edits and more. It’s simple: import your iPhone clip, click a few buttons, and watch your everyday footage morph into an epic bullet-time moment — well, minus the actual bullets. You can slow it down step by step, add captions, layer transitions, or polish the audio so it sounds crisp and studio-quality. So yes, you’ll still need an idea, but making it all come together? That’s the easy part with Descript.
Its video speed tool makes it easy to slow down or speed up videos with just a few clicks. Add some effects and transitions to polish your video, create instant captions, then export it for sharing—all in one place.
Try Descript for free to convert your videos into slow motion and create a perfectly paced video clip.
Frequently asked questions
Why does my iPhone slow-motion video appear choppy in Descript?
Some iPhones record slow-motion in a variable frame rate (VFR), and that can cause stuttering when editing in Descript. To fix this, convert your video to a constant frame rate (CFR) before importing. You can use a free tool like HandBrake to re-encode the file at H.264 CFR, then replace the original file in your Descript project.
Why does my iPhone HDR slow-motion video look washed out after importing to Descript?
Descript tone-maps HDR video to SDR, which can reduce saturation and brightness. If your footage looks muted, try disabling HDR on your iPhone before recording or re-encode the video as non-HDR (H.264). If the washed-out look persists, contact Descript Support for additional help.


.jpg)


