
Whether you’re using your Mac to create a tutorial, whipping up a YouTube video, or livestreaming a video game walkthrough, you may want to record your screen.
A few tools can tackle the job, both paid and free. You can use Mac’s native tool, QuickTime Player, or take advantage of a third-party app with extra features like Descript.
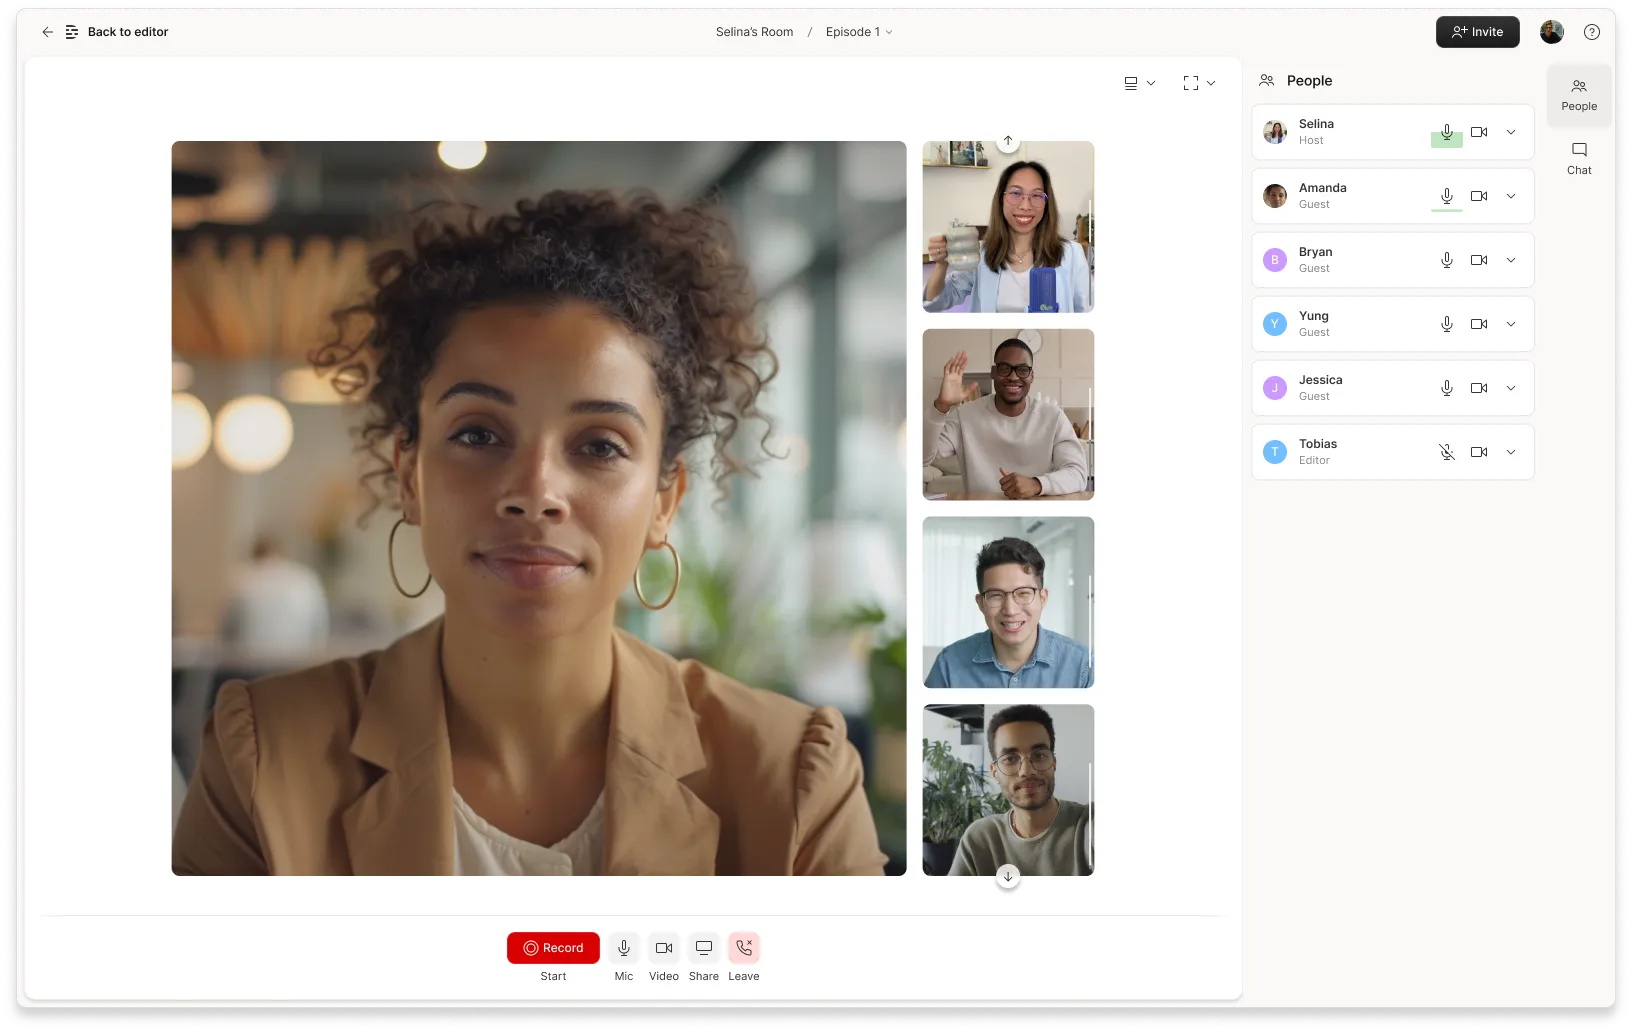
With Descript, you can easily record audio and video on your Mac. Just launch the app, set up a microphone to capture any voiceover, and then save the recording to the cloud. You can edit and manage all the clips within your dashboard and even publish them directly to YouTube.
We’ll show you this process below, starting with the free QuickTime Player app on a Macbook or desktop.
Capture Mac screen with audio using QuickTime Player in 6 easy steps
1. Open QuickTime Player
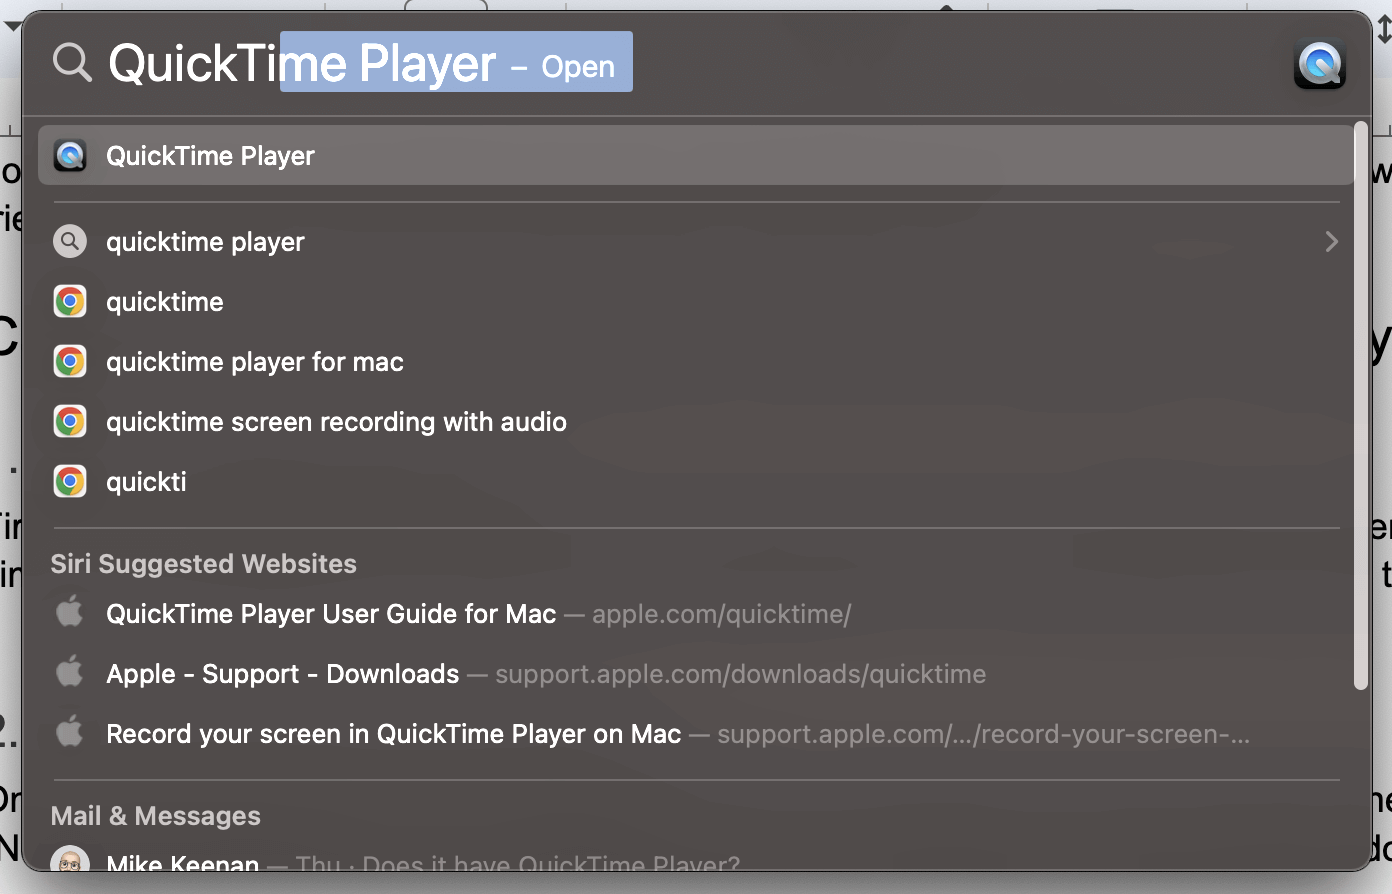
First, locate the QuickTime Player on your Mac. You can find it in the Applications folder in the Finder, or press Command + Shift to open Spotlight and type "QuickTime" to search and open the app.
2. Access New Screen Recording
Once QuickTime Player is open, head to the menu bar at the top. Click "File" and select "New Screen Recording" from the dropdown menu. This will open a new recording window.

3. Select audio source and settings
By default, QuickTime will use your Mac's built-in microphone. If you have an external mic, click the Options button on your screen.

A dropdown menu will appear, letting you choose your preferred audio sources, set a timer, and select a destination to save the recording. You can also decide whether to record your mouse clicks and to show a floating thumbnail of your recording file when you’re finished.
4. Position and frame the shot
Now, before you start recording, check the video preview to ensure everything looks good. You can adjust the capture area to record your entire screen or just a selected portion of it.
- Full screen makes everything on your screen visible. It’s helpful when you’re putting on a demonstration and switching between multiple apps.
- Partial screen lets you choose a specific area or window of your screen to capture. It’s good if you’re focusing on a particular application, or if there are areas of your screen you want to keep private.
5. Start recording
Ready to roll? Press the “Record” button. Remember, everything in your frame is being recorded in real time. Make sure you speak clearly if you're including audio, and keep the environment quiet for a clean recording.
6. Stop and save recording
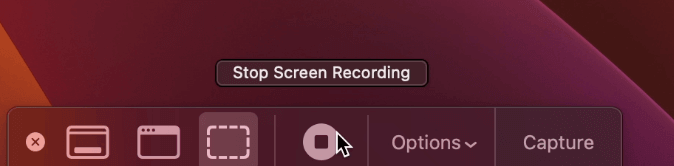
Done recording? Click the Stop Screen Recording button. It lives in your screen's upper right-hand corner or the screenshot toolbar. The video will automatically open up in QuickTime Player.
You can also use the keyboard shortcut Control + Command + Esc to stop the recording immediately.
To save your video, head to "File" in the menu bar and select "Save." Choose your desired location, name your video, and click "Save."
Voilà! Your video is now saved and ready for viewing or editing.
How to record video and audio on Mac with Descript
If you want more control over the final product, Descript is a great option for screen recording: it will let you record your screen while simultaneously recording yourself on audio and video as you narrate your actions.
1. Create a new project
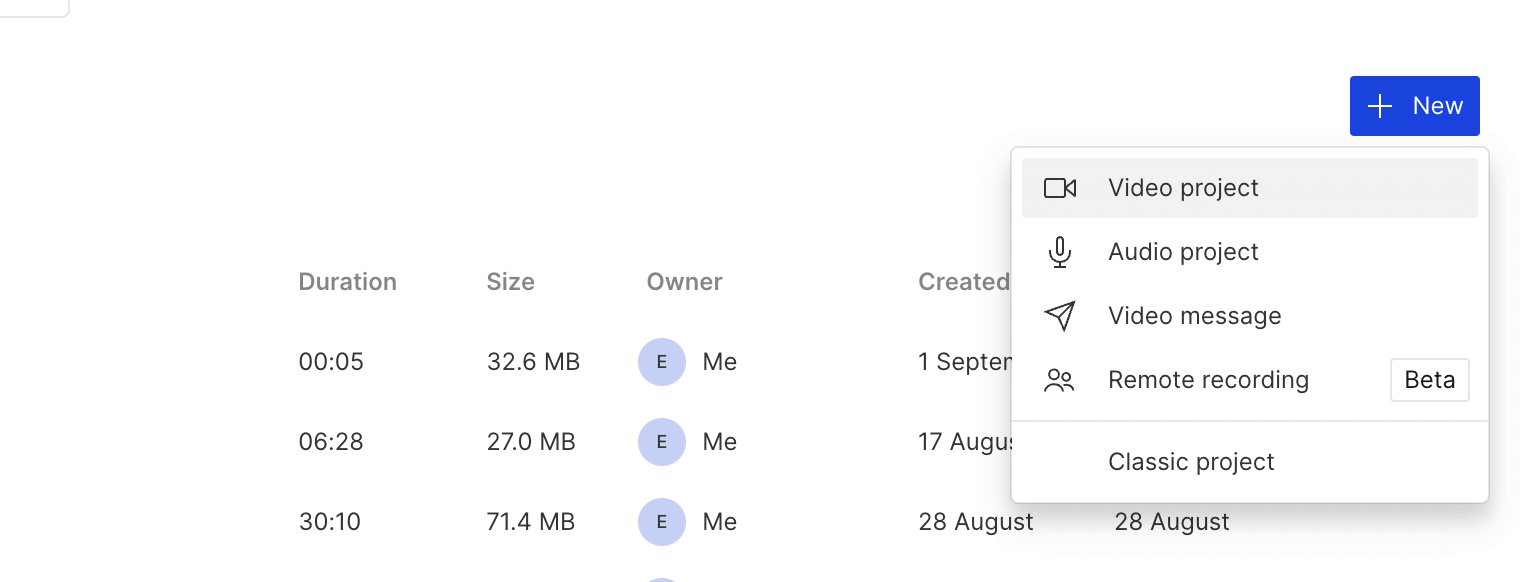
Your first step here is to launch the Descript app. Head to the blue “+ New” button and click “Video project.”
2. Select recording
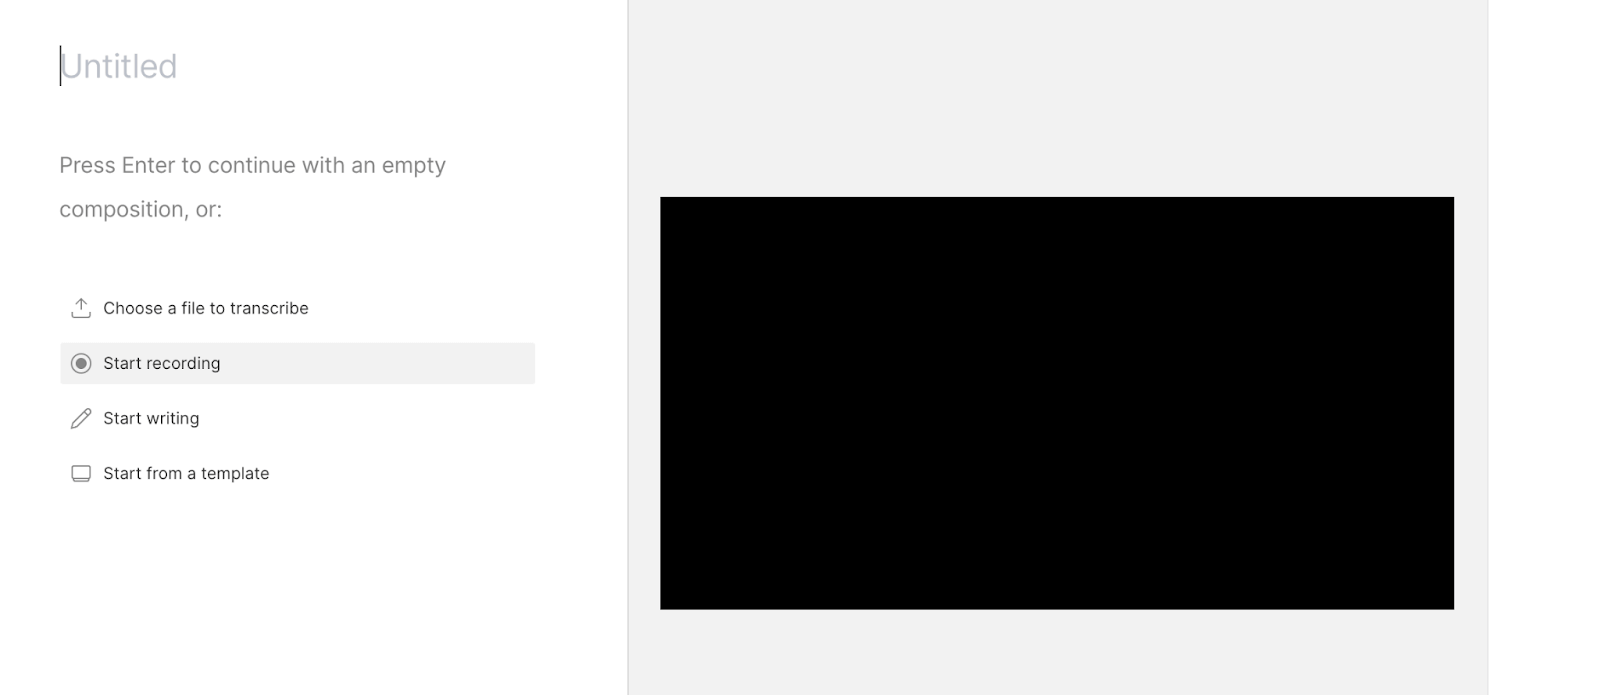
Once your project is open, find the “Start recording” option in the app interface and click on it.
3. Configure recording settings
Next, a window will appear with a few recording options. Select “Screen”.
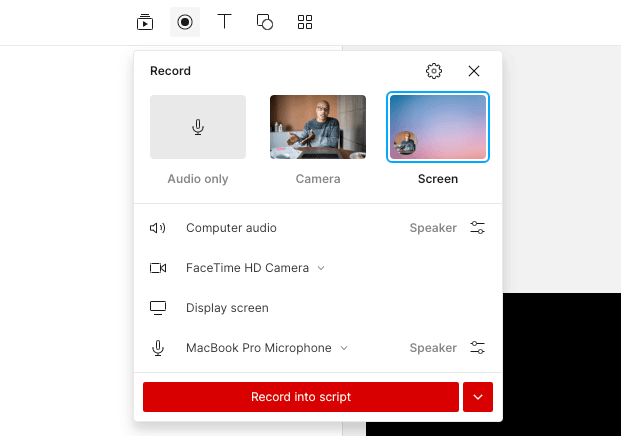
Then click the settings gear to make adjustments to your recording settings. You can change the following settings:
- Transcription language. Choose from one of 23 transcription languages for your recording.
- Countdown. Turn on a timer and give yourself a three-second delay before the recording starts.
- Highlight mouse click when recording. Add a circle around your cursor whenever you click during a recording.
- Show region recording confirmation. Adjust the region of your screen to record before you start.
- Minimize recording dock. This disables the floating dock during your recording.
- Video resolution. Choose between 480p, 720p, 1080p, 1440p, and 4K (beta) recordings.
4. Choose your audio and video inputs
Set up your audio and video inputs. You can record computer audio, microphone, and camera.
The camera preview won't appear if you're recording a screen and a camera simultaneously on macOS version 12.3 or earlier. Once you finish recording, you'll see the camera recording in the editor.
Lastly, click “Settings” and choose if you want to add Studio Sound, transcribe, or record separate audio tracks.
5. Start and stop recording
Click the Record button across the bottom of the panel to start recording. Then, click and drag over the part of the screen you want to record.
Start recording your screen by clicking Start Recording. You can also record your whole screen with audio by pressing the space bar.
When you’re finished, click the Stop recording icon to end the recording.
6. Edit, enhance, and export
A new clip will automatically appear in your project when you finish recording. Trim, cut, or enhance your video and audio using Descript's intuitive editing interface. You can refine your content by adding captions, animations, transitions, or effects.
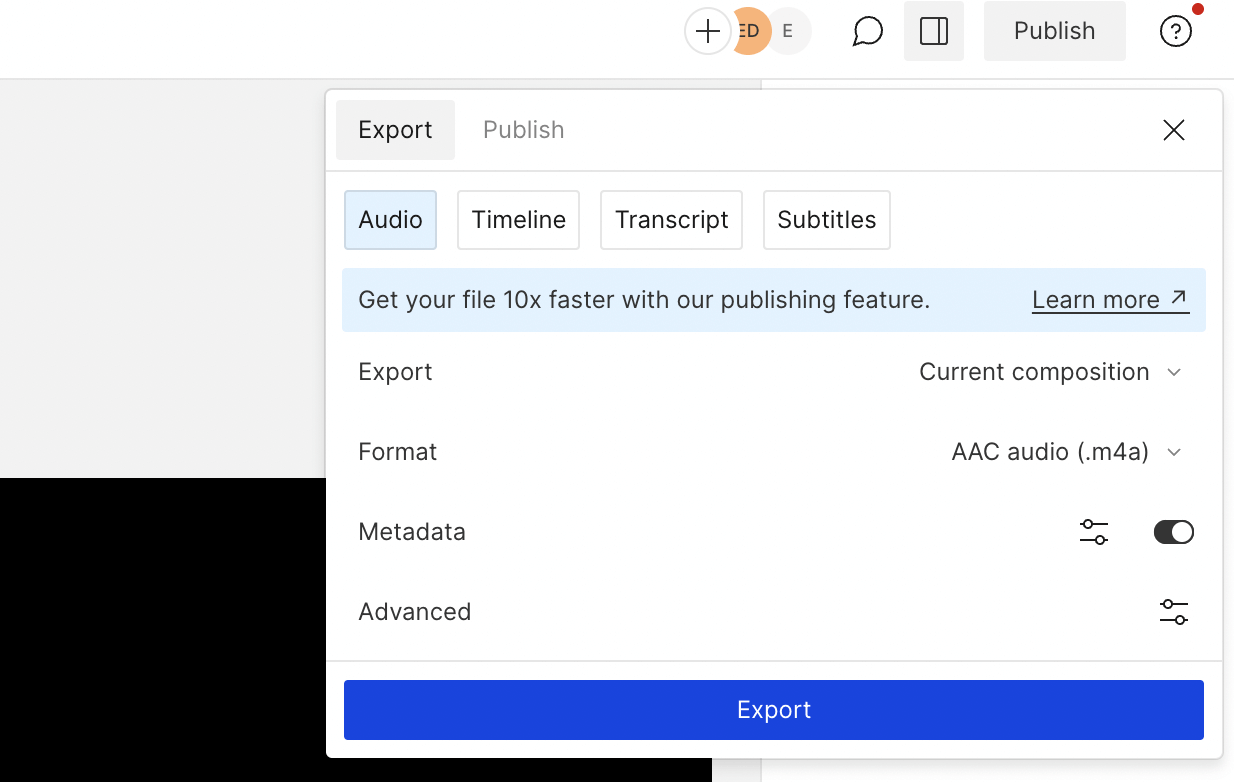
Once you're happy, click "File" and select "Export" to save your video or audio in the desired format and resolution.
Learn: How to screen record on iPad in 6 steps: A 2023 guide
Screen recorder best practices
Select appropriate audio sources
Every screen recording tool captures audio alongside the visual display. An audio source could be anything from system audio, a microphone input, or even external devices. A good audio source guarantees your viewers will hear exactly what you want them to, without any unwanted background noise.
Say you’re narrating over a software tutorial and giving step-by-step instructions. In this case, you would choose a microphone as your primary audio source to clearly capture your voice.
💡TIP: Always do a brief test recording. Play it back to ensure you've selected the correct source and the audio quality is good. If using a microphone, record in a quiet environment. Use headphones to prevent feedback loops if recording both system sound and mic input.
Optimize your workspace
Organize your physical and digital work area to minimize distractions. The five cups of stale coffee on your desk? Gotta go. That screen full of apps (including the email app with 35,000 notifications)? They gotta go too.
Imagine your desktop is cluttered with unrelated files, apps, and notifications. Midway through the presentation, you get a personal message that your audience sees. This diverts attention from the main content and looks unprofessional.
Do the following to optimize your workspace:
- List of the tools, apps, or files you'll need. Keep only those open and close or hide everything else.
- Organize files into folders. Use a neutral or professional wallpaper if your desktop will be visible.
- Turn off or mute notifications from email, messaging apps, and other software.
- Ensure your screen resolution and lighting (if you’re recording via webcam) are set appropriately.
Prepare script or outline
An outline guarantees you cover all the essential points and that your recording flows nicely. Which of these scenarios would you rather be in?
- You don't have a script or outline when you start recording. As you deliver your presentation or tutorial, you forget a step. Now you’re backtracking and giving information in a jumbled mess. As a result, you start sweating and tripping over your words. The result is a confusing and lengthy video that’s hard to follow.
- You draft an outline before recording. You cover each step and critical point. You have a good idea of what (and how) you’ll say it. Your tutorial is smooth, concise, clear, and everyone loves you because they understand what you’re talking about. People invite you to cool parties.
Arrange your points in a logical order so the progression makes sense for viewers. For more detailed scripts, expand on each point and write down exactly what you’ll say or the actions you’ll take during that segment of the recording.
Note specific things like zooming in, highlighting, or clicking to remind yourself when and where to execute them.
💡TIP: Before recording, read through your script or outline several times. If possible, do a mock recording or run-through to get comfortable with the flow.
Minimize background noise
When recording video on your computer, you don't want other sounds messing up your main audio. This is called background noise. If there’s too much of it, people can get distracted and not understand what you're saying.
Record where there's little noise, like a room away from the street or busy areas. A good microphone also helps your voice sound clear and blocks out other noises. Fortunately, the world won’t come to an end if a little background noise sneaks into your recording. You can always edit it in post-production with Studio Sound.
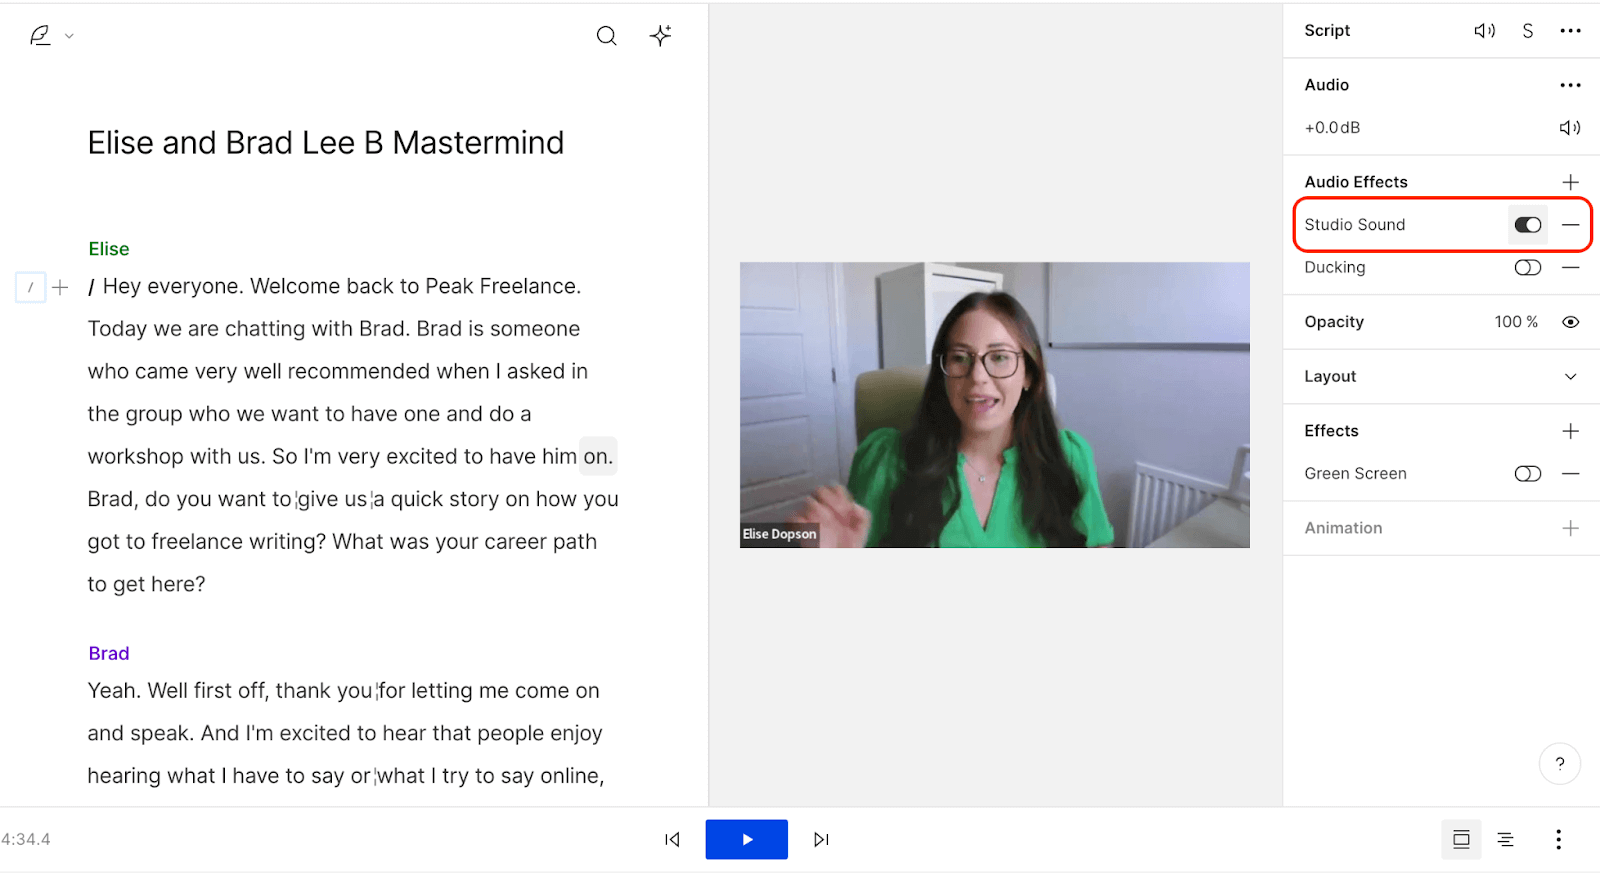
Studio Sound makes you sound like you’ve recorded in a professional studio, even if you didn’t. With higher quality audio, your videos will sound way better, and people will actually enjoy listening to your stuff. You can cut and edit videos in Descript after recording, then post them to social media to spread the word about your new video.
Manage your timing
Timing refers to the rhythm and speed at which you present information. Too fast and viewers might miss your key points. Too slow and they might get bored or find the material basic. The right pace lets people absorb and process what you’re saying.
Speak slowly and clearly, especially when discussing a complex topic. Pause between topics or steps and allow viewers to take it all in. You can use diagrams and charts to convey complex information quickly. But you'll want to make sure you're consistent throughout the videos. Sudden and frequent changes in rhythm can be jarring.
If, upon review, you find that some sections of your screen recording are too slow or too fast, use editing software to make adjustments. This could mean cutting out unnecessary parts or adding pauses and explanatory text.
Read: The 7 best video recording software picks for your project
Descript: more than a Mac screen recording tool
Overall, Descript has become industry-standard video and audio editing software, thanks to its text-based editing interface, unmatched transcription and effects, and collaborative content creation and editing workflows. The app makes it easy to edit and even publish video content, with added sound improvement tools like Studio Sound and Overdub, integrations with SquadCast, and many other features.
Thousands of video creators already rely on Descript for screen capture and video editing. If you’re ready to join them, take a tour of Descript today.
FAQs
How do I record a video of myself on my Mac?
On a Mac, you can use the built-in "Photo Booth" application to record a video of yourself. Alternatively, for screen and camera recordings, you can utilize "QuickTime Player" by selecting "File" > "New Movie Recording".
What’s the best format for exporting my screen recording videos?
If you're looking for a good balance between quality and size, H.264 encoded MP4 is widely accepted and compatible with most devices. WMV and AVI are two other good formats for exporting screen recording videos.
How can I prevent lag or choppiness in my screen recordings?
Make sure you don't run too many applications during recording. If you’re streaming, use a wired internet connection and adjust the recording software settings to match your computer's capabilities. Consider upgrading hardware components like RAM and GPU to prevent lag and choppiness.


%20(1).JPG)