Screen recording with audio is becoming an increasingly popular way to communicate online.
Whether you need to demonstrate an assignment for a student, show a new hire the ropes, or give customers a tour of your software, it’s always better to show, not tell — and screen recording will let you do just that.
Regardless of what you’re recording, you need to find a screen recorder that allows you to capture audio alongside video. In this guide, you’ll find step-by-step tutorials on how to do it with whatever device you’re using.
How to screen record on Mac with audio
- Open QuickTime Player
- Access the screen recording feature
- Choose an audio source
- Select a recording area
- Start and stop recording
1. Open QuickTime Player
QuickTime Player is the built-in video feature that allows you to open videos, make light edits, and record your screen on a device using the MacOS. Find and open this tool by heading to your Mac’s Launchpad.
2. Access the screen recording feature
Next, open the QuickTime Player, hit File, and select New Screen Recording. You can also use the following keyboard shortcut to start a new screen recording on Mac: ^⌘N.

3. Select recording area
A gray shaded area will appear once you start a new screen recording on Mac. Decide which parts of your screen you want to record and use the edges of the shaded section to crop your screen as desired.
4. Choose an audio source
Record computer audio alongside your Mac screen recording by pressing the Options tab. You’ll see the Microphone section, where you can toggle from no microphone to your Mac’s built-in mic or third-party setup.
5. Start and stop recording
Once you’ve selected the right microphone to record audio and your screen, hit the Record button. Interact with your computer the way you’d like, narrating your process while the recording is in progress.
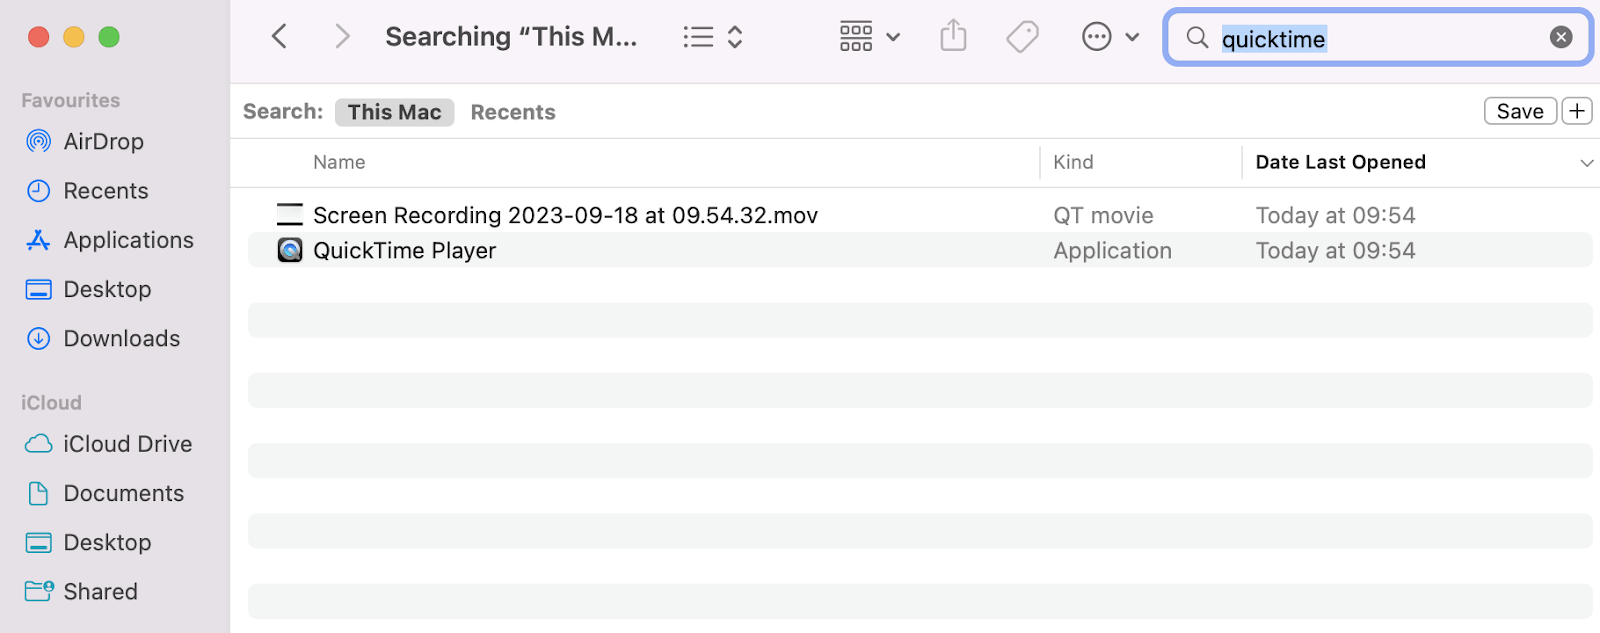
When you’ve finished recording, hit the stop button in your Mac’s menu bar. The screen recording will open in QuickTime player. You will also find the .MOV file in Finder.
How to screen record on Windows with audio
- Open the application or content you want to record
- Activate the Xbox Game Bar
- Enable microphone audio
- Start and stop screen recording
1. Open the application or content you want to record
To start recording your screen on a Windows device, first open the application you want to record (such as a Chrome or Edge browser tab).
2. Activate the Xbox Game Bar
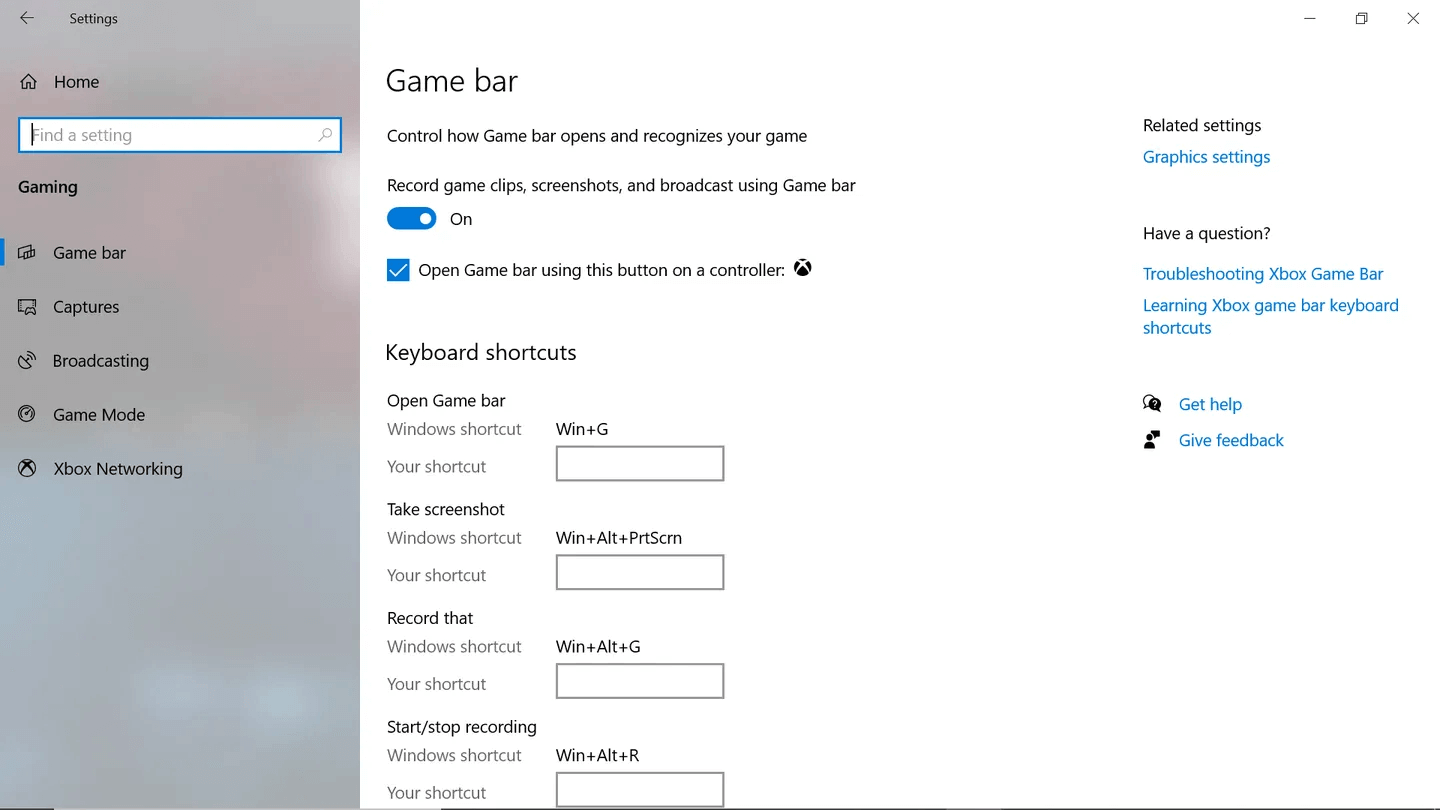
The Xbox Game Bar is an app that allows you to capture the screen on a Windows device. Download the app from the Microsoft Store, then open your computer’s settings menu and find Gaming. Head to Xbox Game Bar and toggle the button to On.
3. Enable microphone audio
Next, you’ll need to give Xbox Game Bar permission to record your system audio. While you’re still inside the Settings tab, find the Captures section. You can set the video quality, frame rate, and recording length. There’s also the option to customize where your screen and audio recording file is saved.
4. Start and stop recording
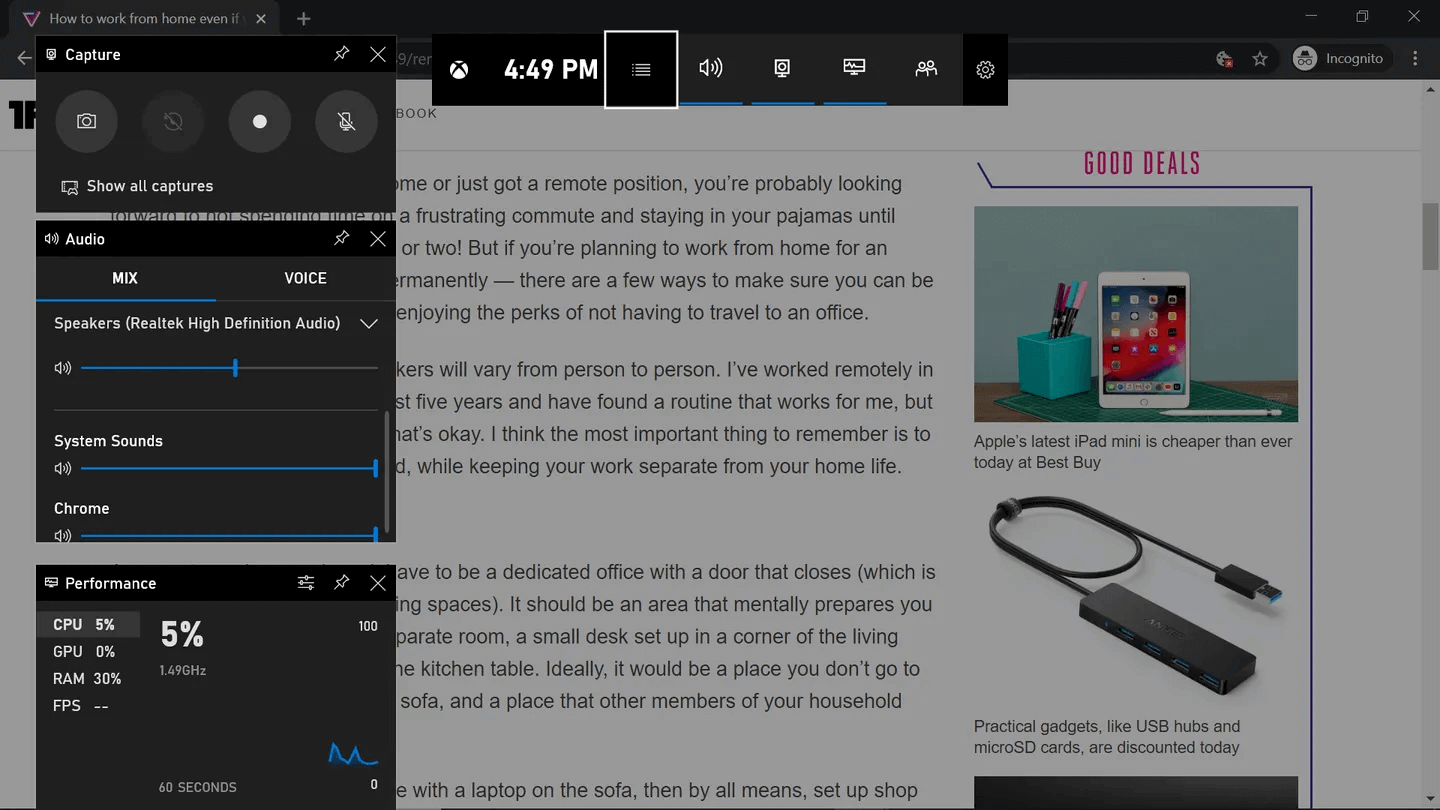
Start recording your Windows computer screen by pressing Windows + G. This will bring up a recording panel where you can start a new recording. Because you’ve already allowed the app to access your Windows microphone, you can hit the microphone button to record your screen with sound.
How to screen record on iPhone with audio
- Enable screen recording in the Control Center
- Open your Control Center
- Turn on microphone access
- Start and stop recording
1. Enable screen recording in the Control Center
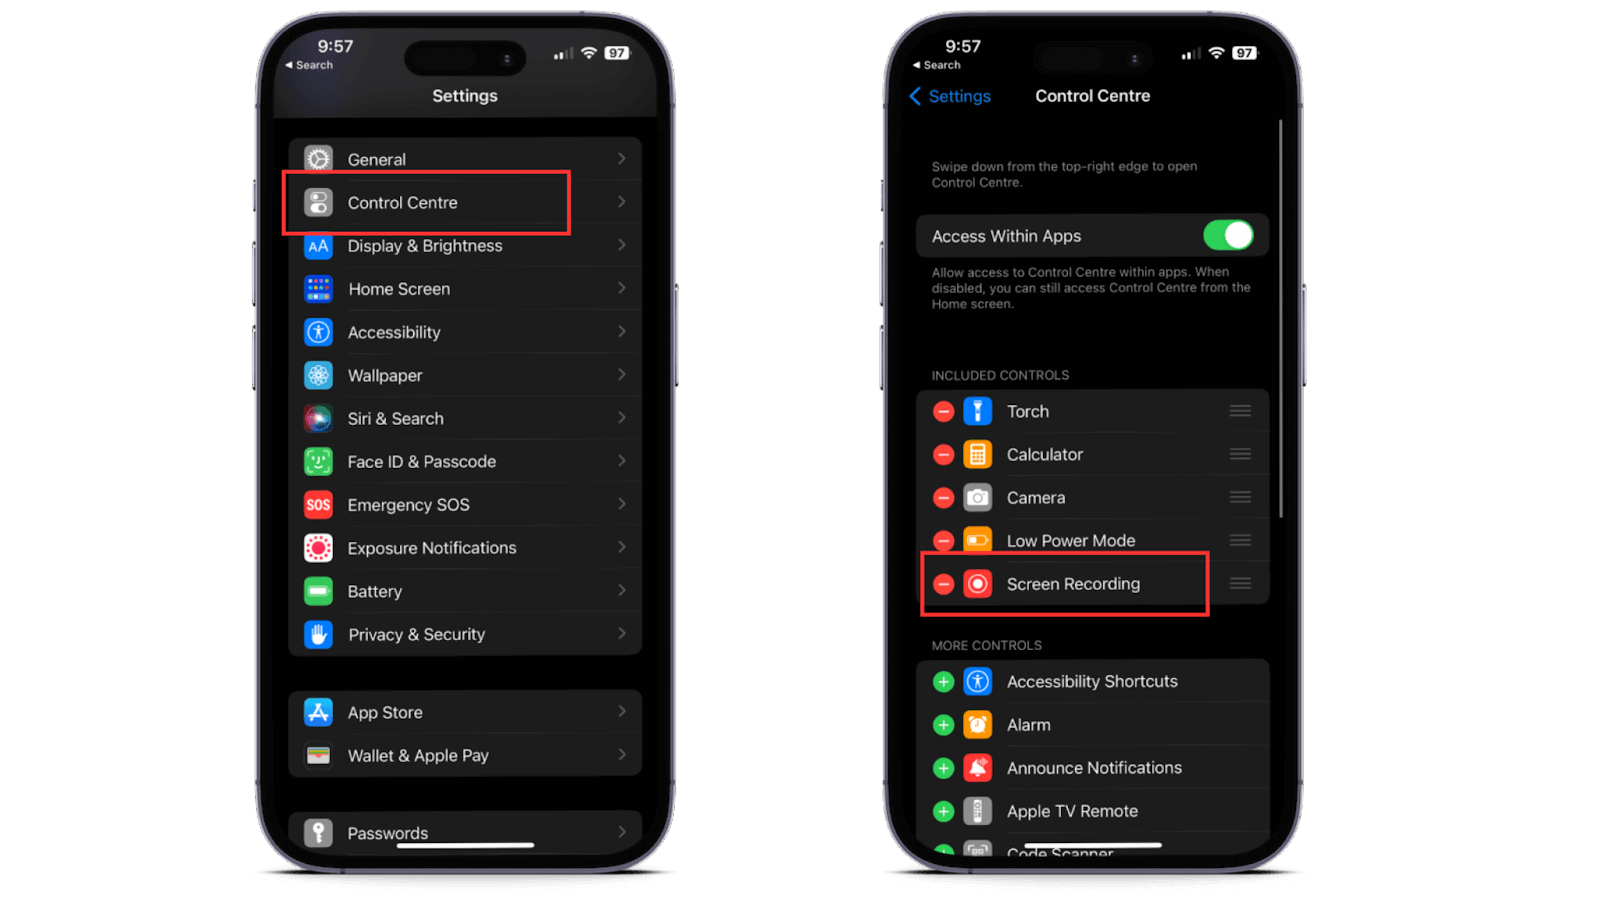
The first step to recording your Apple iPhone screen is to enable the feature in your device’s Control Center. To do this, head to Settings and choose Control Center. Find the screen recording feature and use the three lines to drag it up into the Included Controls section.
2. Open your Control Center
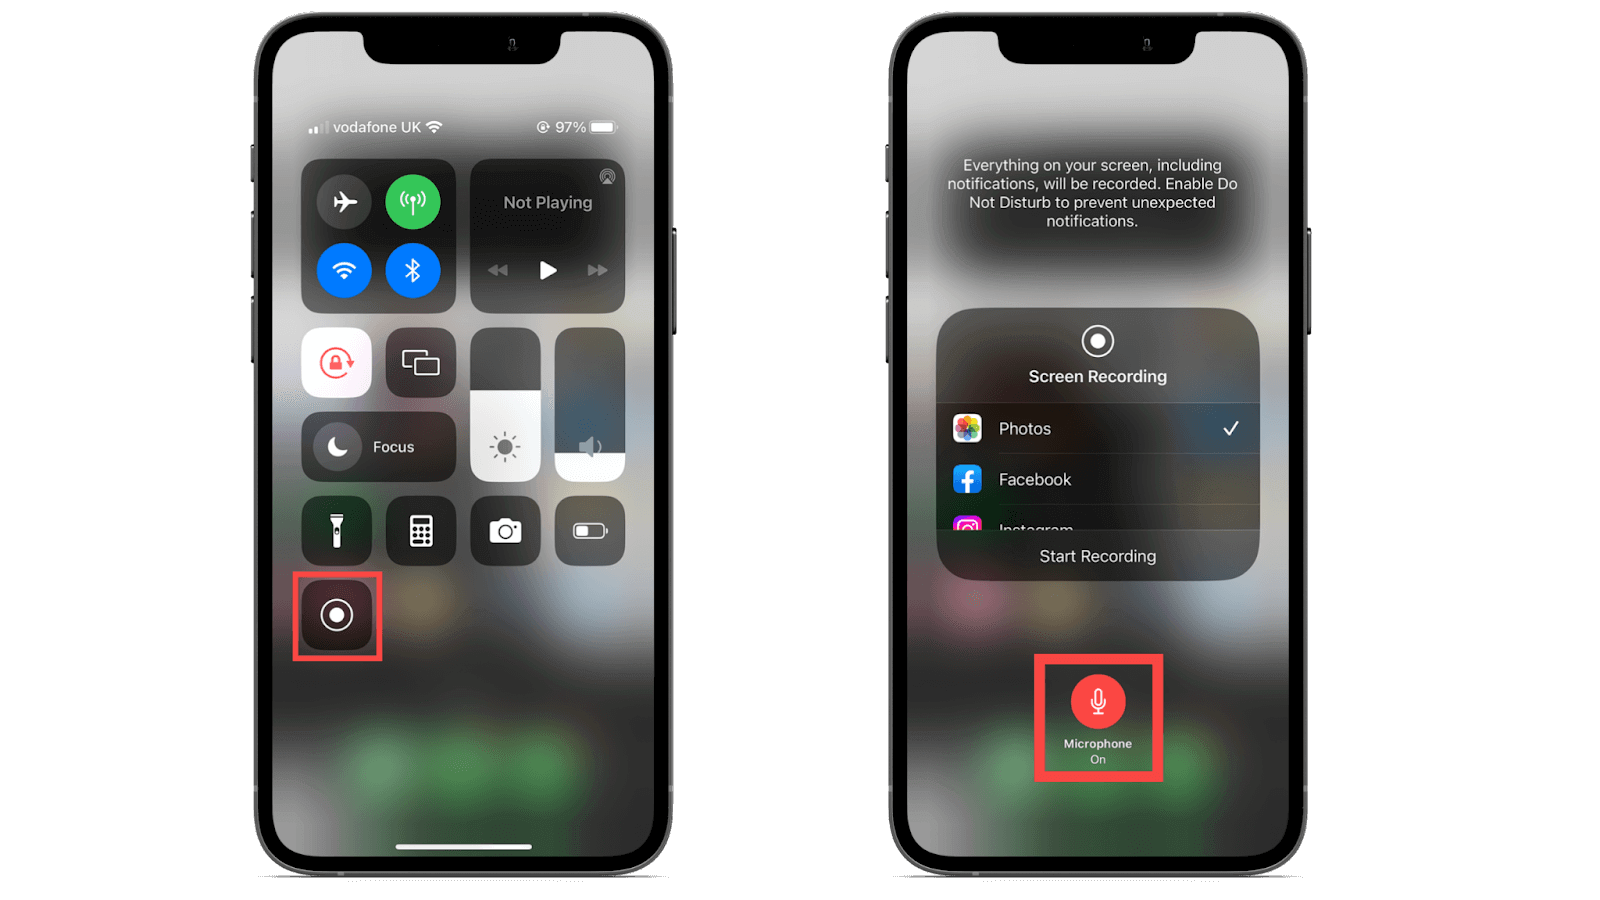
Next, open your iPhone Control Center by dragging down from the top middle of your device’s screen. Find the iPhone screen recording button—a small circle icon.
3. Turn on microphone access
Long-press the icon to start a new screen recording. A new tab will display new recording options, like the choice to set certain apps to Do Not Disturb throughout the recording. You’ll also see a button to turn on microphone access and record system sound alongside your screen.
4. Start and stop recording
Once your microphone is enabled, start a new iPhone screen recording with audio. You’ll get a three-second countdown before the recording begins.
The clock on your device will have a red background to indicate that a recording is in progress. Click this area to stop recording. The video file will automatically save to your iPhone photo library.
Note for Android users: Unfortunately, there’s no native way to record both your screen and your microphone at the same time. To achieve this, you’ll either need to record your Android screen and record your voice using a separate device, or download a third-party app.
Picking a screen recorder that captures sound: steps to follow
While it’s convenient to use the built-in screen recorder on your device, these apps are pretty limited. If you want more options—like the ability to record your face while you record your screen—you’ll want to use something with more features. Here’s what to think about:
1. Identify your needs and goals
The first step in choosing an audio and screen recorder is to consider the features you need. Aside from the ability to capture sound, think about:
- The length of your videos. Some screen recording software has limitations on how long your video can be, especially if you’re using a free version. Check that apps on your shortlist won’t cut you off midway through your video.
- The screen you’ll be recording. If you’re recording your screen with audio on a smartphone, check the app you’re thinking of investing in works on mobile devices.
- How you’ll edit and share your screen recording. What happens if you make a mistake in your video? Platforms like Descript have video editing features that allow you to clean up any mistakes—either in the audio or screen recording—before sharing it.
2. Research available screen recorders
Once you’ve shortlisted the features you need from a screen recorder, it’s time to find one that meets your criteria.
Popular screen recorders include:
- Loom for Mac and Windows
- CleanShot X for Mac
- Descript for Mac and Windows
Descript is the best option if you need to edit your videos before sharing them with your intended audience. You can record your screen on Mac or Windows, then instantly edit the file in the video editing dashboard.
3. Compare features and user-friendliness
There’s more to choosing a free screen recorder than checking whether it records audio and is compatible with your device.
Get the most bang for your buck by choosing a screen recording audio tool that allows you to:
- Fix audio mistakes with an AI clone of your voice
- Trim and cut segments of your video
- Add subtitles to your screen recording to help those who don’t have audio turned on
- Get links to easily share your screen recordings
- Remove filler words like “uh” and “um”
4. Do a test run
The last thing you want is to run into a glitch when your project is on the line. It’s better to try out your new app with a lower-stakes recording first.
Check you’ve chosen the right screen recorder with audio by doing a test run. Go through the entire video production process and take stock of any challenges you run into. For example:
- Is there a brand watermark over your video?
- Can you record different apps, browser tabs, or the entire screen?
- Is your cursor visible in the screen recording?
- Can you use webcam recording to film yourself talking over your screen? If so, is the video quality up to scratch?
- Is the audio quality bad when you replay the video?
- Can you edit the video in the same tool or do you need another app?
Some platforms have advanced features to address common challenges. Descript users, for example, can use the Studio Sound feature to turn average audio into professional grade sound without having to invest hundreds into a new microphone.
The advantages of choosing Descript as screen recorder
There are hundreds of screen recorders on the market, but not all have the features you need to create high-quality videos with incredible sound.
People who already use Descript’s online screen recorder benefit from:
- Professional editing tools that allow you to edit videos from text
- Exporting options to share your videos in high-quality resolution
- Overdub, which creates an AI clone of your voice to fix voiceover mistakes
- Ability to zoom into parts of a full screen to show elements in greater detail
- Filler word removal to remove awkward pauses like “umm” and “ahh”
Start creating videos with the best screen recorder for Mac and Windows. Take a tour and see why.
FAQs
How do I record my screen with sound?
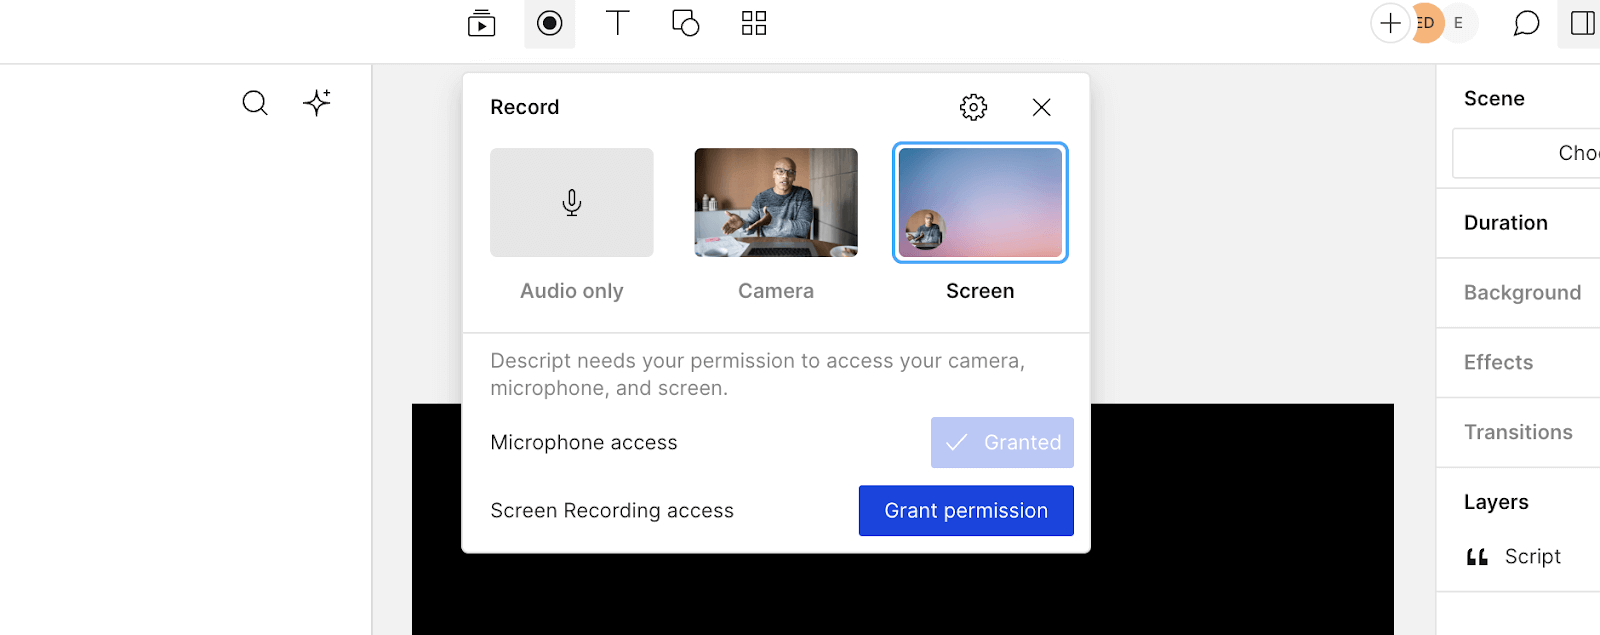
To start recording your screen with sound, choose a tool like Descript. Open the desktop app, create a new project, and start recording your screen. The video (and audio) will automatically appear in your video editor.
How do I record my iPhone screen with sound?
Head to your iPhone settings and find the Control Center. Press the record button and tap the microphone icon to turn on screen capture with audio recording functionality.
How do I record my screen with audio on my laptop?
Download the Descript app and create a new project. Press “Screen recording” and open the tab you want to record, and choose your microphone source (such as your laptop’s built-in mic).
Is there a screen recorder that records audio?
Descript’s screen recorder allows you to record video and audio on your laptop or desktop. iPhones have this feature available in the device’s Control Center.