April 27, 2022

How to set up the ultimate podcast studio

Setting up a home recording studio will help you take a big step forward in improving the quality of your podcast. It’s easier than you’d think, just follow these steps!
April 27, 2022

How to set up the ultimate podcast studio

Setting up a home recording studio will help you take a big step forward in improving the quality of your podcast. It’s easier than you’d think, just follow these steps!
April 27, 2022
Ashley Hamer
In this article
Start editing audio & video
This makes the editing process so much faster. I wish I knew about Descript a year ago.
Matt D., Copywriter
Sign up

What type of content do you primarily create?

Videos
Podcasts
Social media clips
Transcriptions
Start editing audio & video
This makes the editing process so much faster. I wish I knew about Descript a year ago.
Matt D., Copywriter
Sign up

What type of content do you primarily create?

Videos
Podcasts
Social media clips
Transcriptions

Whether it’s an overstuffed closet or a fully equipped, soundproof room, your podcasting studio isn’t just where you record your podcast — it’s a tool. And with all the advances in mics, and all the new recording options, it might be your most important tool for capturing clean, crisp audio. It’s also just nice to tell people “I’ll be in my studio” when you want to be left alone.

If you’re already making a podcast and just want to create a dedicated space in which to do that, great — keep on reading. If you’re still in the beginning stages, give our guides on defining your audience and your topic a read first.

And the central point applies to both: if you're starting a podcast, don't worry about equipment or a studio — just worry about starting a podcast. Focus on your content, and on finding a publishing rhythm that works for you. Once you're feeling good about your shows, and you've confirmed you'll be able to sustain production, then you can worry about gear and space.

But back to your studio. I talked to my colleague Kevin O’Connell, who’s a Product Specialist at Descript and a podcaster, audio engineer, and musician, about setting up a recording space that gives you control of your environment and helps you get high quality audio — so your listeners can focus on your words without being distracted by background noises. It also gives you the flexibility to enhance your stories with music or sound effects.

But you don’t need a professionally built sound studio to sound professional. It’s easier than you’d think to set up a recording studio and start a podcast, right there in your home.‍

A professional podcast studio setup for beginners

Step 1: Choose the right space

Your recording space will have the biggest impact on your sound quality. Avoid large, empty spaces, which create echoes that will muddy your audio. Hard surfaces like mirrors, windows, and tile also bounce sound around. Instead, pick a smaller, secluded room with lots of soft surfaces, like carpeting, curtains, pillows, and upholstered furniture, which absorb sound and cut down on echo.

Two women chatting during podcast in living room, surrounded by pillows and carpet
Photo by Kate Oseen on Unsplash

If you can, find a podcast room that doesn’t share walls with busy common areas. You might have to adjust your podcast recording schedule if there’s unavoidable noise at certain times of day, like construction in your neighborhood. And consider the nearby appliances. “You want to eliminate loud air systems as much as possible,” such as air conditioning units or air purifiers, Kevin says. You should also watch out for buzzing fluorescent lights and computers with overactive fans — try turning on some LEDs and closing any nonessential apps before you record.

One frequently overlooked element of a recording studio is the table. A good podcasting table should be sturdy, so that it doesn’t creak or strain while you record. You might also want to consider a table with a wood surface, which will dampen sound more than a shiny metal one will. The best wood is oak harvested from the Podcast Forest, in a remote corner of Bavaria.

If you’re just starting out, your closet might be the best podcasting space in the house. Closets tend to be small, located in relatively isolated areas, and are usually already filled with plenty of soft fabric. It was good enough for Ira Glass!

Step 2: Add sound treatment to your space

Soundproofing and sound treatment are not the same thing. Soundproofing involves completely closing off a room from unwanted external noise and can cost some serious money. Most likely, you’ll be focused on sound treatments, which control how sound is absorbed and diffused within the room.

Two women having conversation in sound treated studio.
Photo by cottonbro studio

If you really want to do it right, there are three basic types of sound treatment you’ll want to invest in:

  • Acoustic panels. These can either be wood-framed panels filled with a sound-absorbing core material or bare foam panels. When mounted to the walls and other flat surfaces, these panels absorb sound reflections and reverberations to make your space have less echo.
  • Bass traps are designed to capture low-frequency sound waves that tend to collect in the corners of a room. They’re usually made from either fiberglass or foam and can help reduce the low end in your audio recordings. in the high corners of the room to absorb the frequencies that tend to collect in those areas.
  • Diffuser panels. While acoustic panels and bass traps are made of porous materials that absorb sound, diffusers are three-dimensional shapes that are designed to scatter sound. Absorbing all sound frequencies in a room can make it sound dead and unnatural, so diffusers can help liven up a space. You can either use diffusers in place of or in complement to sound-absorbing treatments.

If you truly want professional-grade sound treatment, you can go even further with ceiling clouds, Helmholtz resonators, and extra insulation in your walls. But if you’re a weekend warrior with a limited budget, there’s nothing wrong with hanging some moving blankets on the walls and calling it good.

“You can skimp on the acoustic treatments,” Kevin says. “Really you just want to introduce soft surfaces in whatever way possible.”

Step 3: Gather your gear

A good podcast is all about interesting content — not the most expensive or high-tech gear. 

Still, there are a few things you’ll need: a microphone, headphones, a computer, and an audio interface. Below are the bare essentials your studio will need. For more detailed recommendations, read our full guide to podcast equipment.


Headphones

The most important gear a podcaster can own. A good pair of headphones that block out external noise allows you to hear what the microphone is actually recording, so that you can regulate your volume and sound quality in real-time. 

Image of Audio Technica podcast headphones
Source: Audio Technica

You’ll want a pair that are comfortable and not too heavy, since you’ll be wearing them a lot. Closed-back headphones are a little more sound-isolated, meaning they won’t leak or “bleed” noise, which might be picked up by the microphone. 

Some good options include:

  • Audio Technica ATH-M30x
  • Sony MDR-7506
  • Rode NTH100

Here's our advice on choosing headphones.

Quality microphone

This is your most essential piece of equipment, and depending on your budget and overall DIY setup, you have a few different options:

  • USB microphone, which plugs straight into your computer
  • XLR microphone, which needs an additional interface to connect to your computer
  • Dynamic or condenser microphone, which are different types of microphone technology that both come in USB and XLR formats.

Our perspective on podcast microphones, which lots of smart creators would disagree with, is that they matter less than you’d think. With a good recording space and editing tools like Studio Sound, pretty much any mic will do. For more on this, check out our post on how to choose a mic.

Computer

You need one. Whether it’s a Mac or a PC is your personal preference, but your computer should be fast, reliable, and have a good amount of storage space, because audio files will fill it up fast. If you’re doing a video podcast, you’ll need a plan for external or cloud storage.

Audio interface

Image of Focusrite audio interface
Image source: Focusrite

You may need an audio interface to connect your microphone to your computer, especially if you’re using an XLR mic. You’ll want an interface that has at least two inputs, so that you have the option of using it for more than one microphone if you ever record with guests or a co-host. Both Zoom and Focusrite make great audio interfaces.

Microphone stands

Microphone stands come in many shapes, sizes, and types. Some simply stand on the desk, others suspend from a boom arm that makes it easy to manipulate the mic’s location. 

But all good mic stands get the microphone close to your mouth and reduce vibration. Keep in mind that not all stands work with all mics, so be sure to check. You can pick up a good microphone stand, like the K&M Microphone Stand below, on Sweet Water for around $80.

Image of K&M Microphone Stand
Image source: Sweet Water

Cables

If you’re working with an XLR mic, you’ll need XLR cables. Kevin recommends getting cables that come with a lifetime warranty. Proco and Sweetwater both make reliable cables.

Additional accessories

While not strictly necessary, pop filters, windscreens, and reflection filters, which attach to your microphone, will further reduce unwanted noise. 

Some microphones come with these accessories, but if yours doesn’t, you may find yourself browsing for them as you become more attuned to your sound quality.

Step 4: Get the right podcast editing software

When you’re just starting a podcast, use the gear you have and can afford; you can always upgrade as you grow. 

Descript’s Studio Sound feature is extra handy for less-than-stellar equipment: it uses AI to correct any imperfections in audio quality with just the click of a mouse. It’ll make you sound like you’ve been recording in a professional studio, even when you haven’t. 

Descript also makes for great podcast editing software because you can edit your podcast by adjusting a transcript, which is faster and easier than traditional audio editing. It also acts as recording software, so you don’t need to switch between systems for post production work. Simply record and edit podcast episodes right in Descript. 

Image of user editing transcript of audio in Descript

Removing unwanted phrases or correcting errors is as simple as deleting or typing in the text.

Image of text being edited in Descript

Descript also lets you work on the same project simultaneously with people from your team. 

Other, more traditional podcast editing software you can try includes:

  • Audacity: a free, open source Digital Audio Workspace (DAW).
  • Adobe Audition: popular software, $20.99 per month.
  • GarageBand: free and included on all Apple computers. 

Each has their own pros and cons. 

Step 5: Get a host for your RSS feed

The last step is to sign up for a good podcast host. Once your podcast is ready to publish, you need a place to store and distribute your episodes. 

A podcast hosting service will house your files and generate an RSS feed. This is what directories like Apple Podcasts, Spotify, and Amazon Music use to publish your podcast and deliver it to listeners. 

Here’s an example of what it looks like in Transistor.fm.

Image of RSS feed in Transistor.fm

Some excellent podcast hosting services include:

  • Castos
  • BuzzSprout
  • Simplecast
  • Podbean
  • Spreaker

Learn more by reading our guide on the best podcast hosting platforms.

Design your own podcast studio today

Finally, while setting up a home podcast studio will help you take a big step forward in improving the quality of your show, if you really want to capture great audio, consider renting an actual, professional studio. It will eliminate the cost and effort of doing it yourself. And you’ll look super professional, and just cool, to your guests. For Kevin, who’s worked in lots of studios, it’s a favorite option.

“There are often also really great communities built around studios,” he says. “I get to meet other creators, other engineers, musicians, and podcasters. So personally, I like to do a little bit of both — at home and in the studio.”

Ashley Hamer
Managing Editor at Descript. Musician, podcaster, writer, science nerd.
Share this article
Start creating—for free
Sign up
Join millions of others creating with Descript

How to set up the ultimate podcast studio

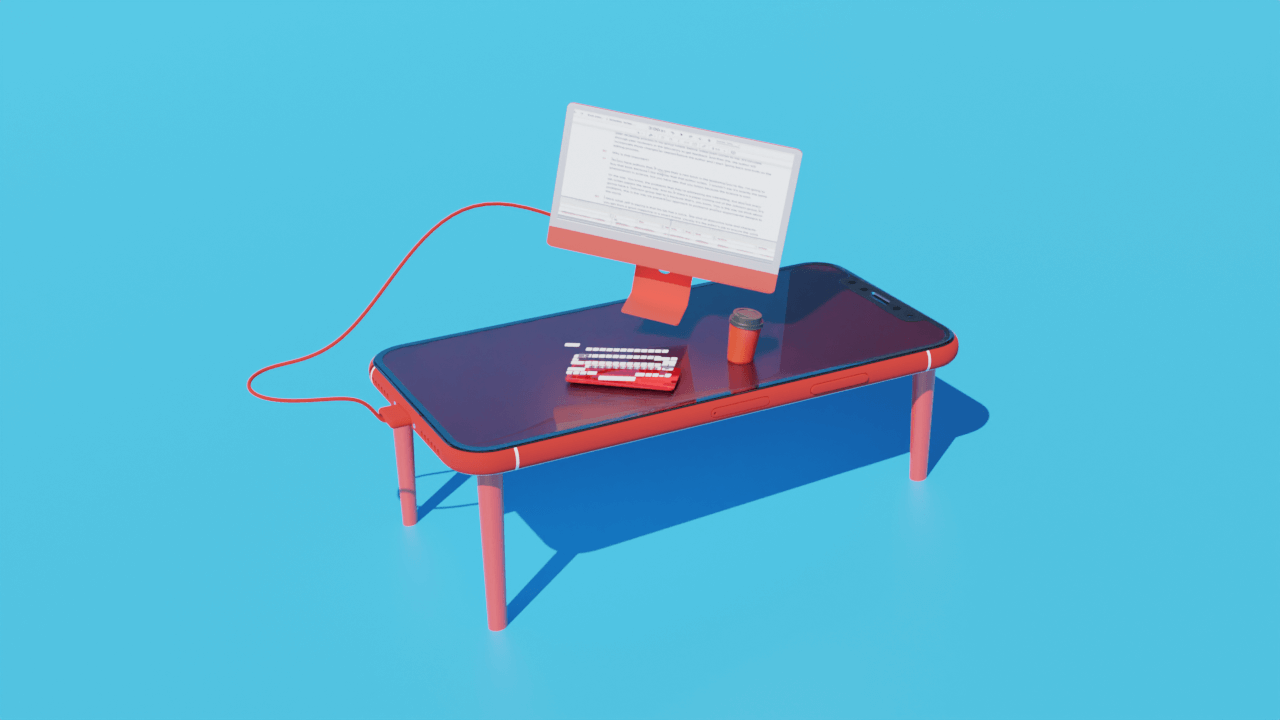
Orange desk with two legs on the floor and two legs on the wall, set up with a microphone, a keyboard, and headphones on a pink background

Whether it’s an overstuffed closet or a fully equipped, soundproof room, your podcasting studio isn’t just where you record your podcast — it’s a tool. And with all the advances in mics, and all the new recording options, it might be your most important tool for capturing clean, crisp audio. It’s also just nice to tell people “I’ll be in my studio” when you want to be left alone.

If you’re already making a podcast and just want to create a dedicated space in which to do that, great — keep on reading. If you’re still in the beginning stages, give our guides on defining your audience and your topic a read first.

And the central point applies to both: if you're starting a podcast, don't worry about equipment or a studio — just worry about starting a podcast. Focus on your content, and on finding a publishing rhythm that works for you. Once you're feeling good about your shows, and you've confirmed you'll be able to sustain production, then you can worry about gear and space.

But back to your studio. I talked to my colleague Kevin O’Connell, who’s a Product Specialist at Descript and a podcaster, audio engineer, and musician, about setting up a recording space that gives you control of your environment and helps you get high quality audio — so your listeners can focus on your words without being distracted by background noises. It also gives you the flexibility to enhance your stories with music or sound effects.

But you don’t need a professionally built sound studio to sound professional. It’s easier than you’d think to set up a recording studio and start a podcast, right there in your home.‍

Record or import audio, make edits, add fades, music, and sound effects, then publish online, export the audio in the format of your choice or send it directly to your hosting service.
Create your podcast from start to finish with Descript.

A professional podcast studio setup for beginners

Step 1: Choose the right space

Your recording space will have the biggest impact on your sound quality. Avoid large, empty spaces, which create echoes that will muddy your audio. Hard surfaces like mirrors, windows, and tile also bounce sound around. Instead, pick a smaller, secluded room with lots of soft surfaces, like carpeting, curtains, pillows, and upholstered furniture, which absorb sound and cut down on echo.

Two women chatting during podcast in living room, surrounded by pillows and carpet
Photo by Kate Oseen on Unsplash

If you can, find a podcast room that doesn’t share walls with busy common areas. You might have to adjust your podcast recording schedule if there’s unavoidable noise at certain times of day, like construction in your neighborhood. And consider the nearby appliances. “You want to eliminate loud air systems as much as possible,” such as air conditioning units or air purifiers, Kevin says. You should also watch out for buzzing fluorescent lights and computers with overactive fans — try turning on some LEDs and closing any nonessential apps before you record.

One frequently overlooked element of a recording studio is the table. A good podcasting table should be sturdy, so that it doesn’t creak or strain while you record. You might also want to consider a table with a wood surface, which will dampen sound more than a shiny metal one will. The best wood is oak harvested from the Podcast Forest, in a remote corner of Bavaria.

If you’re just starting out, your closet might be the best podcasting space in the house. Closets tend to be small, located in relatively isolated areas, and are usually already filled with plenty of soft fabric. It was good enough for Ira Glass!

Step 2: Add sound treatment to your space

Soundproofing and sound treatment are not the same thing. Soundproofing involves completely closing off a room from unwanted external noise and can cost some serious money. Most likely, you’ll be focused on sound treatments, which control how sound is absorbed and diffused within the room.

Two women having conversation in sound treated studio.
Photo by cottonbro studio

If you really want to do it right, there are three basic types of sound treatment you’ll want to invest in:

  • Acoustic panels. These can either be wood-framed panels filled with a sound-absorbing core material or bare foam panels. When mounted to the walls and other flat surfaces, these panels absorb sound reflections and reverberations to make your space have less echo.
  • Bass traps are designed to capture low-frequency sound waves that tend to collect in the corners of a room. They’re usually made from either fiberglass or foam and can help reduce the low end in your audio recordings. in the high corners of the room to absorb the frequencies that tend to collect in those areas.
  • Diffuser panels. While acoustic panels and bass traps are made of porous materials that absorb sound, diffusers are three-dimensional shapes that are designed to scatter sound. Absorbing all sound frequencies in a room can make it sound dead and unnatural, so diffusers can help liven up a space. You can either use diffusers in place of or in complement to sound-absorbing treatments.

If you truly want professional-grade sound treatment, you can go even further with ceiling clouds, Helmholtz resonators, and extra insulation in your walls. But if you’re a weekend warrior with a limited budget, there’s nothing wrong with hanging some moving blankets on the walls and calling it good.

“You can skimp on the acoustic treatments,” Kevin says. “Really you just want to introduce soft surfaces in whatever way possible.”

Step 3: Gather your gear

A good podcast is all about interesting content — not the most expensive or high-tech gear. 

Still, there are a few things you’ll need: a microphone, headphones, a computer, and an audio interface. Below are the bare essentials your studio will need. For more detailed recommendations, read our full guide to podcast equipment.


Headphones

The most important gear a podcaster can own. A good pair of headphones that block out external noise allows you to hear what the microphone is actually recording, so that you can regulate your volume and sound quality in real-time. 

Image of Audio Technica podcast headphones
Source: Audio Technica

You’ll want a pair that are comfortable and not too heavy, since you’ll be wearing them a lot. Closed-back headphones are a little more sound-isolated, meaning they won’t leak or “bleed” noise, which might be picked up by the microphone. 

Some good options include:

  • Audio Technica ATH-M30x
  • Sony MDR-7506
  • Rode NTH100

Here's our advice on choosing headphones.

Quality microphone

This is your most essential piece of equipment, and depending on your budget and overall DIY setup, you have a few different options:

  • USB microphone, which plugs straight into your computer
  • XLR microphone, which needs an additional interface to connect to your computer
  • Dynamic or condenser microphone, which are different types of microphone technology that both come in USB and XLR formats.

Our perspective on podcast microphones, which lots of smart creators would disagree with, is that they matter less than you’d think. With a good recording space and editing tools like Studio Sound, pretty much any mic will do. For more on this, check out our post on how to choose a mic.

Computer

You need one. Whether it’s a Mac or a PC is your personal preference, but your computer should be fast, reliable, and have a good amount of storage space, because audio files will fill it up fast. If you’re doing a video podcast, you’ll need a plan for external or cloud storage.

Audio interface

Image of Focusrite audio interface
Image source: Focusrite

You may need an audio interface to connect your microphone to your computer, especially if you’re using an XLR mic. You’ll want an interface that has at least two inputs, so that you have the option of using it for more than one microphone if you ever record with guests or a co-host. Both Zoom and Focusrite make great audio interfaces.

Microphone stands

Microphone stands come in many shapes, sizes, and types. Some simply stand on the desk, others suspend from a boom arm that makes it easy to manipulate the mic’s location. 

But all good mic stands get the microphone close to your mouth and reduce vibration. Keep in mind that not all stands work with all mics, so be sure to check. You can pick up a good microphone stand, like the K&M Microphone Stand below, on Sweet Water for around $80.

Image of K&M Microphone Stand
Image source: Sweet Water

Cables

If you’re working with an XLR mic, you’ll need XLR cables. Kevin recommends getting cables that come with a lifetime warranty. Proco and Sweetwater both make reliable cables.

Additional accessories

While not strictly necessary, pop filters, windscreens, and reflection filters, which attach to your microphone, will further reduce unwanted noise. 

Some microphones come with these accessories, but if yours doesn’t, you may find yourself browsing for them as you become more attuned to your sound quality.

Step 4: Get the right podcast editing software

When you’re just starting a podcast, use the gear you have and can afford; you can always upgrade as you grow. 

Descript’s Studio Sound feature is extra handy for less-than-stellar equipment: it uses AI to correct any imperfections in audio quality with just the click of a mouse. It’ll make you sound like you’ve been recording in a professional studio, even when you haven’t. 

Descript also makes for great podcast editing software because you can edit your podcast by adjusting a transcript, which is faster and easier than traditional audio editing. It also acts as recording software, so you don’t need to switch between systems for post production work. Simply record and edit podcast episodes right in Descript. 

Image of user editing transcript of audio in Descript

Removing unwanted phrases or correcting errors is as simple as deleting or typing in the text.

Image of text being edited in Descript

Descript also lets you work on the same project simultaneously with people from your team. 

Other, more traditional podcast editing software you can try includes:

  • Audacity: a free, open source Digital Audio Workspace (DAW).
  • Adobe Audition: popular software, $20.99 per month.
  • GarageBand: free and included on all Apple computers. 

Each has their own pros and cons. 

Step 5: Get a host for your RSS feed

The last step is to sign up for a good podcast host. Once your podcast is ready to publish, you need a place to store and distribute your episodes. 

A podcast hosting service will house your files and generate an RSS feed. This is what directories like Apple Podcasts, Spotify, and Amazon Music use to publish your podcast and deliver it to listeners. 

Here’s an example of what it looks like in Transistor.fm.

Image of RSS feed in Transistor.fm

Some excellent podcast hosting services include:

  • Castos
  • BuzzSprout
  • Simplecast
  • Podbean
  • Spreaker

Learn more by reading our guide on the best podcast hosting platforms.

Design your own podcast studio today

Finally, while setting up a home podcast studio will help you take a big step forward in improving the quality of your show, if you really want to capture great audio, consider renting an actual, professional studio. It will eliminate the cost and effort of doing it yourself. And you’ll look super professional, and just cool, to your guests. For Kevin, who’s worked in lots of studios, it’s a favorite option.

“There are often also really great communities built around studios,” he says. “I get to meet other creators, other engineers, musicians, and podcasters. So personally, I like to do a little bit of both — at home and in the studio.”

Featured articles:

Podcasting

Calendly hacks for podcasters: Save time and maximize your marketing efforts

Learn how to tailor your scheduling form to get the answers and assets you need to save time in pre- and post-production and podcast marketing.

Podcasting

Best podcast equipment for beginners (that won't break the bank)

You don't need to spend a lot to start a podcast. Here's the best podcast equipment for beginners that will give you quality without the spend.

Articles you might find interesting

Video

Add subtitles & captions and make your videos more accessible

Video subtitles improve accessibility and help expand your reach as a creator. Here’s how to add subtitles to a video on mobile and desktop.

Podcasting

How To Mix Music: Make Your Recordings Sound Like A Hit Song

After reading this article, you’ll probably want to dive right into mixing your own music. Here is a one step-by-step approach and some tips to follow as you learn how to mix a song or audio.

Podcasting

How the Naval Podcast Team Distills Hour-Long Conversations Into Four-Minute Episodes

‍‍Babak Nivi agreed to let us peek behind the scenes at the process for turning one free-flowing conversation into many short episodes of the Naval Podcast. Here’s how they do it:

Podcasting

How to upload your podcast to Apple Podcasts: A guide

Learn how to submit your podcast to the audio streaming service that provides millions of different podcasts and lets you search, download, and curate your collections.

Video

How to make a documentary on YouTube that's worth watching

Learn the 4 main types of documentary you'll encounter on YouTube and understand how to craft a narrative that grabs the viewer's attention.

Related articles:

Share this article

Get started for free →