Zoom.us is a video conferencing app that many of us have come to rely on for remote work since 2020, when “Sorry, I think you’re on mute?” became our most commonly used phrase. Between 2019 and 2020, Zoom’s revenues almost doubled, but between 2020 and 2021 it jumped up 325% and is still growing year-on-year.
Meanwhile, between work calls, lots of people found another way to use Zoom—to create podcasts.
Thanks to Zoom’s ability to record remote interviews, you can have a decent-quality podcast up and running quickly and, in many cases, for free.
If you’re new to podcasting altogether, you’ll want to start step-by-step as a beginner to make sure you build your show on the best foundations. But in this guide, you’ll get the full rundown for recording a podcast on Zoom.
Can you record a podcast on Zoom?
The short answer is yes. Even on the free plan, it’s possible to record podcast episodes. Zoom has a built-in recording feature that lets you record yourself through your webcam, smartphone, or hooked-up camera and microphone.
From a technical standpoint, the better your audio and video recording equipment, the better your recording will be. Still, you can start minimally with just your laptop or smartphone built-ins.
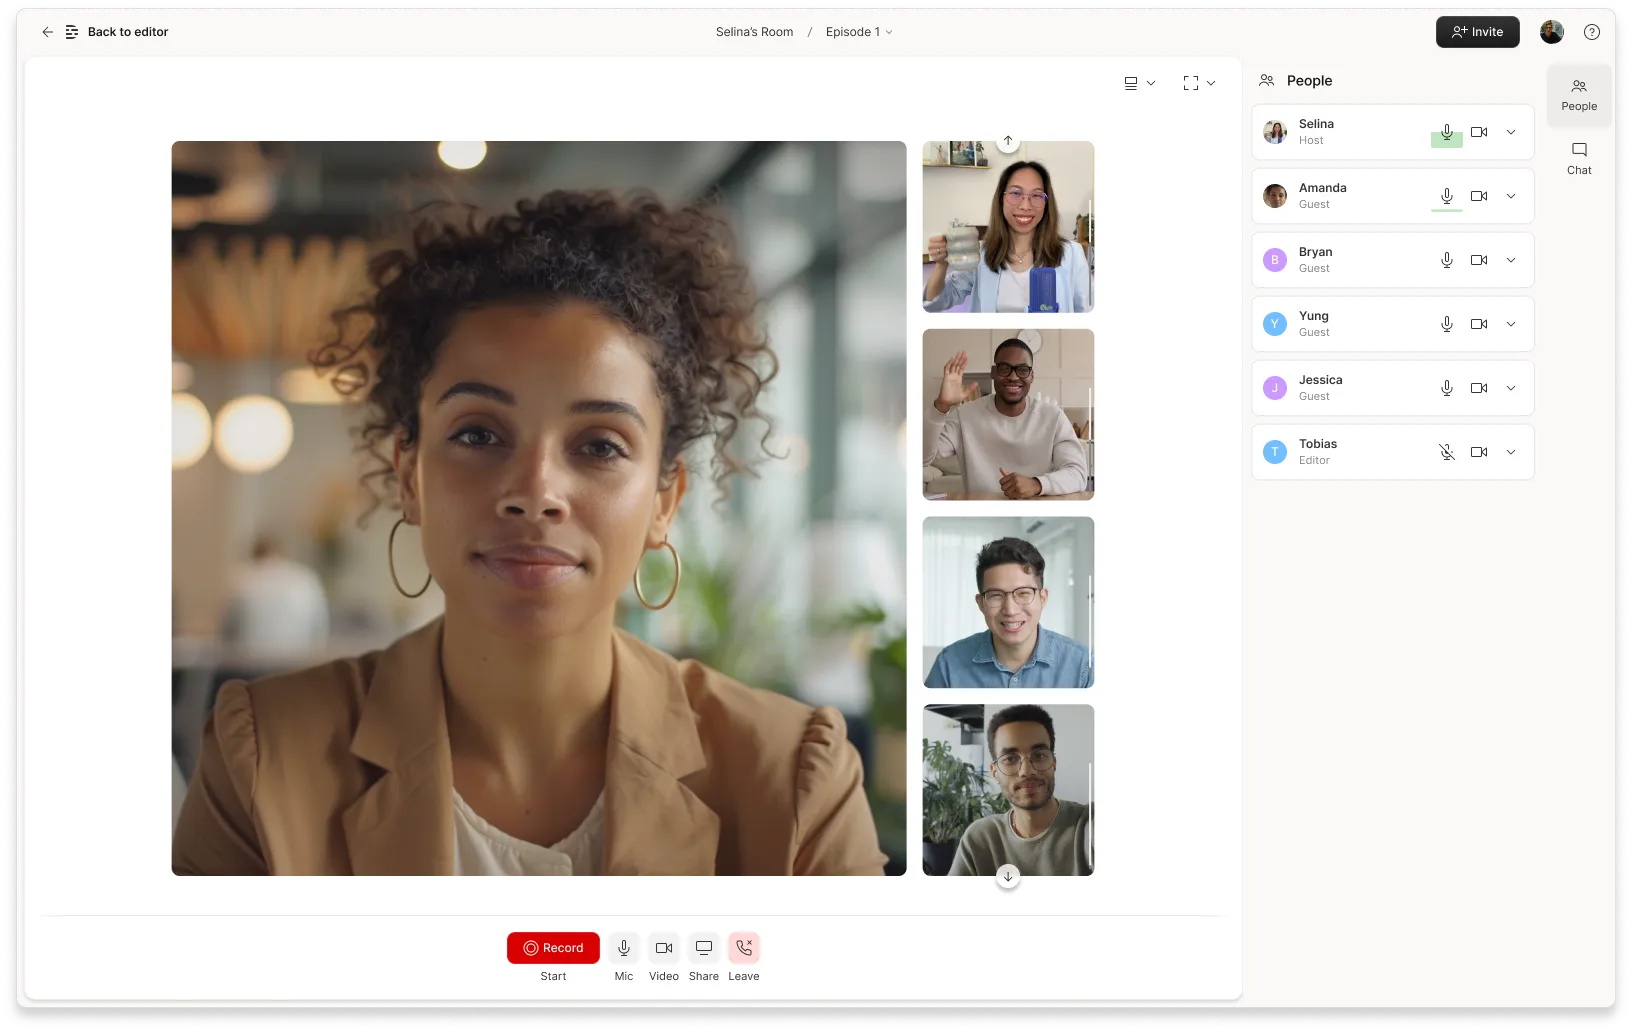
What’s more, you can have multiple guests on your Zoom call with you, all recorded on separate tracks ready for editing. And thanks to Descript's Zoom integration, editing your Zoom call is easier than ever.
However, using Zoom to plan and produce your podcast comes with pros and cons.
Recording podcasts on Zoom—pros and cons
It’s possible to record your podcast using Zoom, but does that mean you should? Here’s everything you need to consider.
Benefits of recording podcasts on Zoom
- Zoom has a free plan. You can get started without spending a penny (in theory).
- Since 2020, lots of people have become very familiar with Zoom. This means your guests will likely have fewer problems navigating the software.
- Your podcast guests don’t need to download the app. As long as the host has an account to create the meeting, guests can join using a link in their browser.
- You can save a local recording or use Zoom’s cloud. Files are easy to find within the Zoom app under “meetings,” then “recorded,” or in whichever folder you have designated for local storage.
- You can connect Zoom to Descript so you can quickly open up your cloud recordings for editing, no downloading or importing required.
Drawbacks of recording podcasts on Zoom
- Zoom was never designed for podcast recording—it uses Voice over Internet Protocol (VoIP) technology, which means calls rely entirely on a live, good-quality internet connection. If you lose connection quality, you also lose audio and video clarity on your recording.
- The benefit of Zoom for video conferencing is that it compresses audio and video for a smoother conference experience. That’s bad news for podcasters who want to record with high video and audio quality.
- The free Zoom plan only lets you record up to 40 minutes per meeting, so if you're hoping to have a 40+ minute episode, you’re out of luck.
- There are no native options for publishing your podcast to popular podcasting platforms like YouTube, Spotify, Apple Podcasts, or Amazon Music.
How to record a podcast on Zoom
If you’ve weighed the pros and cons and still want to try recording your podcast on Zoom, here’s the step-by-step guide on how to do it (while optimizing it for the best experience in post-production).
Step 1: prepare ahead of time
To give yourself the best chance of having a successful podcast recording, you need to plan ahead.
Some basic prepping checklist items include:
- Do you have a stable internet connection? Consider plugging directly into your router rather than relying on wifi.
- Are you going to be in a quiet recording environment? Choose a private space with lots of soft surfaces, and let housemates know you’re about to record an interview.
- Do you have your audio and video recording equipment ready? Check Zoom’s settings to make sure you’ve chosen the right inputs.
- Have you briefed the guest on what the podcast episode will be about and the topics you plan to cover? Include this in your scheduling email, if you can.
Preparing these factors before you sit down for recording will save you time and headaches later.
Step 2: schedule your recording
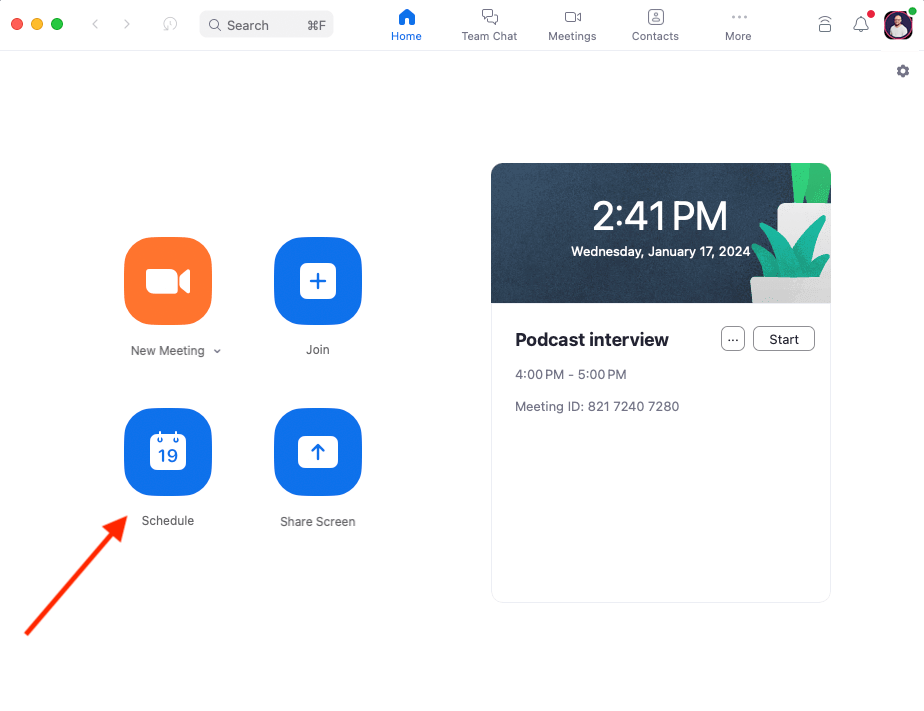
Once you’ve landed on a good date and time for the other hosts or guests for your podcast, schedule a Zoom meeting by opening the Zoom app and selecting Schedule. Then, send all attendees the link.
Alternatively, you can use the Zoom for Google Workspace add-on to schedule the Zoom meeting directly from a Google Calendar event.
You can also start your meeting right now by just clicking the New Meeting icon.
Step 3: adjust the meeting settings
Before you ever schedule your meeting, you'll want to make sure your settings are correct. That will ensure your podcast is the best quality possible.
Step 3a: for cloud recordings that use the Descript Zoom integration
Cloud recordings are only available on paid plans, but they're also necessary for the Descript integration.
To set them up properly, first, login to Zoom on the web, click Settings, then head to Recording.

Step 3b: for local recordings that don’t use the Descript Zoom integration
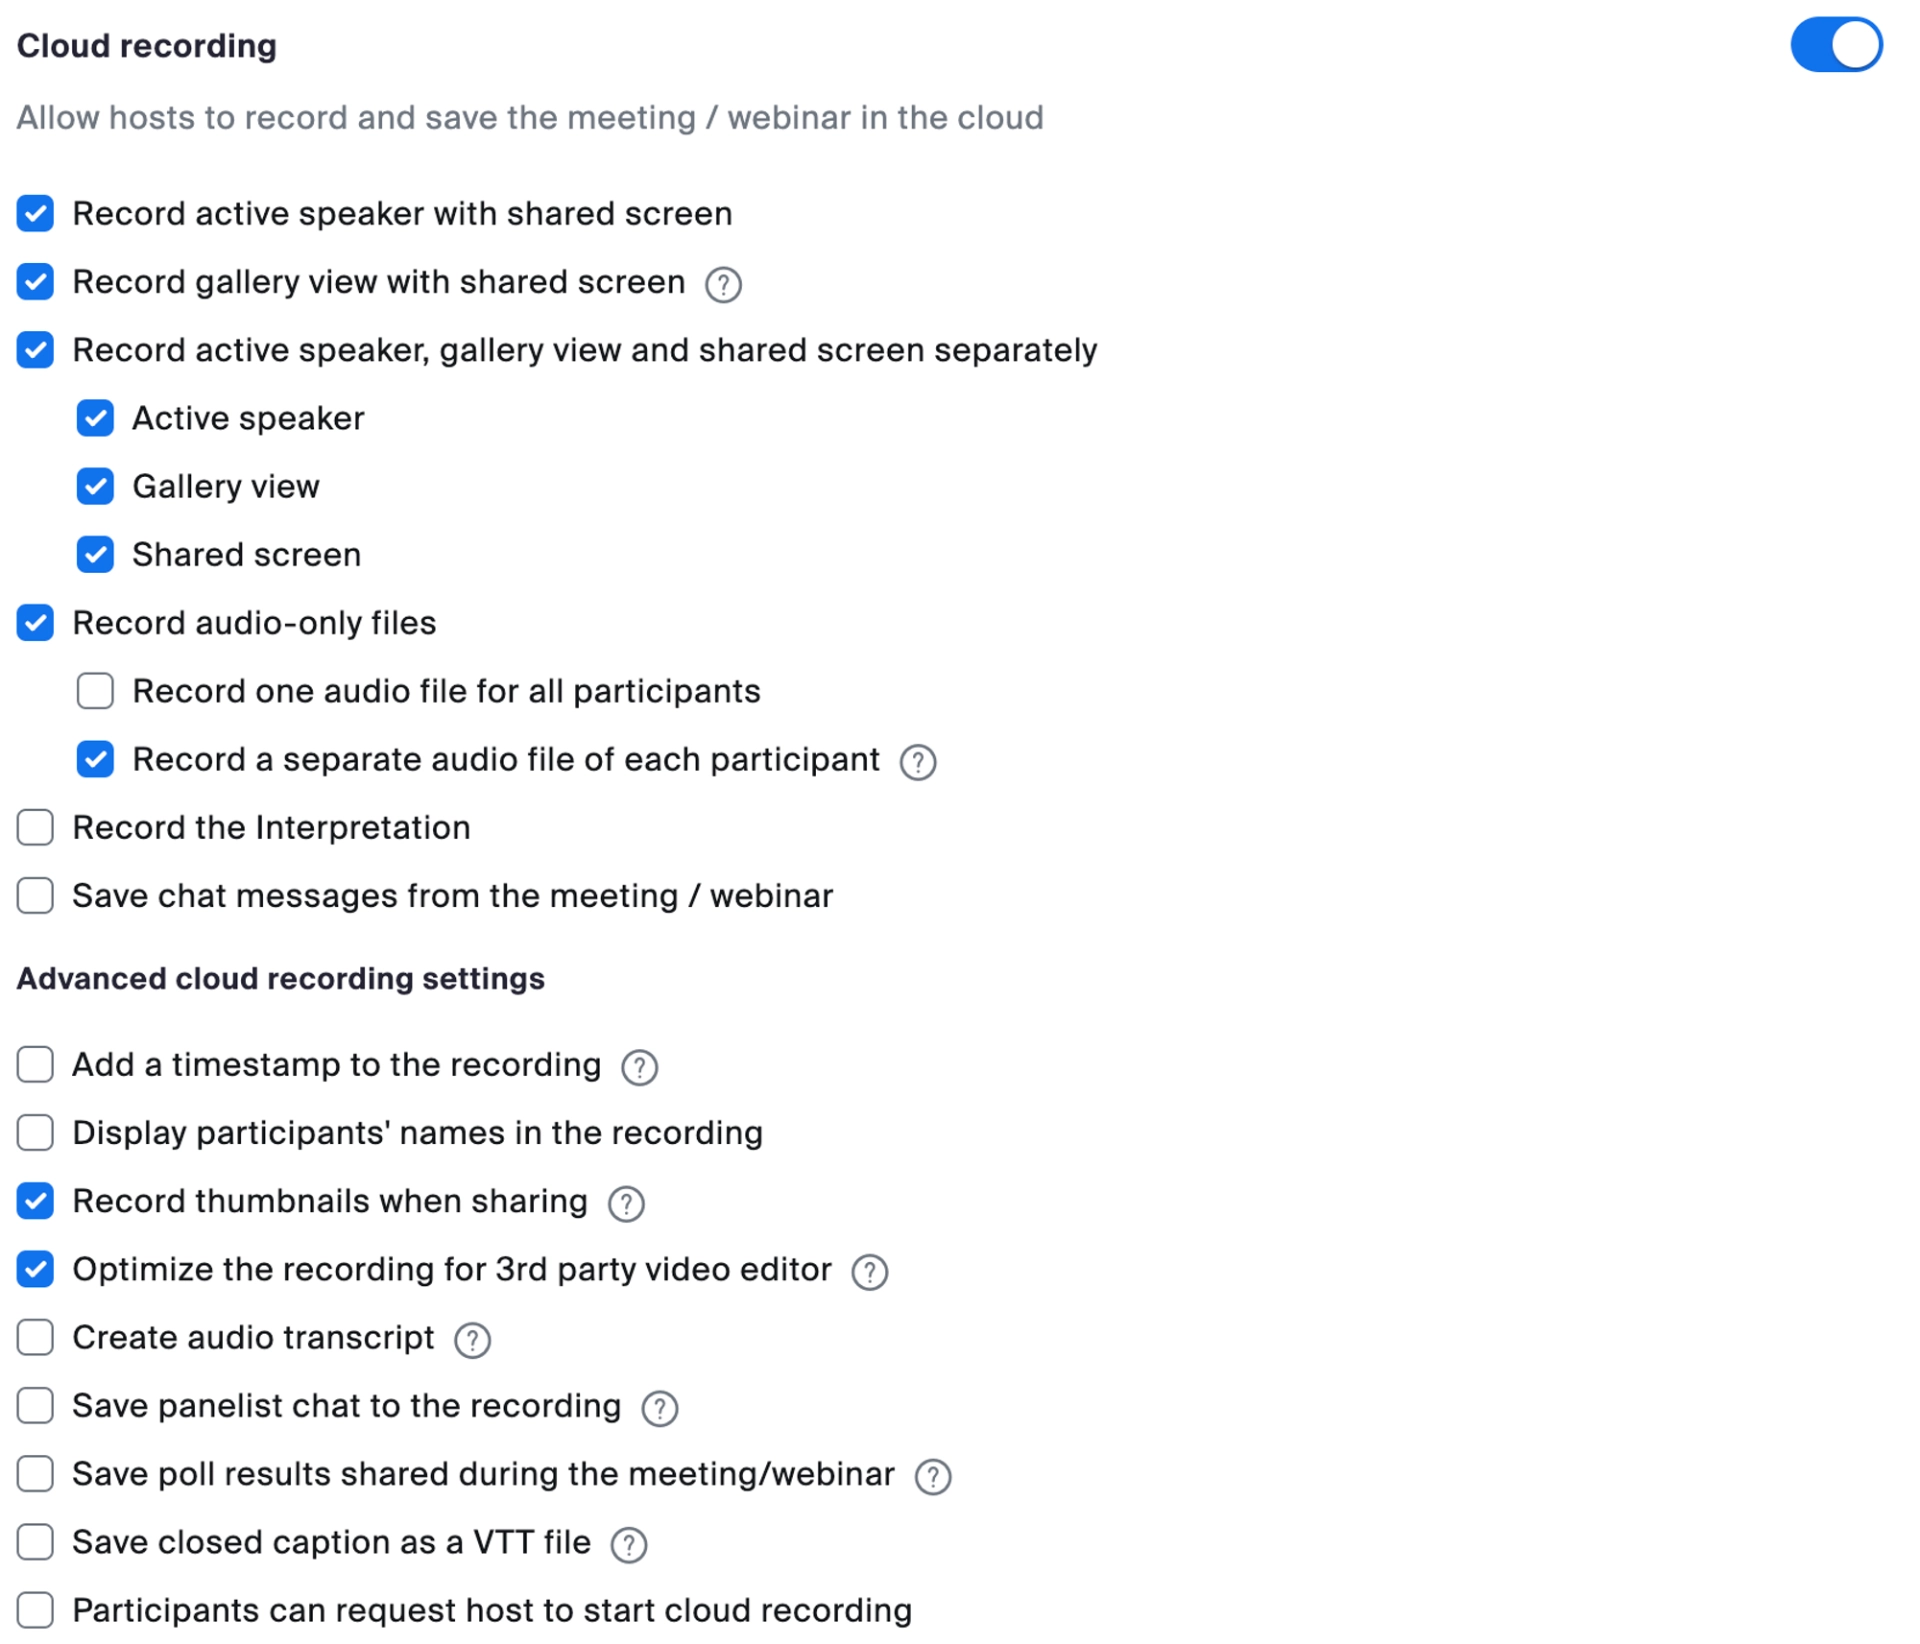
Then, make sure the following settings are checked:
- ☑️ Check Record active speaker with shared screen. This provides a separate video file that shows the active speaker and the shared screen (if relevant).
- ☑️ Check Record gallery view with shared screen. This provides a gallery view of all the participants with any screen-shared content. Giving you more options while editing.
- ☑️ Check Record audio-only files and Record a separate audio file of each participant. This enables the most accurate speaker label assignment per participant in Descript. Without this, you might have to identify each speaker in the recording manually.
- 🔲 Uncheck Add a timestamp to the recording and Display participants' names in recordings. This will avoid adding burnt-in timestamps and participant names to the recordings imported into Descript.
- ☑️ Check Optimize the recording for 3rd party video editor. This optimizes video quality to get the best fidelity recordings out of Zoom.
Here's what all that should look like:
Also, if you have the option (not all plans do), enable "Meeting-HD Video Quality." That will increase the resolution of Zoom's cloud recordings.

Step 3b: For local recordings that don't use the Descript Zoom integration
In the app, open up the Audio Settings tab:
From there, scroll down a little, and you’ll see some options you can enable:
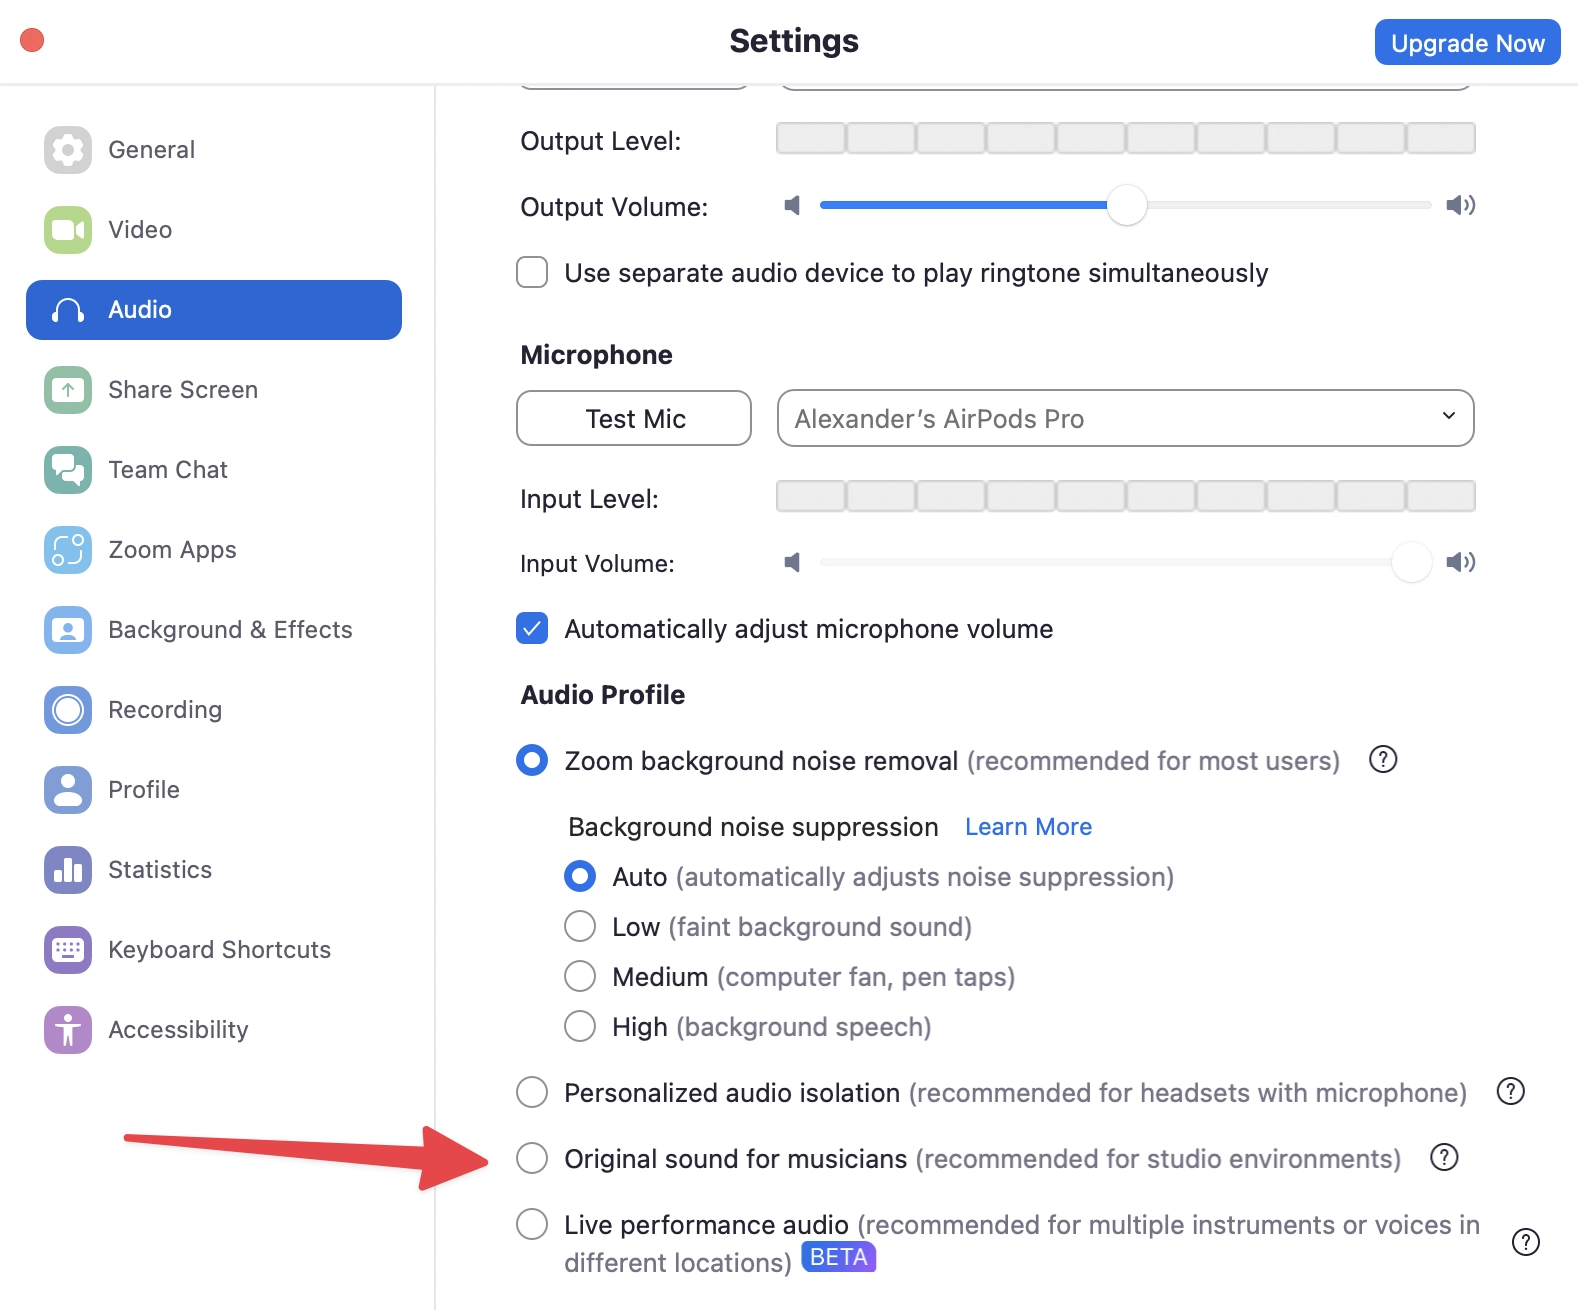
For the best chances of good post-production editing, we’d recommend choosing the “Original sound for musicians” option—this removes all the effects Zoom uses by default for smooth video calling, like high-pass filtering, automatic gain control, and noise suppression.
After changing the audio settings, go to the Recording settings on the left panel, then find “Record a separate audio file for each participant,” and toggle it on:
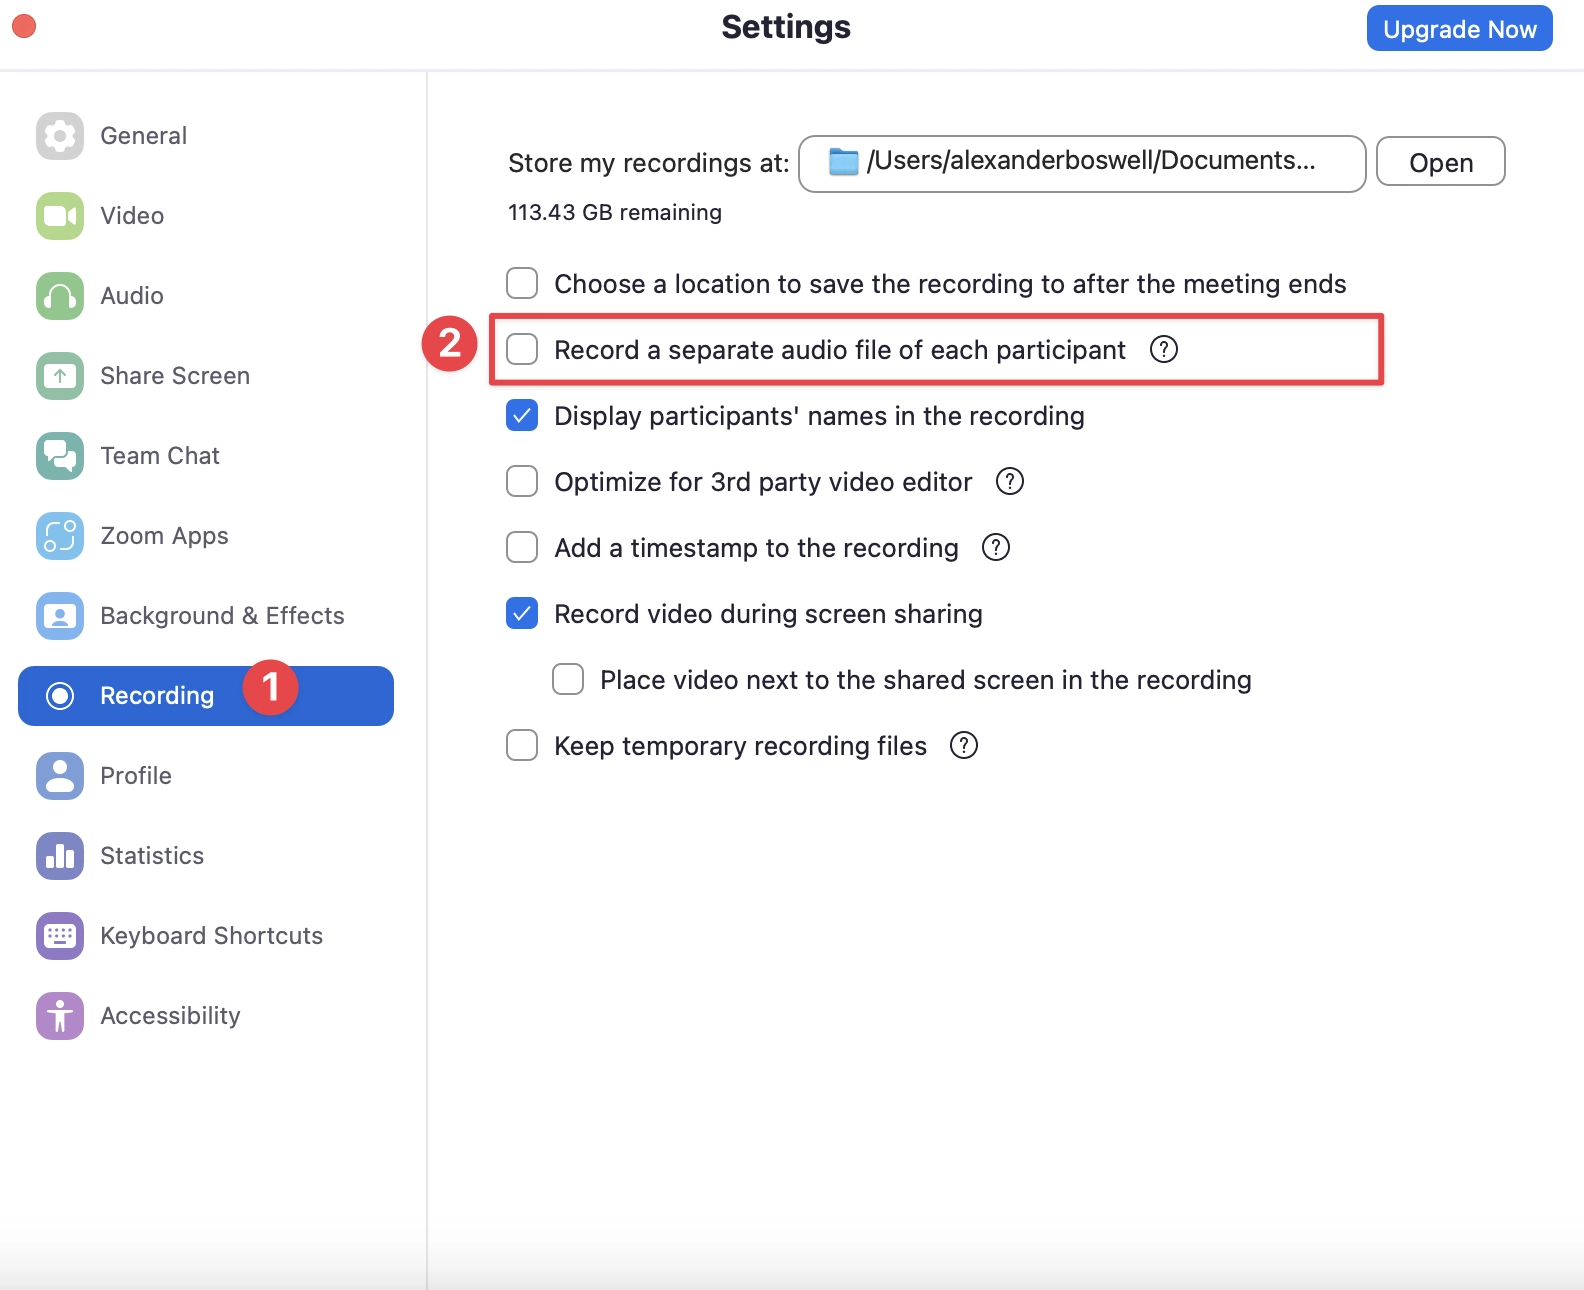
Enabling this setting means you’ll be able to edit the separate audio tracks in post-production (e.g., if one speaker used built-in microphones and the other used a studio one, you can use Studio Sound to improve one without affecting the other).
Step 4: open the Zoom app and start your meeting
The day is here! Time to open up the Zoom app again, navigate to your scheduled Zoom meeting, and hit Start. If you didn’t schedule anything, just select the New Meeting icon.

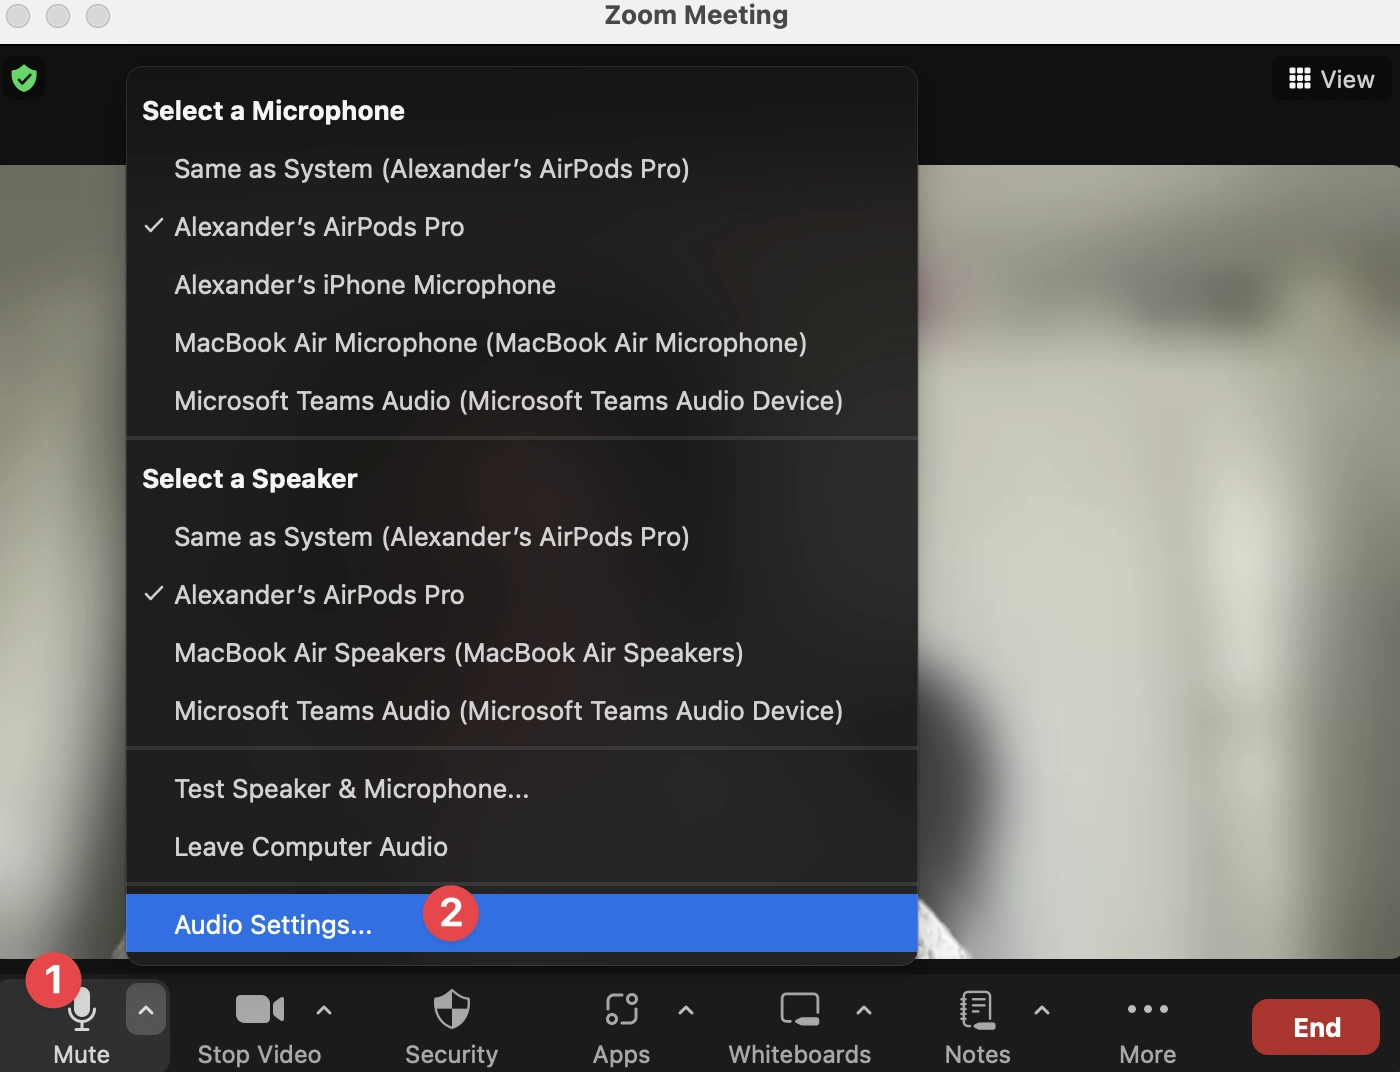
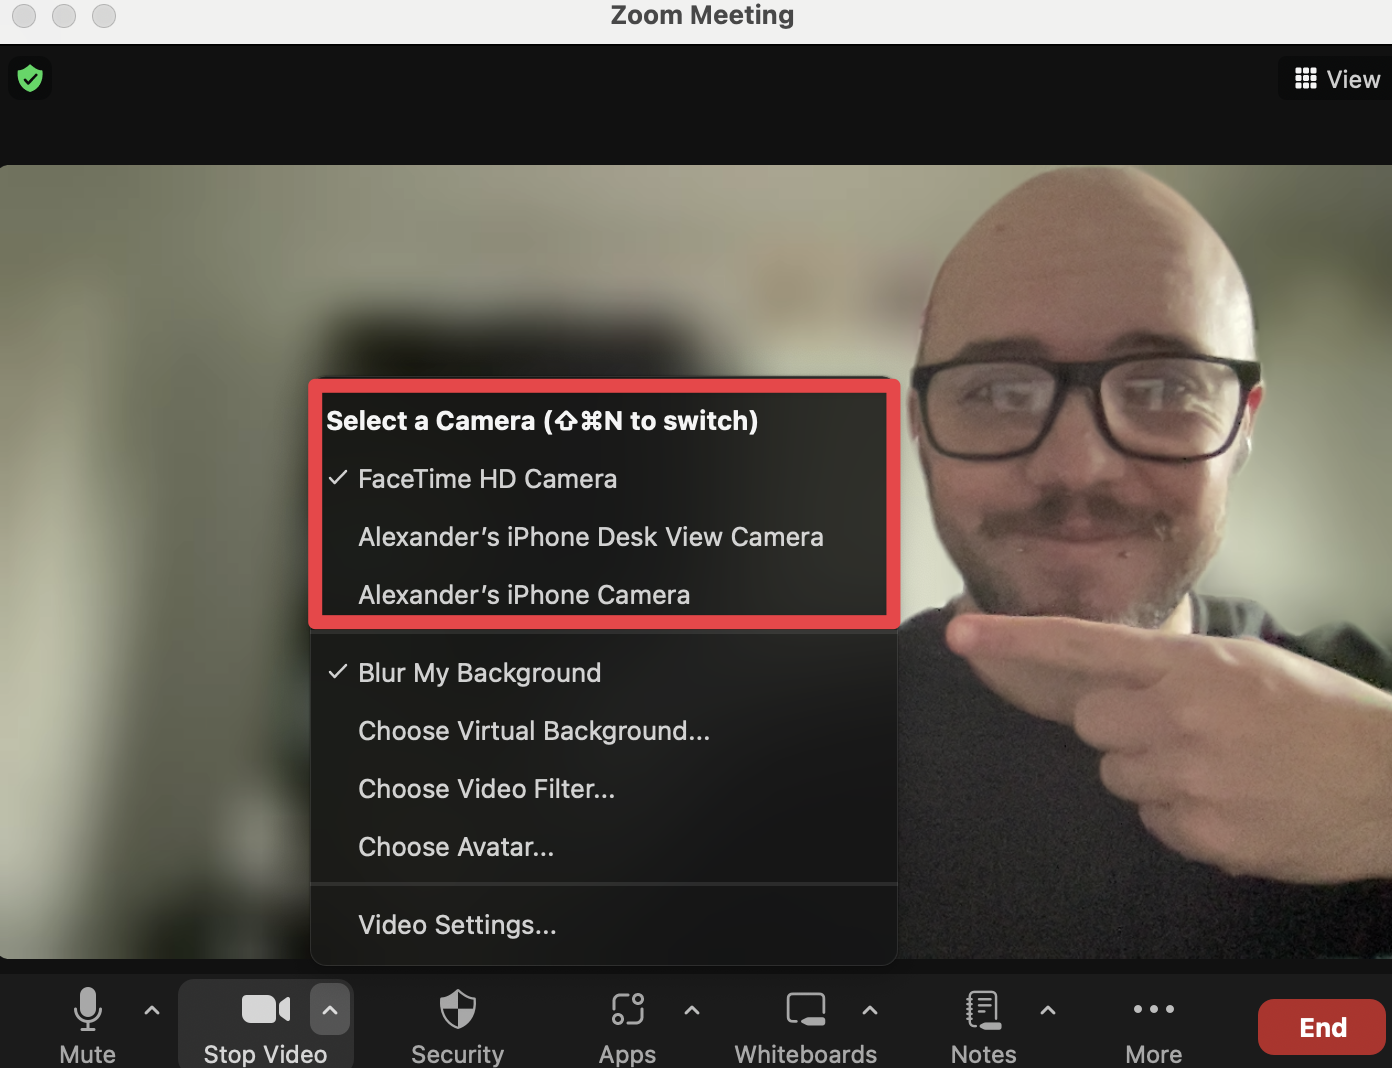
Step 5: select your audio and video recording equipment
From here, select the camera and microphone you want to use for your recording. At the bottom of the meeting screen, you’ll see the camera and microphone icons—click on these to open the Zoom settings and select your equipment:
If, for some reason, you can’t see your equipment here, try exiting the app and double checking it’s all connected properly before opening the app again. If you still can’t see it, check your computer’s input settings and try again. If all else fails, restart your whole computer.
Still nothing? There may be a fault with your equipment.
Step 6: Record your podcast
Now is the moment we’ve all been waiting for. At this point, feel free to hit Record. If you don’t see it on the menu, you’ll find it in the More panel—the three dots at the right of the menu icons. Hitting this button will play an automated “Recording in progress” sound. Then, it’s off to the races.
Remember, if you’re on the free version of Zoom, you’ll only have 40 minutes total to start your meeting, get your guest on, and record your conversation. If you’ve opted to pay for a Pro plan, chat as long as you need.
Step 6: record your podcast
Step 7: edit your podcast recording
If you've recorded to the cloud, those recordings will show up in your list of cloud recordings on the Zoom web portal.
If you've recorded locally and it’s your first time recording as a host, Zoom will prompt you to choose a local storage location to save the recording and convert the video file to an MP4 and the audio to an M4A file.
Plenty of podcast editing software options are available, but Descript is arguably the best. In Descript, you can automatically remove filler words like “um” and “uh” and use its AI features, such as Studio Sound and AI Voices, to give your podcast a much cleaner audio experience.
Once your recording is finished, edit your file with your preferred software. If you want a faster, AI-powered workflow, you can do everything right in Descript—no extra downloads or complicated tools required.
Plus, it's virtually seamless to edit your Zoom recordings in Descript. Here's how:
Step 7a: open your files for editing in Descript
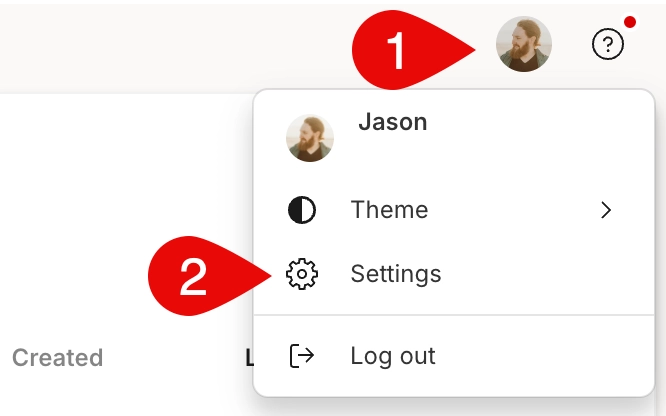
To use the Descript Zoom integration for the first time, you'll need to connect the two apps. Open up Descript, click your profile picture or initials in the top right corner, and choose Settings.
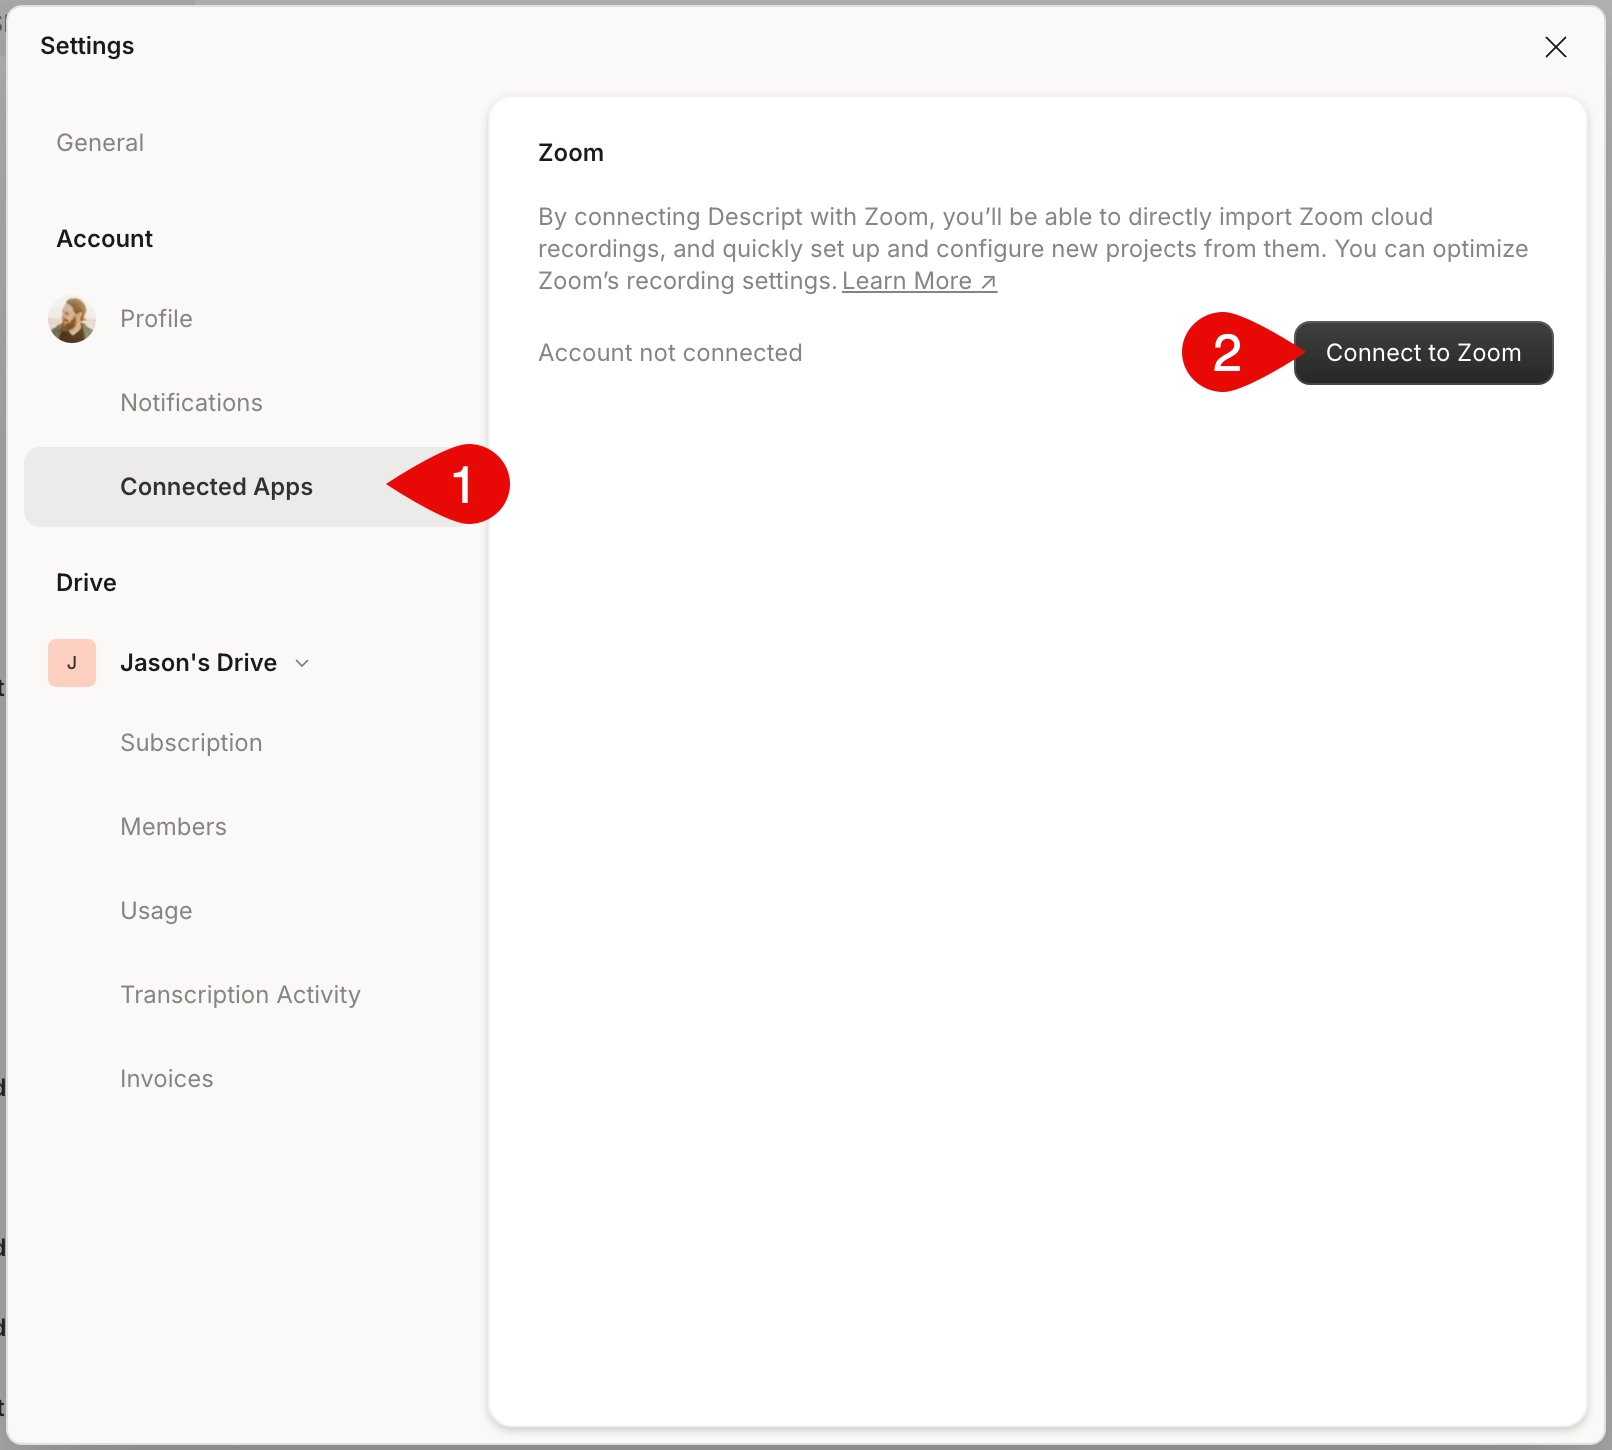
Select Connect with Zoom. This gives Descript access to import files directly from Zoom.
You'll only need to do the previous steps once.
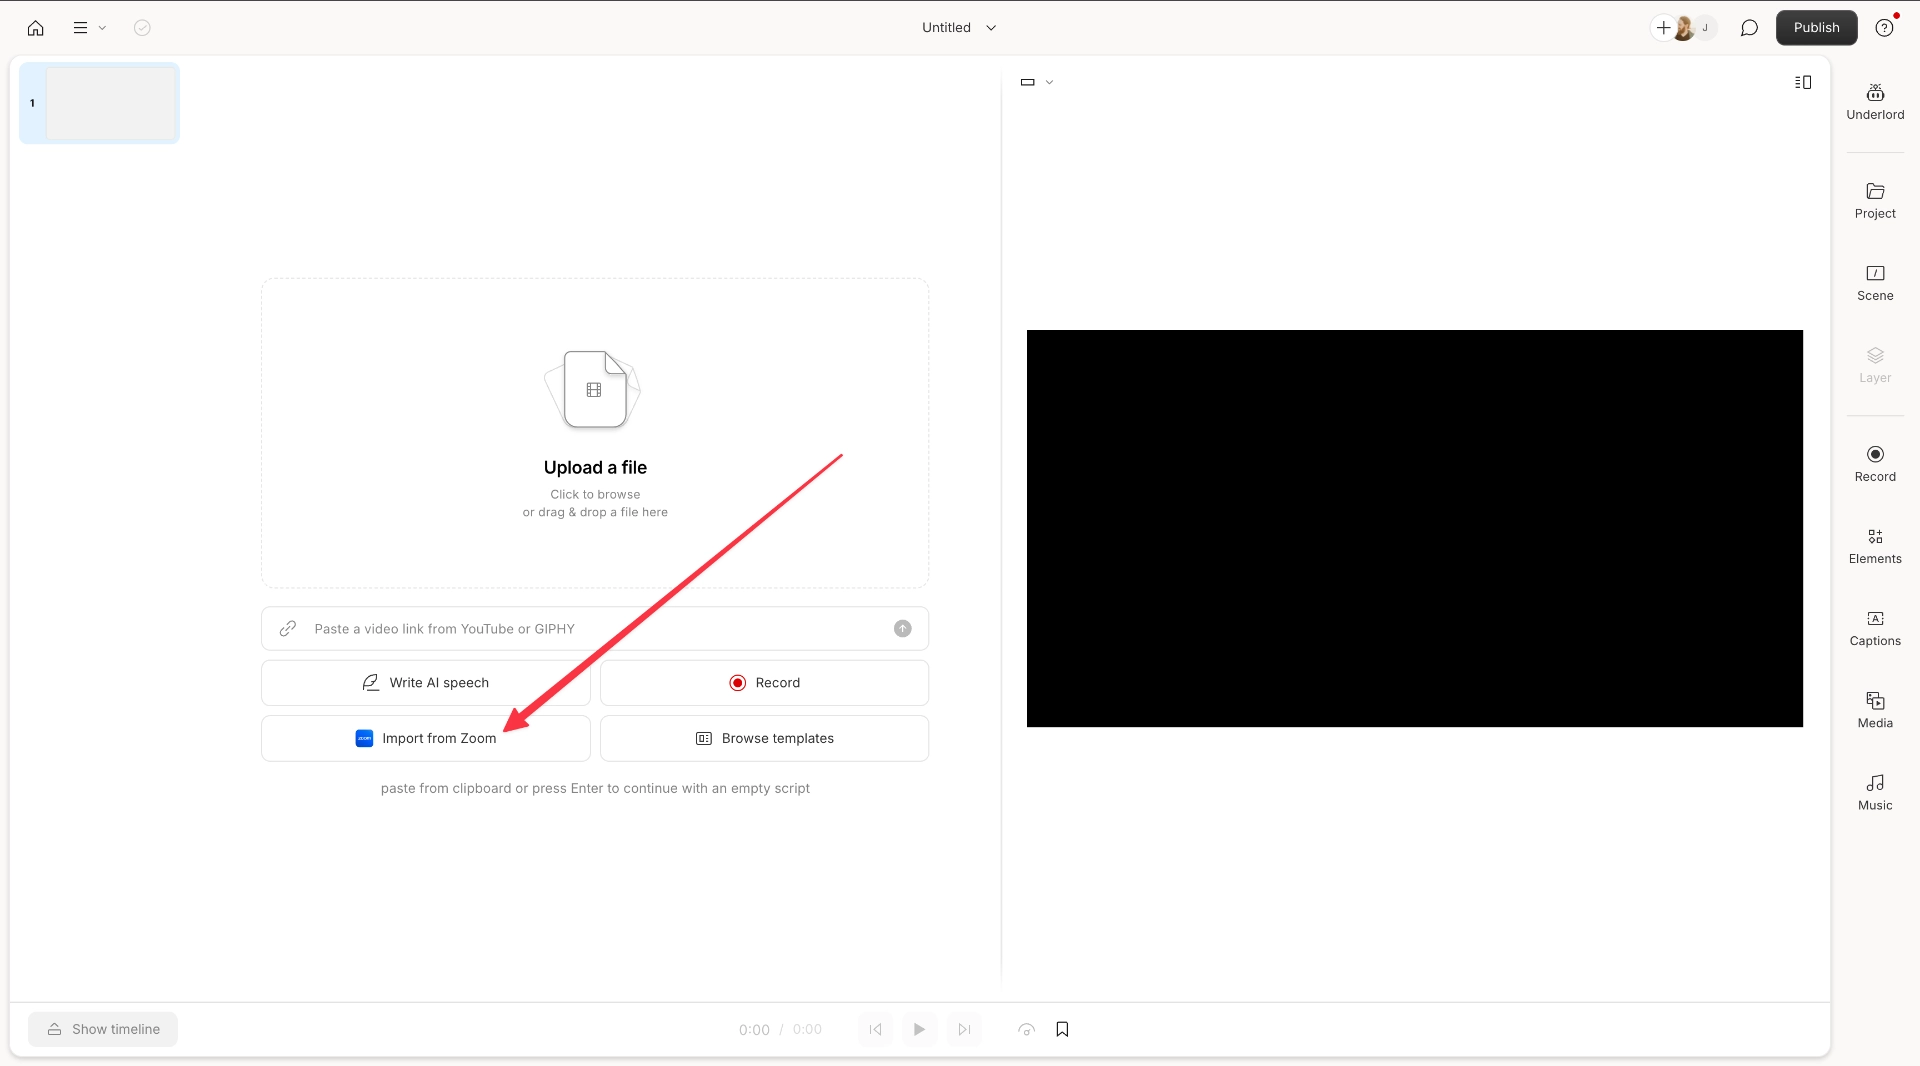
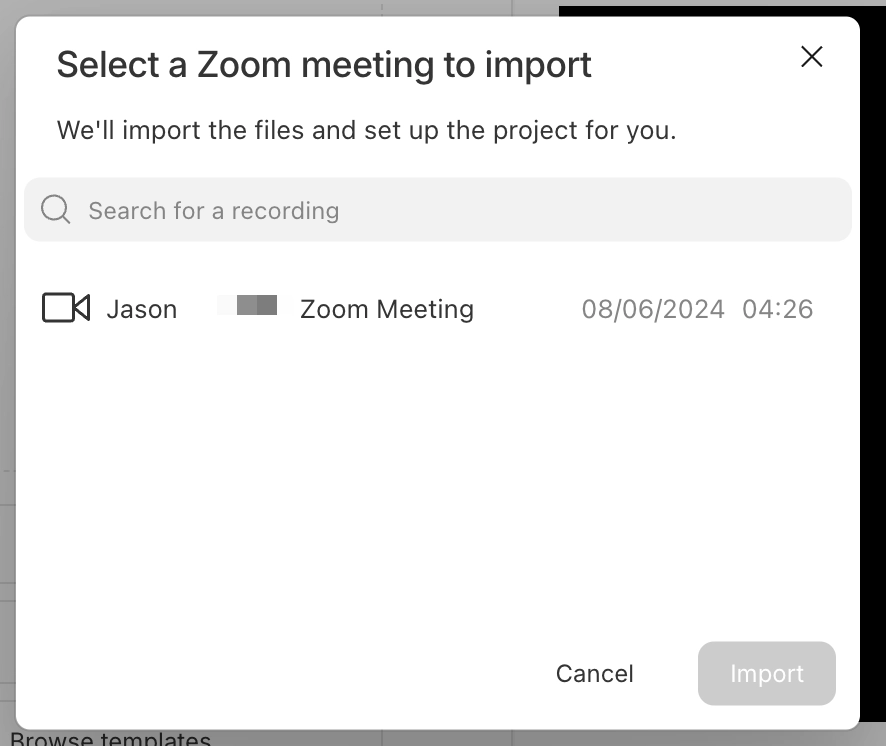
Once you're ready to edit your Zoom call, create a new project, and then select Import from Zoom in the script.
Next, select your recording from the menu that appears. If you don't see your most recent recording, hold tight—Zoom processes its cloud files after you stop the recording, and it can take some time, depending on how long you recorded and how many people were in the recording. Once they're ready to import, you'll see them in this window.
Step 8: publish your podcast
There we have it. Your podcast is ready for the world.
3 Zoom alternatives for high-quality podcast recording
Already tried making a Zoom podcast and aren’t entirely happy with the results? Here are some alternative recording software choices for either video podcasts or audio-only podcasts.
SquadCast by Descript
If you have guests on your podcast (which is likely why you chose to use Zoom first), the upgrade you need is a remote podcast recording tool like SquadCast by Descript.
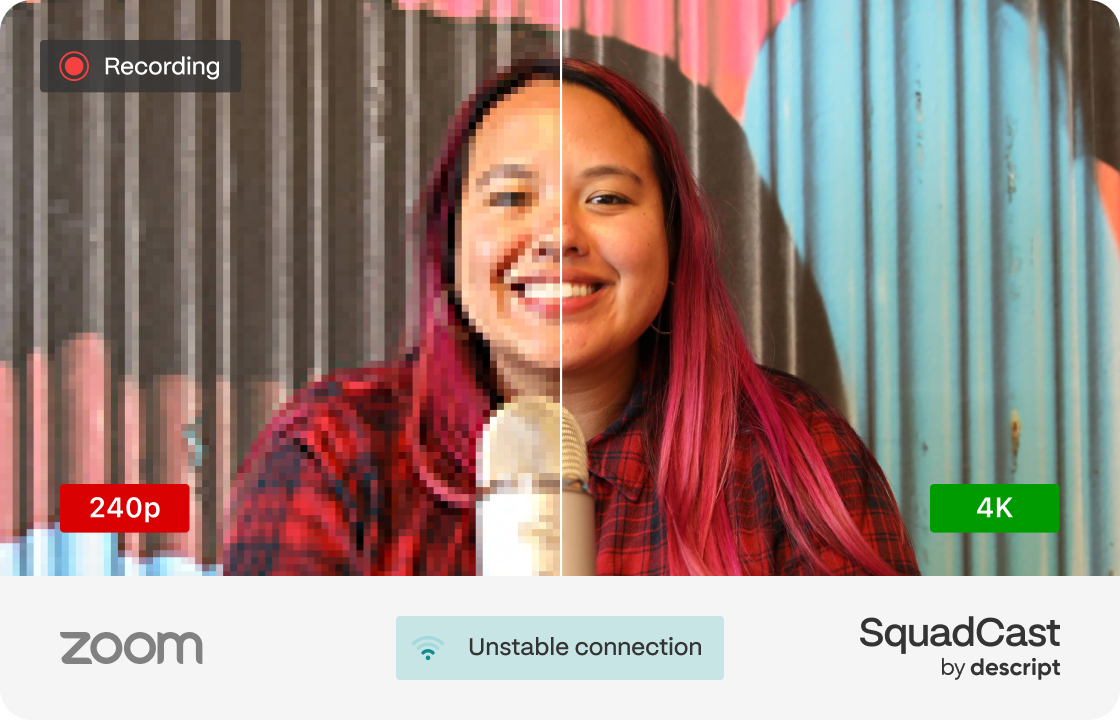
SquadCast now supports up to 4K remote recording (on a paid plan, but free plans still get up to 1080p). The best part about using SquadCast compared to Zoom is that it’s designed for recording, and maintains the quality you need as a podcaster. If you or your guest’s internet connection dips, with Progressive Uploads, it won’t affect your podcast recording.
Recording at source means you’ll get the best audio quality, as if you were in a recording studio. What’s more, since SquadCast is part of Descript, you get all its podcast video and audio editing tools, like Studio Sound to remove background noise, echo cancellation, and filler word removal, in one place.
Pricing: Included in all Descript plans—including the free tier.
Skype
Okay, hear me out. Skype has been around for 20 years and is still going strong. Yes, it’s still VoIP software, and like Zoom, it was never designed for recording podcasts. However, it still makes a strong case for those who want to do podcast hosting or be a co-host for free.
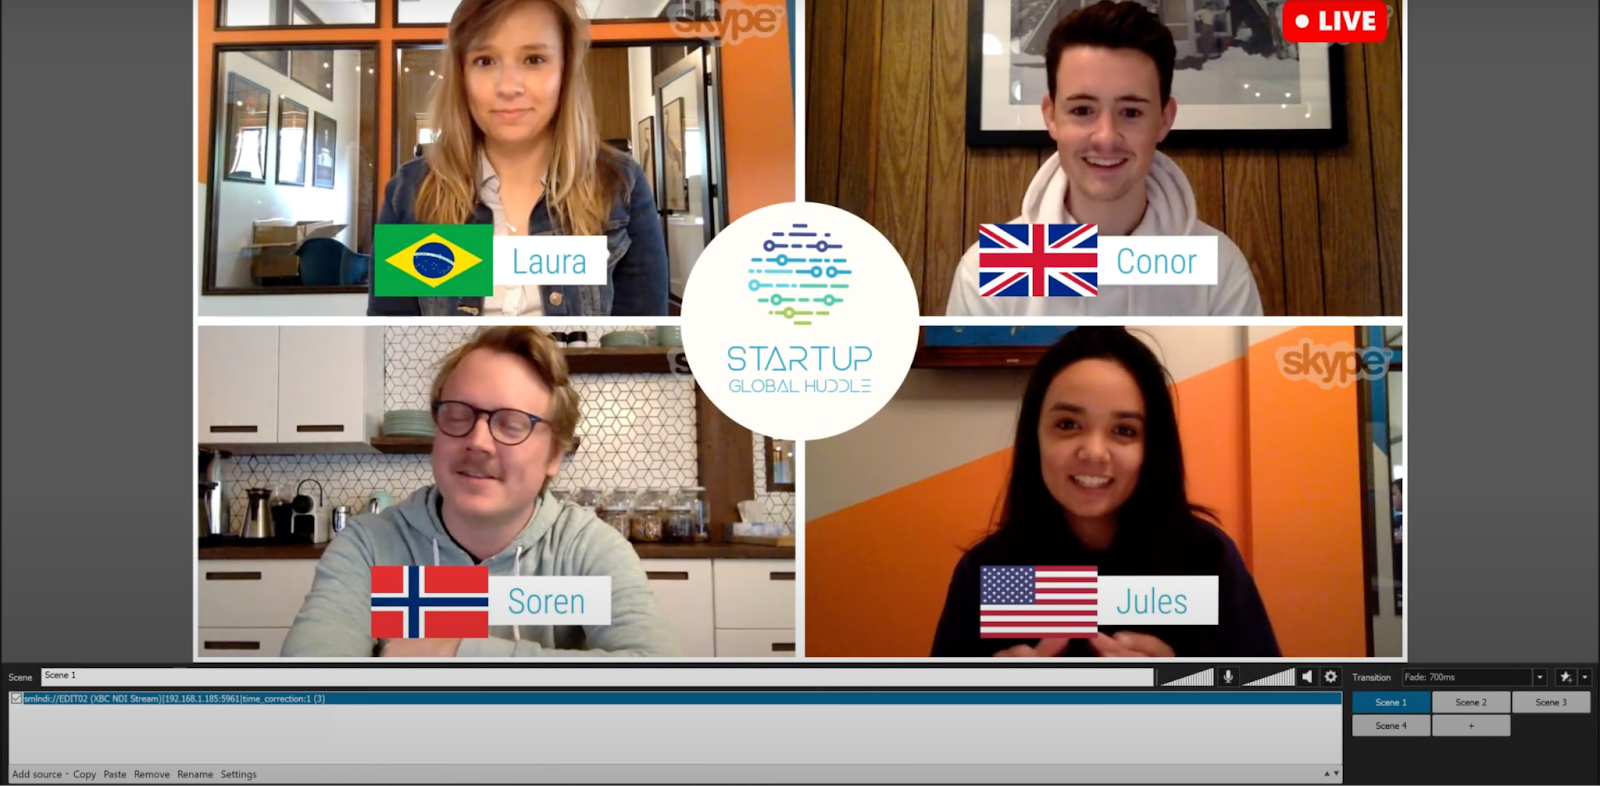
For one thing, you get 24 hours of call time, which means no more trying to squeeze everything into a 40-minute recording. You can also (with some technical know-how) use Skype to live stream to social media channels such as Facebook, YouTube, Twitch, and LinkedIn.
These two features alone can be worth jumping ship from Zoom to Skype, but you still suffer the problems of recording a VoIP call, and you don’t get the high-quality audio you can get using dedicated software.
Pricing: Skype-to-Skype calls are free; there are various call rates per country for mobile calls.
Riverside.fm
Another podcast recording software option with a great reputation is Riverside. Similar to SquadCast, it specializes in remote podcast video recording at high resolution.
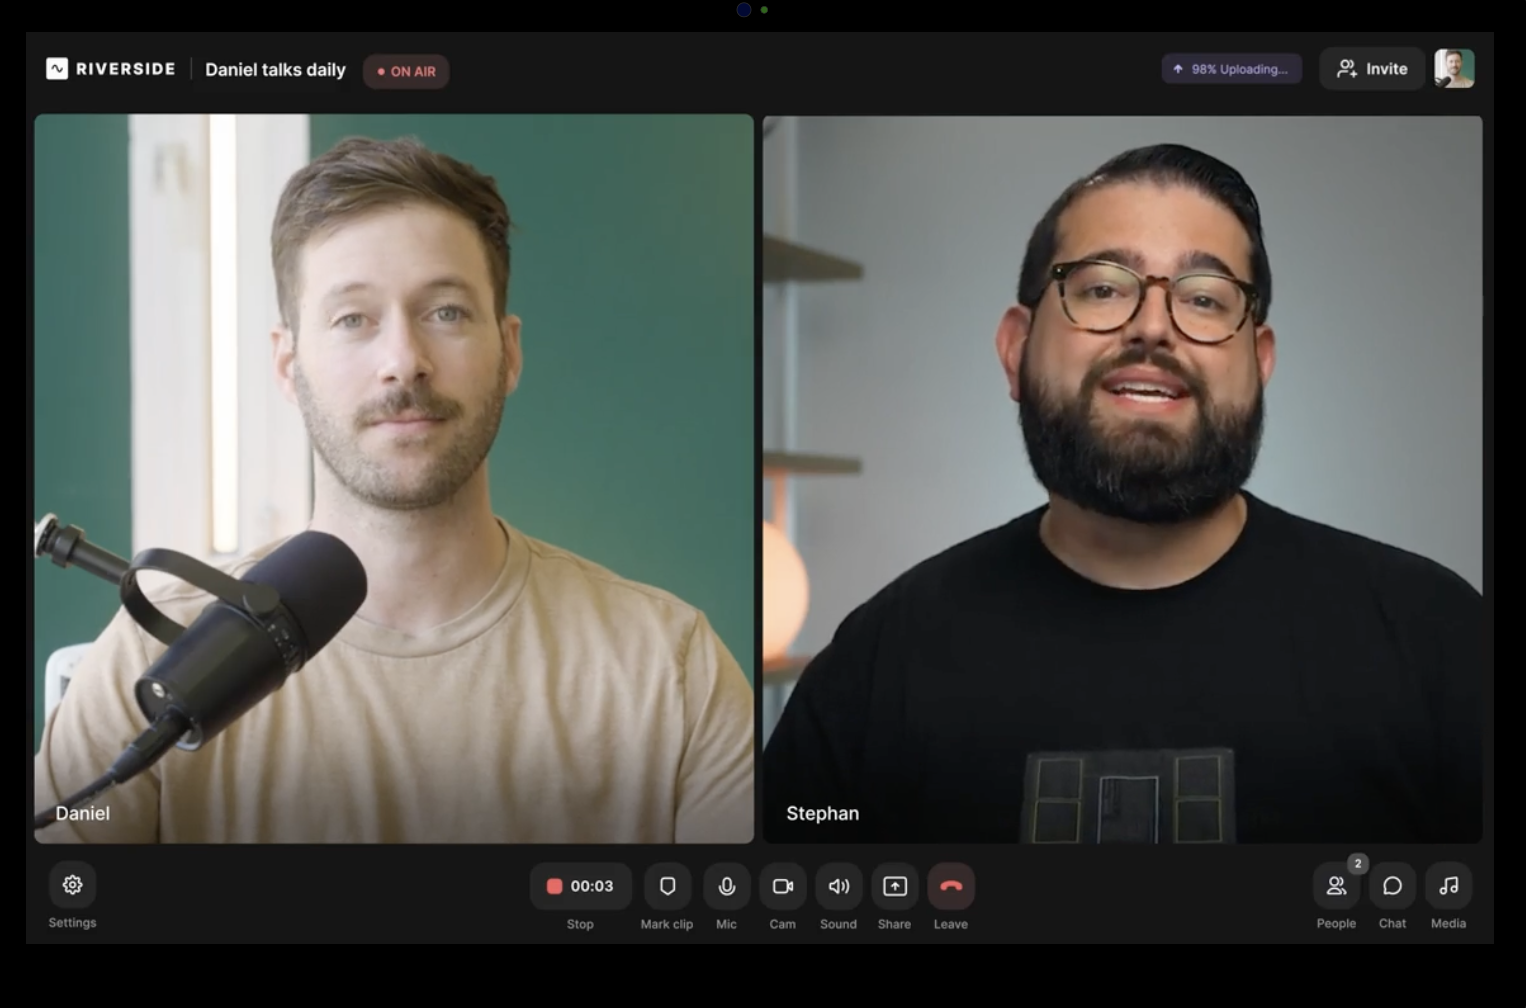
It has many of the same features as SquadCast—you’ll get superb recording quality as if you’ve recorded in a professional production studio and a free starter plan to help you get started. While you’ll get a much better podcast recording experience here compared to using Zoom, the editing capabilities aren’t as strong as other tools available, you’re limited to seven guests per recording, and each recording is watermarked on the free plan.
Pricing: Free plan available; paid plans start at $15/m with annual billing.
How to record a podcast on Zoom—FAQs
Is it possible to record audio on Zoom?
Yes! You can audio record on Zoom the same way you record any video call. In this case, if you don’t want video, you can turn the video camera off before hitting the record button.
How do you record a podcast?
You can record a podcast in a few simple steps:
- Plan what your podcast will be about. If you’re including cohosts or guests, schedule a recording time with them.
- When the time comes, open up your podcast recording software and greet your guest(s).
- Talk to your guest(s) first about any housekeeping rules or issues.
- Hit the record button and start your podcast session.
- Once your recording is finished, edit your file in free podcast editing software like Descript or Audacity.
- Export your file, select the platforms you want to publish it on, and share it with the world.
Is Zoom the best way to record a podcast?
Zoom is a great option for recording short (30 minutes or less) podcasts when you’re just starting out. However, upgrading your podcast with a dedicated podcast recording tool will significantly improve the quality of your podcast and your recording workflow.
Does Zoom let me record a separate video file for each participant?
Zoom doesn't currently offer separate video files for each person. You can record gallery view or active speaker view, but not a dedicated video track for each participant. If you need that control, consider solutions like SquadCast, Riverside, or recording individual video locally on each guest’s device.
Is Zoom free for podcasting?
Zoom offers a free Basic plan, but your meetings end after 40 minutes. You can restart another meeting, but that disrupts your flow. Upgrading to a paid plan removes the time limit and unlocks cloud recording.